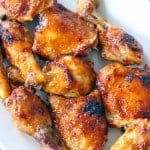
Two Ingredient Crispy Oven Baked BBQ Chicken
This recipe uses only TWO INGREDIENTS - barbecue sauce and chicken (plus a little olive oil, salt, and pepper) - to make the crispiest, most perfectly glazed, sweet, sticky, and tender barbecue baked chicken you will ever have.
Servings: 8 pieces
Calories: 402kcal
Ingredients
- 8-10 chicken thighs and/or drumsticks bone-in, skin on
- 2 cups of your favorite bbq sauce
- 2 tablespoons extra-virgin olive oil or canola oil
Instructions
- Preheat oven to 400 degrees F.
- Coat the chicken on all sides with olive oil and season with salt and pepper.
- Place the chicken skin side down on a rimmed baking sheet. Bake for 25 minutes.
- Remove chicken from oven and turn the temperature of the oven up to 425 degrees.Tip: be sure to close the oven door every time you remove the chicken in this recipe, as you don't want the heat from the oven to escape!
- Coat the top of the chicken with barbecue sauce using a basting brush. Use a spatula to flip the chicken over, being careful not to tear the skin. Baste the other side of the chicken, and place back in the oven for 7 minutes.
- Remove from oven, baste top with barbecue sauce, and place back in oven for 7 more minutes.
- Remove from the oven again and baste again, for a total of three times, and place back in oven for 7 more minutes. The chicken will have cooked for a total of 46 minutes. This should be enough time for it to cook fully, but you should always double check temperature with a meat thermometer to make sure it's at least 165 degrees F.Tip: You should double check the temperature of the chicken at the thickest part of the meat using a high quality meat thermometer - it is fully cooked at 165 degrees F but dark meat is best at 180-190 degrees F, see notes for more on this). Give it more time in the oven to cook if it's not up to temperature. See notes for more troubleshooting.
- If the chicken hasn't crisped and browned to your liking, move the oven rack up and broil the chicken for 3-5 minutes, until it's more crispy.
Video
Notes
- Crispy skin tips: Pat the chicken dry before cooking. You can also place the chicken skin side up from the beginning (skip the first, skin side down step) on a baking rack nestled into a rimmed baking sheet, to elevate it so it's not sitting in its juices, resulting in more crispiness all around (and less fat!). Bake for 25 minutes, then add BBQ sauce as directed, do not flip.
- Water chilled vs. Air Chilled chicken: Water chilled chicken is cheaper, but it contains a high water content and a diluted flavor. I recommend using air chilled chicken if you can afford it. But if you need to use water chilled chicken (this is the most common kind) - here are my tips for making sure it's not too soggy or watery:
- Dry brine it. Place the chicken pieces on a wire baking rack on a rimmed baking sheet and rub them with salt, and leave it uncovered in the fridge for 2-12 hours. Some of the water will be drawn out by the salt, and will collect in the bottom of the baking sheet. Elevating the chicken on the rack will ensure it’s not reabsorbing the liquid. As a bonus, this will also flavor the meat and help it retain moisture when cooking. You can also follow the advice above for crispy skin, baking the chicken directly on the wire rack. Give the chicken a rinse to remove the majority of the salt, pat dry, and don't add much or any additional salt to the chicken.
- Bone-in, skin on chicken thighs and drumsticks are the best for juicy chicken every time. If you use chicken breasts, I recommend bone-in, skin on.
- If you really want to use boneless, skinless chicken breasts, I recommend baking them initially for only 10 minutes instead of 25, add some bbq sauce on the top, flip them, then continue to baste them in BBQ sauce every 7 minutes three times. This will result in a total cooking time slightly over 30 minutes. At this point they will probably be done cooking, but you should use a meat thermometer inserted into the thickest part to double check that they are 165 degrees F.
- Over-cooking the chicken - using thighs actually ensures you probably won't overcook the chicken! Thighs are best when they are more around 185-195 degrees F, but safe to eat at 165 degrees F. But like other fattier cuts of meat, cooking it for longer can yield a more tender result.
- If you want to use wings, use the same timing and temp.
- Recipe and basting technique adapted from Ree Drummond's Oven BBQ chicken recipe.
- Some users have commented that this recipe makes for a very messy oven. This has never happened to me, so I imagine it has to do with a specific oven and/or pan. But if you find that it is splattering a lot, you can tent it with foil to prevent a mess!
- Some users have had issues with the chicken being "fully cooked" in the given time. 46 minutes is MORE than enough time to cook chicken pieces, but here is some troubleshooting that might help:
- Make sure your chicken is fully defrosted if previously frozen.
- If using giant chicken thighs or larger pieces like legs, it may need more time.
- Measure the temperature in the thickest part of the meat, not the bone.
- Taking the temperature is the only safe way to gauge doneness. Chicken may look pink or even reddish depending on the type - if it's organic, or a young chicken, this can happen with a chemical reaction with the hemoglobin. This is why the advice of looking for clear juices to indicate doneness is outdated and should not be used.
Nutrition
Serving: 2pieces of chicken | Calories: 402kcal | Carbohydrates: 29g | Protein: 22g | Fat: 21g | Saturated Fat: 5g | Cholesterol: 86mg | Sodium: 815mg | Sugar: 23g