

The best food is simple food. My favorite way to roast vegetables is with nothing but olive oil, salt, and pepper. My favorite way to cook a good steak is the same way. This way, you can really taste the food you are cooking rather than masking it. Same thing with a good burger.
When I make a burger, I season the ground beef with nothing but salt and pepper, and sometimes a teeny dash of Worcestershire sauce. I also add just a bit of olive oil, which helps the patty form a little better and not fall apart. When I buy beef, I always try to buy grass fed, which not only is much better for your health but also tastes SO much better than your average meat. Seasoning it simply will make the flavor of the meat stand out so much more.
Here are my four tips to making the Perfect Simple Cheeseburger.
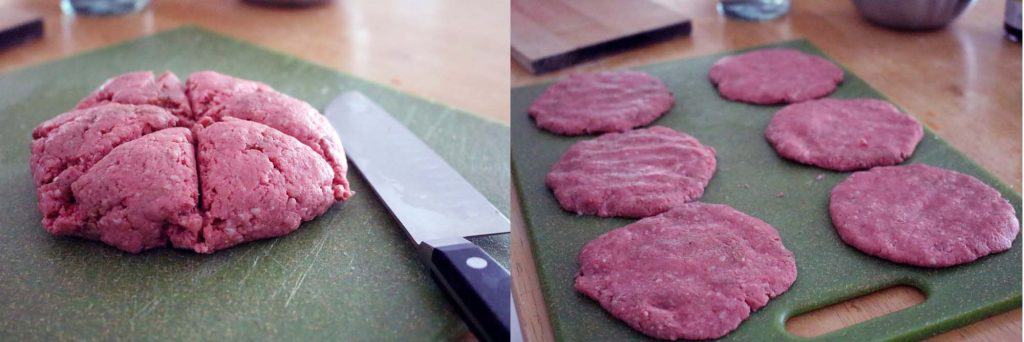
1) Form six equal patties that don’t crumble apart. I like my burger patties super thin (think: McDonald’s. Don’t pretend like you don’t like McDonald’s cheeseburgers. It’s like saying you don’t like bacon. I don’t believe you.) so I make six patties per pound of ground beef. This enables me and Zach to have enough for THREE MEALS! First, I mix up the ground beef with seasonings and a little olive oil (to help bind the meat), then I mash it all together with my hands VERY well. Then, I turn it out on a cutting board and cut it into six equal portions, to ensure patties that are uniform in size. Then, I form the patties with both hands by moving in a circular motion, pressing down to flatten and pressing along the edges to maintain structural integrity.
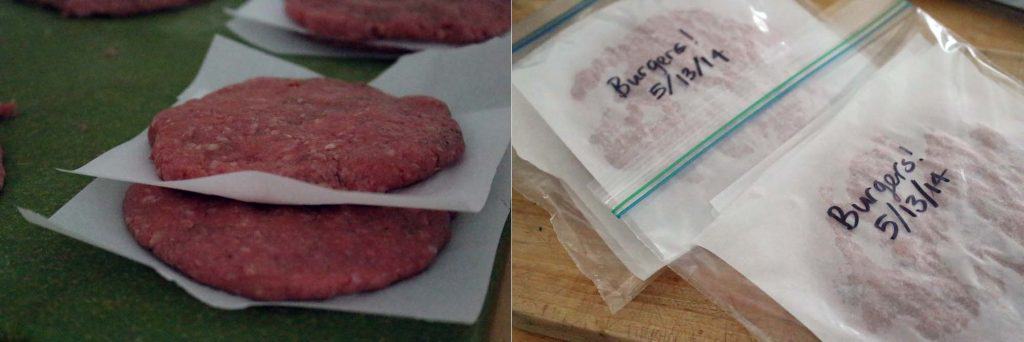
2) I freeze them for other super quick meals: To freeze for later, I cut small pieces of parchment paper and place them in-between the patties and place them in a ziplock bag. Label if you want (exclamation point optional- I really like exclamation points, apparently [!!!]) When you want them, take them out a day before to thaw in the refrigerator and cook as directed in step 3.
3) To not overcook your burgers: I use my cast iron skillet![]() (my all-time favorite kitchen item) to make these. I turn the heat up super high, wait for the skillet to heat up, then place the burgers on. After cooking for only one minute, I flip and add cheese (I used smoked gouda this time… yum!). Then, I turn OFF the heat (cast-iron retains heat well so it will continue to cook) and cover the burgers. You can use a large pot cover for this or, if you do not have one, flip another skillet upside down on top of it. This will retain the heat to melt the cheese without overcooking the burger. After another minute or so, check to see if the cheese is melted. If so, you are ready to serve! You literally will have dinner in only about two minutes, especially if you are using patties you have previously formed!
(my all-time favorite kitchen item) to make these. I turn the heat up super high, wait for the skillet to heat up, then place the burgers on. After cooking for only one minute, I flip and add cheese (I used smoked gouda this time… yum!). Then, I turn OFF the heat (cast-iron retains heat well so it will continue to cook) and cover the burgers. You can use a large pot cover for this or, if you do not have one, flip another skillet upside down on top of it. This will retain the heat to melt the cheese without overcooking the burger. After another minute or so, check to see if the cheese is melted. If so, you are ready to serve! You literally will have dinner in only about two minutes, especially if you are using patties you have previously formed!
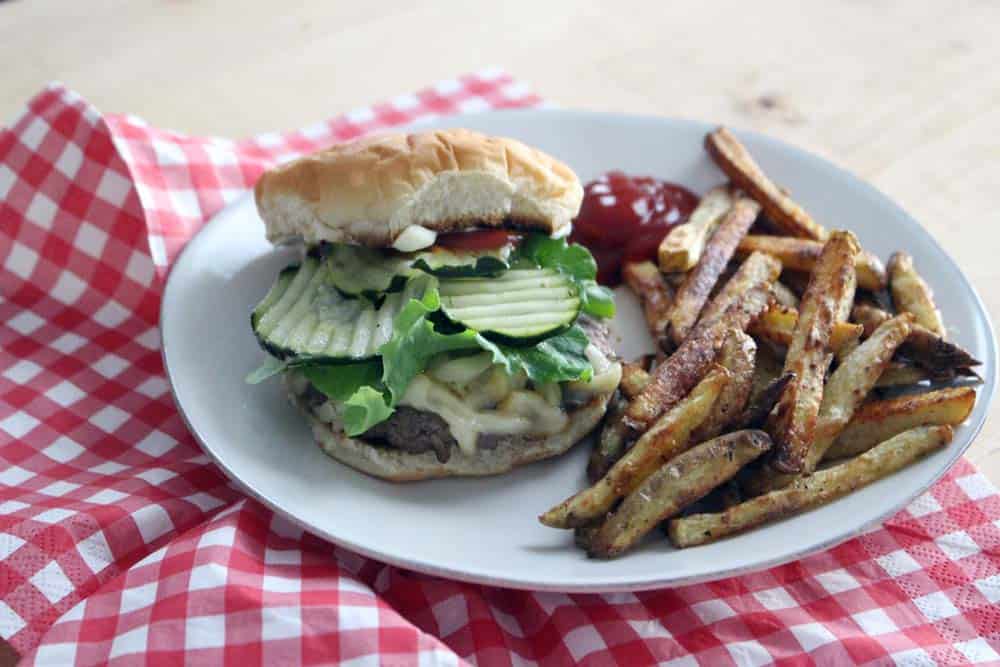
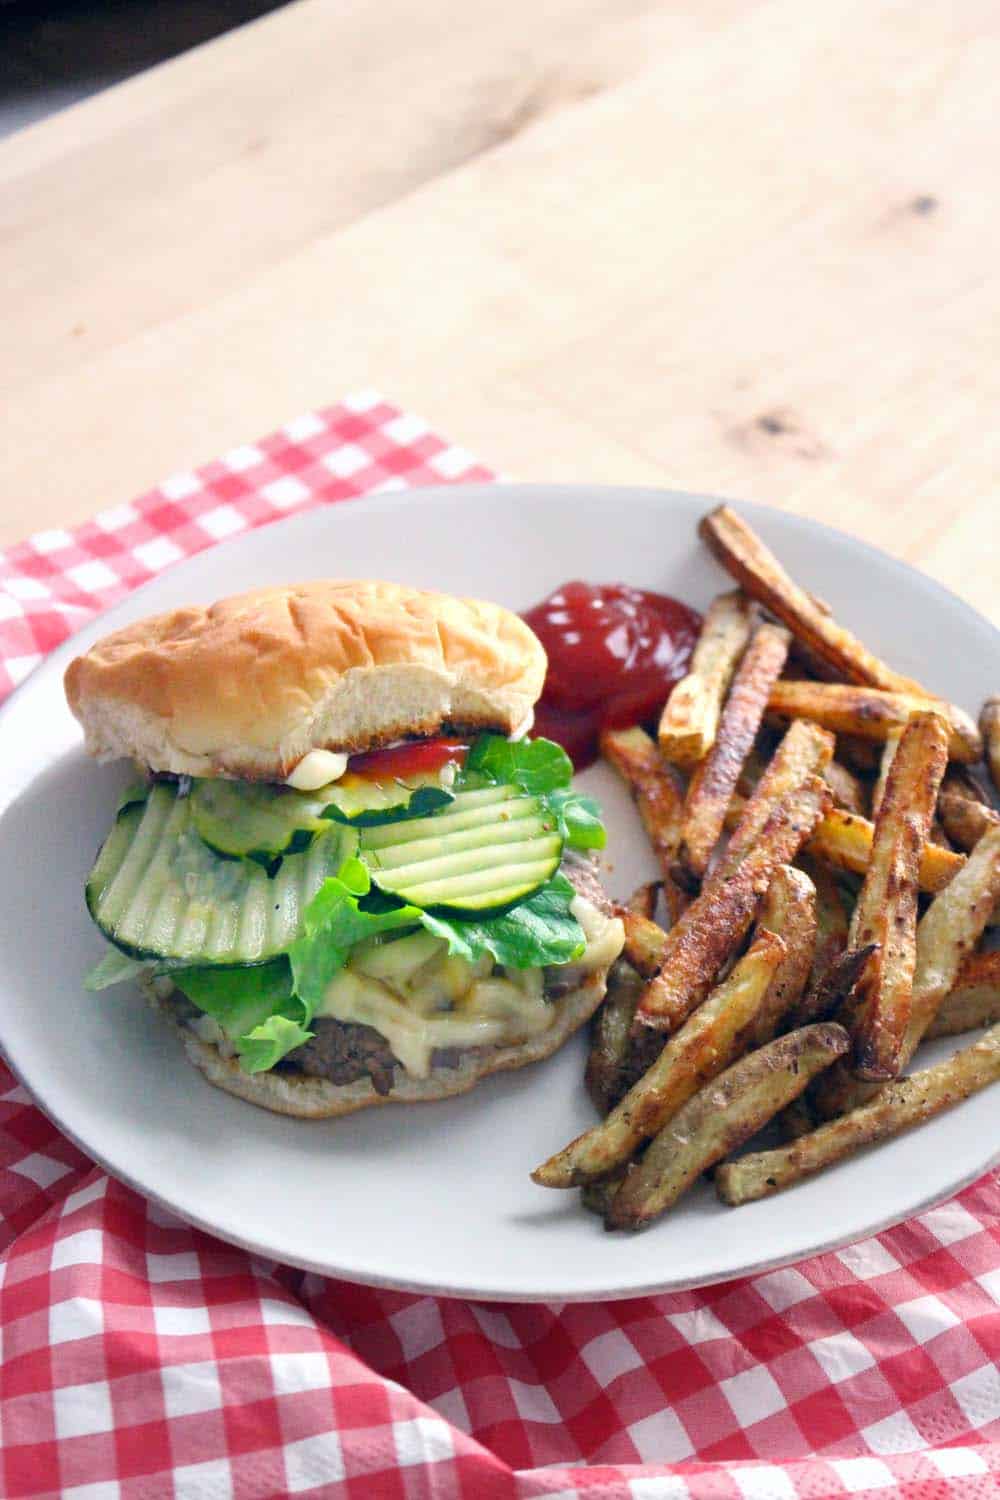
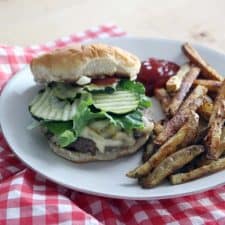
4) Serve with awesome fixings and a side. I topped my smoked gouda cheeseburgers with avocado, mustard, ketchup, a little mayo, and homemade dill pickles and served with homemade oven-baked french fries. Zach put avocado, mayo, and hot sauce on his, which was super delicious as well! Try carrot fries on the side for a healthy alternative to traditional fries.
Perfect Simple Cheeseburger
Ingredients
- grated cheese any kind
- 1 lb. ground beef
- salt and pepper to taste
- 1 tablespoon extra-virgin olive oil
- Buns, fixings, and any other necessary cheeseburger supplies
Instructions
- Heat up a skillet on high heat.
- Combine ground beef, salt, pepper, and olive oil in a medium sized bowl well with your hands.
- Turn out onto cutting board- cut into 6 equal sized portions (like a pie)
- Form patties with both hands by moving in a circular motion and both pressing down and pressing in on the sides to maintain structural integrity.
- Place patties in hot skillet (2 or 3 at a time) and cook for one minute.
- Flip, place cheese on top, turn off heat, and cover. Cook for 1-2 more minutes.
- Done! Serve on whole wheat buns with whatever fixings your little heart desires.
Notes
- To freeze for later, I cut small pieces of parchment paper and place them in-between the patties and place them in a ziplock bag. When you want them, take them out a day before to thaw in the refrigerator and cook as directed in step 3.
- The provided nutrition information does not include any added sodium from seasoning to taste, any optional ingredients, and it does not take brands into account. Feel free to calculate it yourself using this calculator or by adding the recipe to Yummly.
Nutrition
Nutrition Information Disclaimer
The provided nutrition information is my best estimate and does not include any added sodium from seasoning to taste, any optional ingredients, and it does not take brands into account. I use an automatic API to calculate this information. Feel free to calculate it yourself using one of these tools:
Leave a Reply