

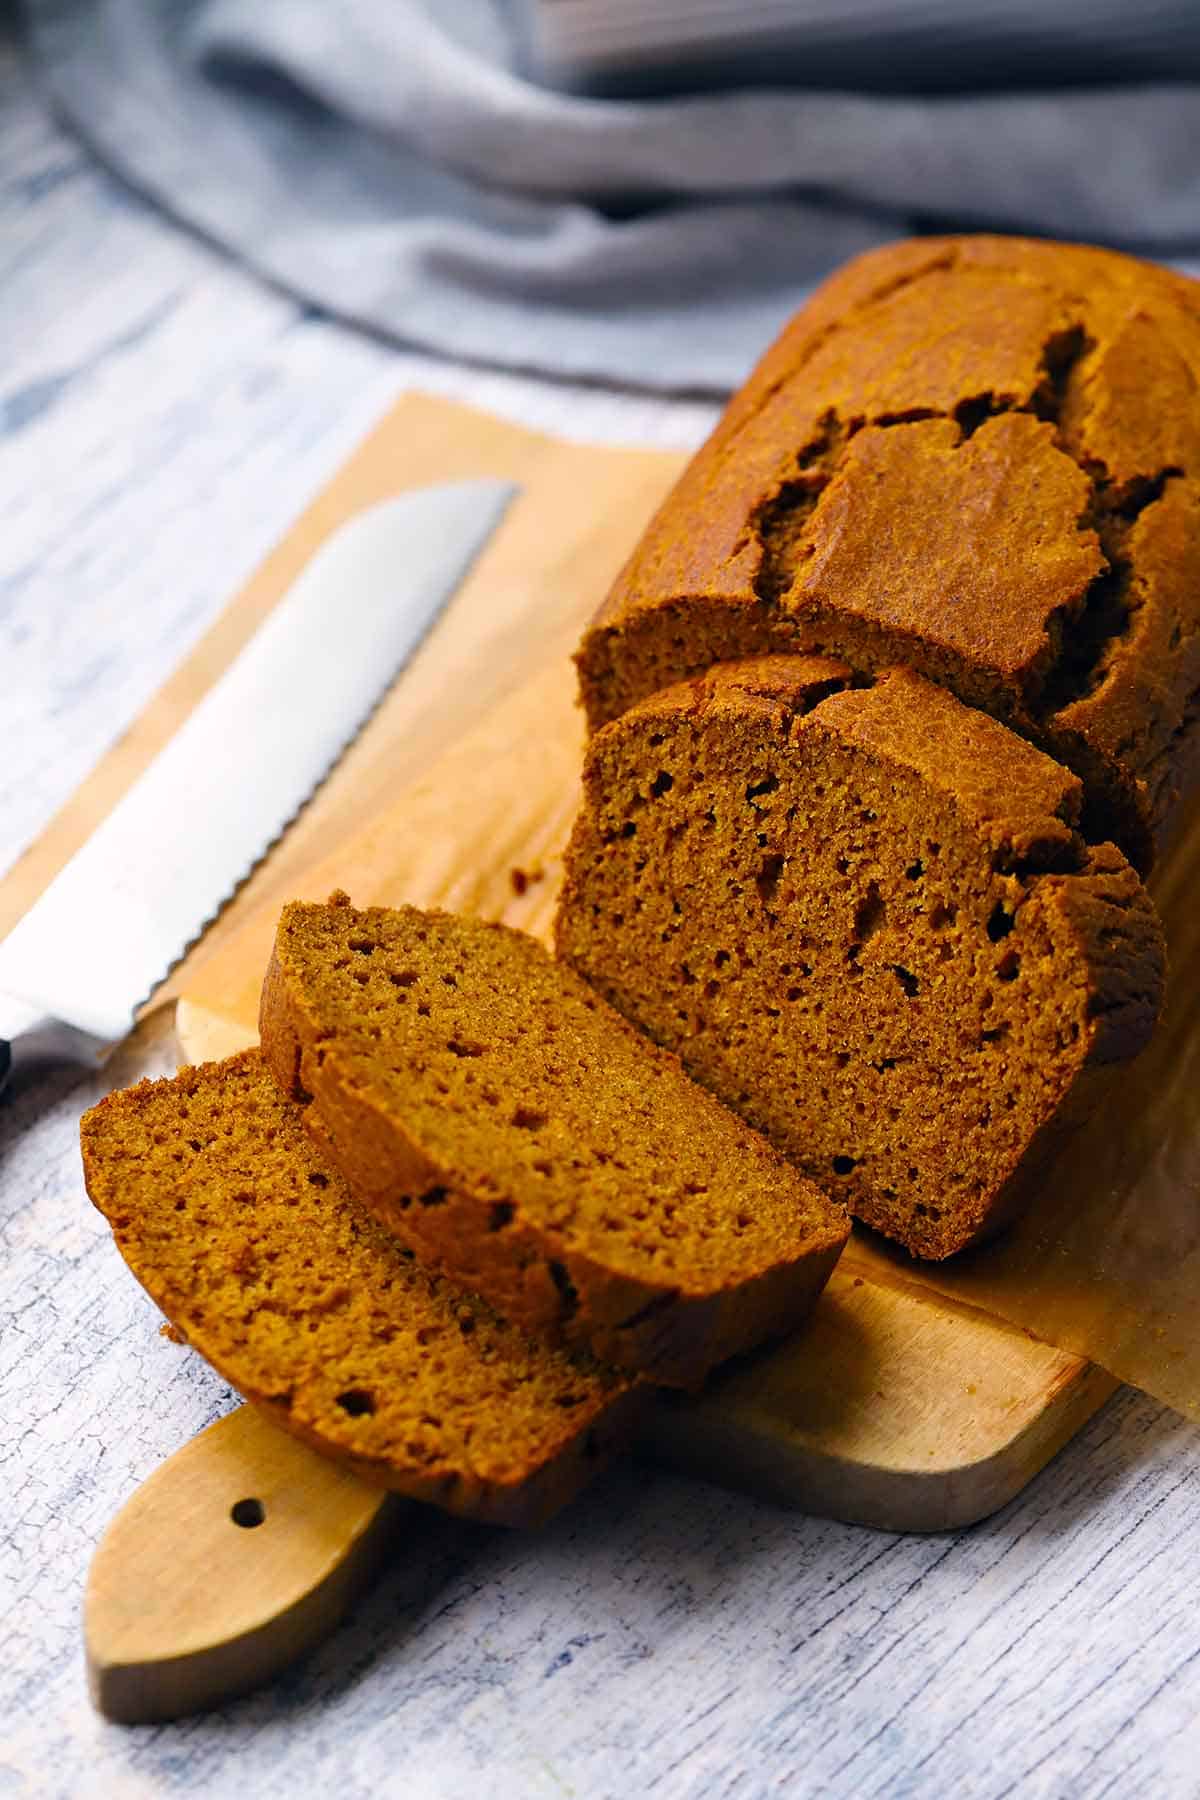
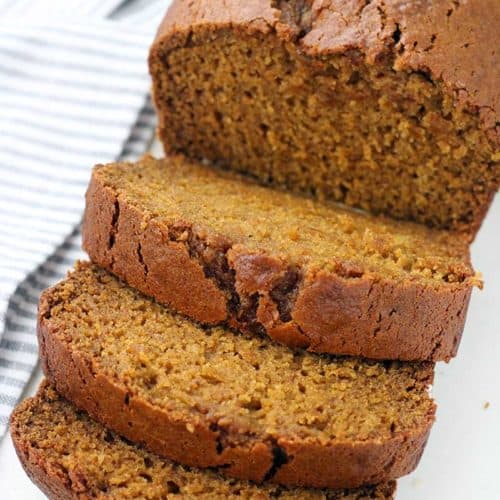
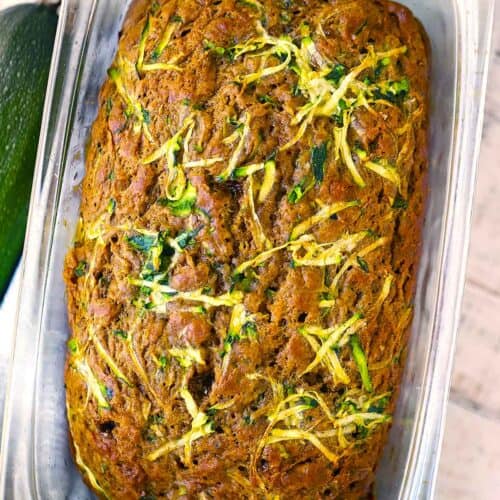
Allow me to introduce you to an actually delicious healthy pumpkin bread, made with 100% whole wheat flour, sweetened with only maple syrup, and baked with extra-virgin olive oil. Don’t be fooled; it’s not what you think. This loaf cooks up incredibly moist and fluffy. It’s just sweet enough! The pumpkin and pumpkin pie spice (a whole tablespoon!) are complemented, not overpowered, by the subtly sweet maple syrup. And it’s so easy and fast to prep with one bowl – no mixers required!
Would you like to email yourself this recipe?
My entire family was surprised to realize we prefer this not-too-sweet, healthy pumpkin bread to the more traditional, sweet, cake-like treat you usually find! And I feel good about serving it as a healthy option for breakfast or snacks to my children (and myself!). I mean, it even has vegetables in it, right?
If you know me, you know I love olive oil in almost anything, and that includes baked goods. From banana bread to lemon cake to blueberry muffins, extra-virgin olive oil can add an earthy depth to the flavor of your favorite treats. And we all know it can be a healthier option, low in saturated fats and unrefined!
This healthy pumpkin bread is sure to make a frequent occurrence in my house from now on. I hope it does for yours as well!
Ingredients and Substitutions
- Canned Pumpkin Puree – I prefer Libby’s brand. Brands tend to vary with liquid content and texture, so you may have different results with a different brand or with homemade puree.
- Maple Syrup – honey can also be used.
- Extra-virgin olive oil – Sometimes unrefined oils can be cost prohibitive, so please feel free to substitute another oil of your choice if you prefer. I love California Olive Ranch as an all-purpose EVOO.
- Whole wheat flour – I use King Arthur whole wheat flour. Regular whole wheat or white whole wheat will both work.
- Eggs – while I haven’t personally tried it, I don’t see why a flax egg substitute couldn’t work here for a vegan option.
- Milk – I use whole milk, but feel free to use an plant-based milk or lower fat milk if you want. The amount is small, so it won’t matter too much. You can get away with water in a pinch.
- Pumpkin pie spice – You can buy a pre-mixed jar at the store, or you can make your own pumpkin spice!
- Salt
- Baking Soda
How to make Healthy Pumpkin Bread
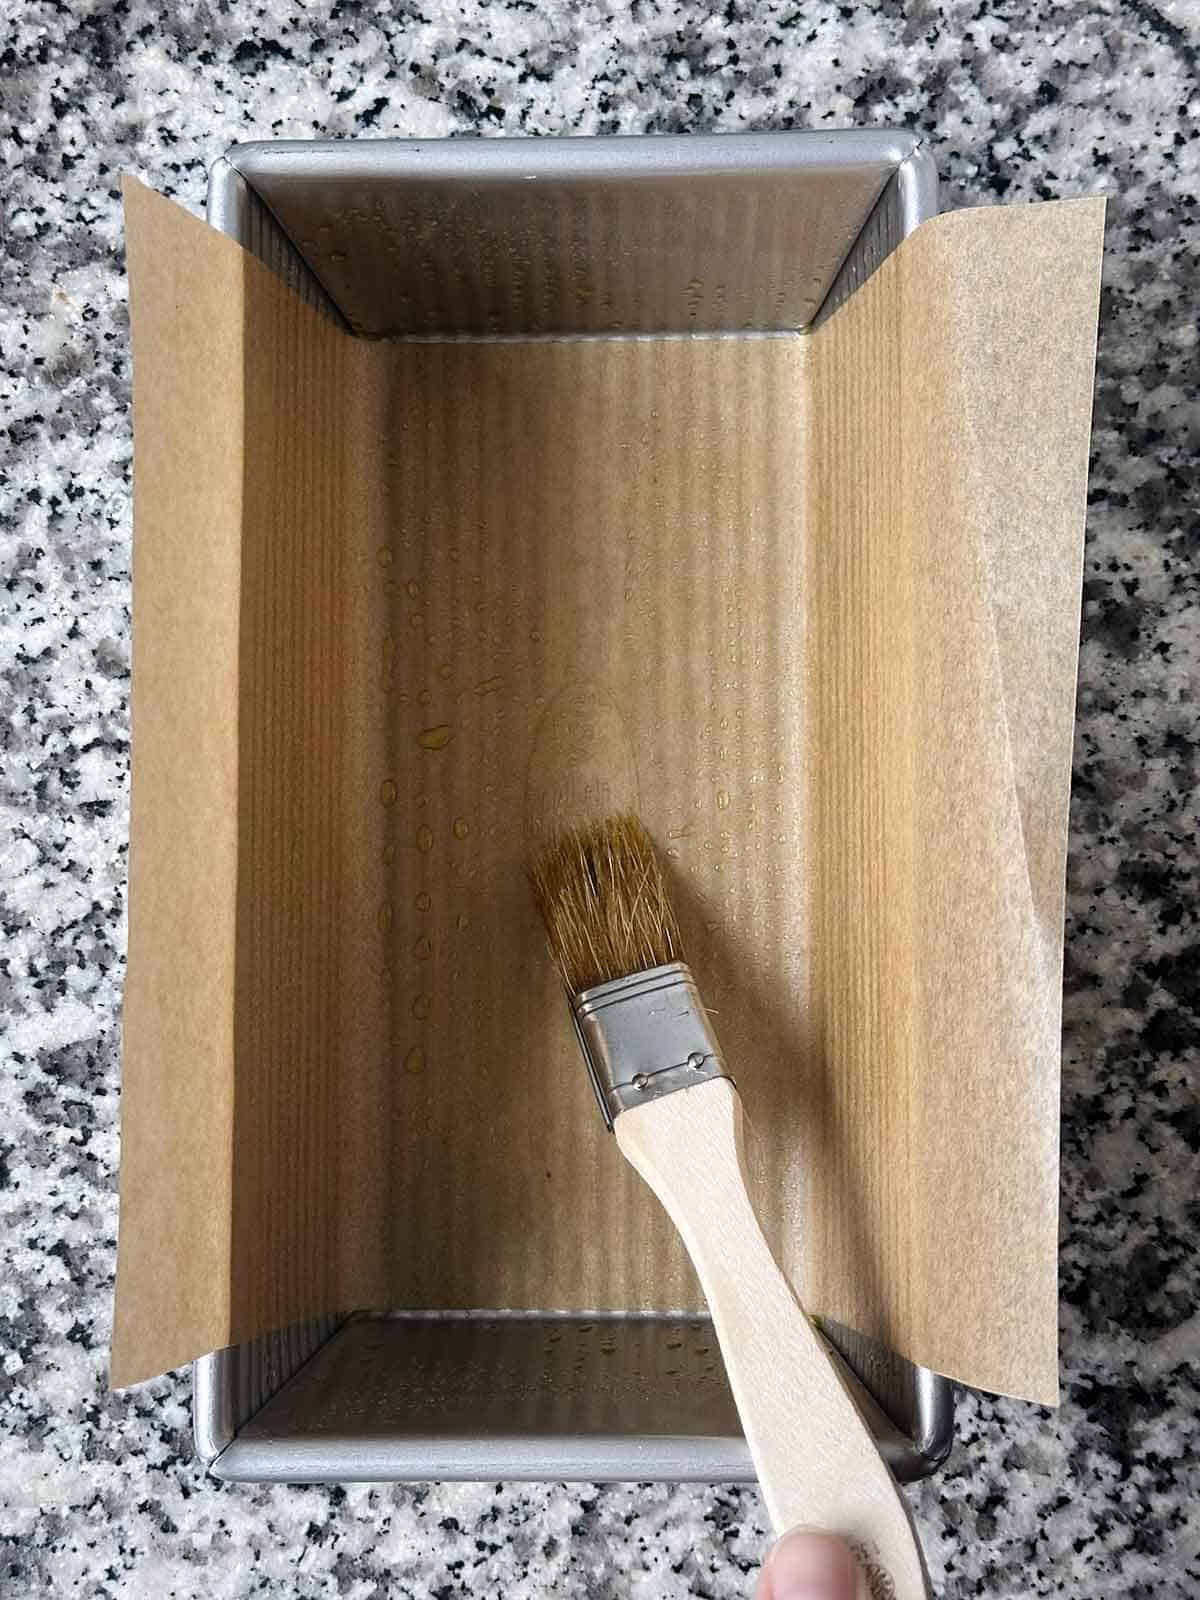
First, we need to prep the loaf pan. I like to not only grease my loaf pan (even if it’s nonstick!) but also add a layer of parchment paper. The paper overhangs the sides of the loaf pan, so when the bread is done, you can just lift it out with ease. To do this, I use a pastry brush to brush olive oil on the bottom and sides of the pan, place a cut piece of parchment paper over the width, and brush the surface of the paper with more oil.
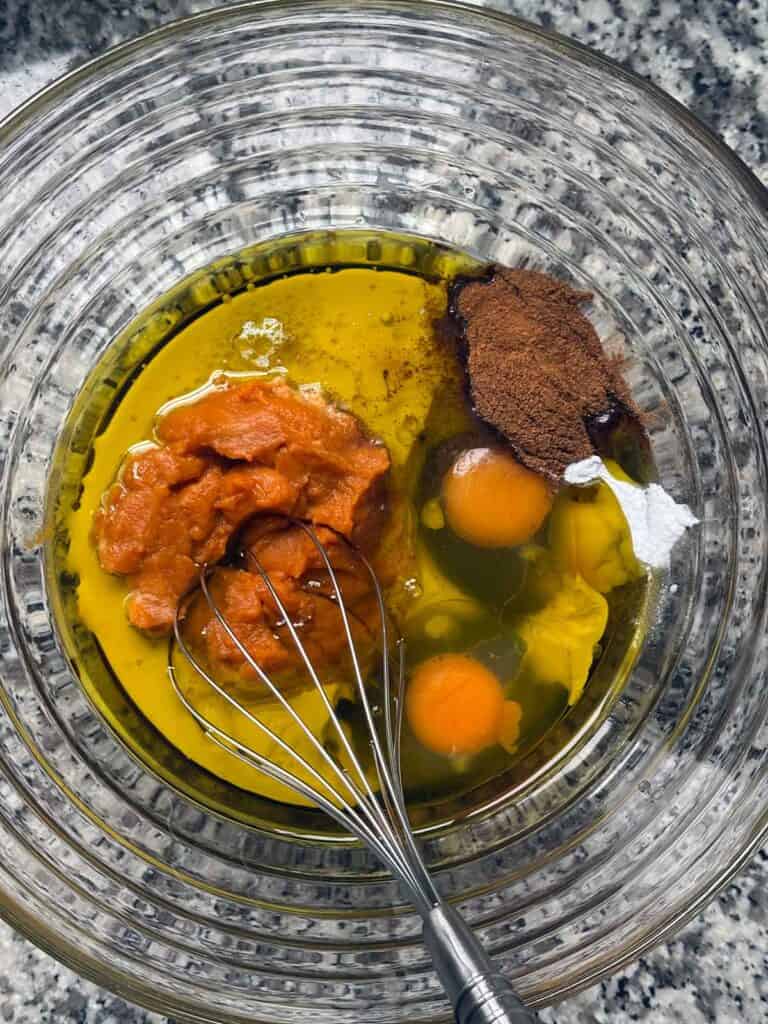
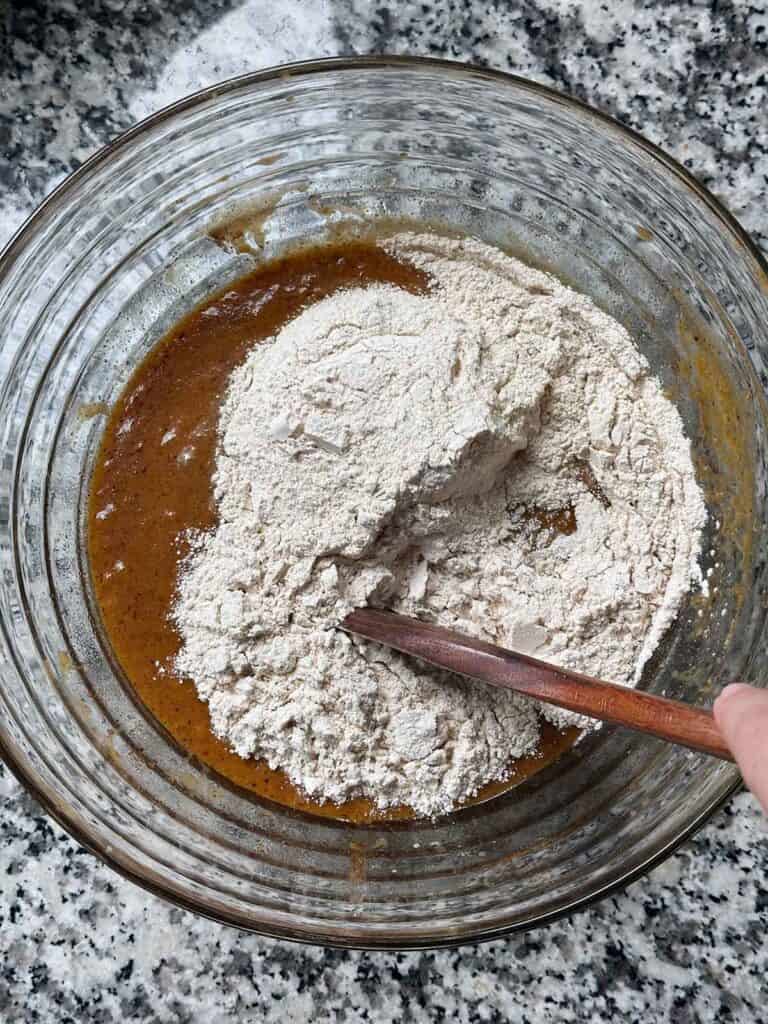
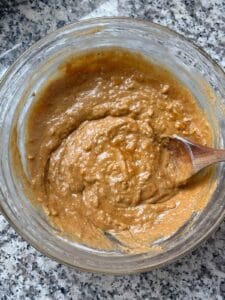
Then, it’s time to mix the batter. It couldn’t be easier. You’ll just whisk all the ingredients except for the flour in a bowl. Then when it’s very well combined, you’ll add the flour and mix with a spoon until it’s just combined. It’s important not to over-mix flour in delicate baked goods like this, otherwise the gluten will develop more and you’ll have a chewy, dense result.

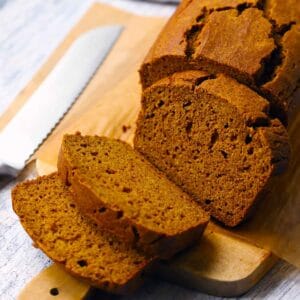
Now, you’re ready to bake! Just pour the batter into the prepared loaf pan (I like to use a spatula to ensure I’m getting all of it out of the bowl) and bake at 325 degrees F for about an hour. Check for doneness with a toothpick – if it comes out clean when inserted in the center, it’s done! Let it cool for 10 minutes or so in the pan before lifting it out with the parchment paper ends.

This is a summary of how to make this recipe. Please scroll to the bottom of the post for the full recipe including ingredient amounts and detailed instructions, written in traditional recipe format, or Jump to Recipe.
What kind of loaf pan should I use for pumpkin bread?
Lately, I’ve been exclusively using my USA Pan nonstick 1-lb loaf pan for anything and everything loaf-related. You can find one on the King Arthur website, which I’ve linked to and always sells reliably great kitchen products.
I like the USA pan because it’s heavy and distributes heat well, but it’s light colored so it doesn’t overcook the edges. The nonstick surface makes for super easy, reliable removal, especially with the addition of parchment paper!
Loaf pans come in a surprisingly large amount of sizes and materials. Keep in mind if you use a larger loaf pan, the result will be a shallower loaf, which may require less cooking time. In addition, the color and material can affect cooking time and outcome. Glass or light colored pans don’t retain heat as much as dark colored pans, so you may need less or more cooking time depending. The edges of the pumpkin bread may be more or less done depending on color and material, too.
But at the end of the day, it’s not that serious! Just use a toothpick to test for doneness and keep an eye on it.

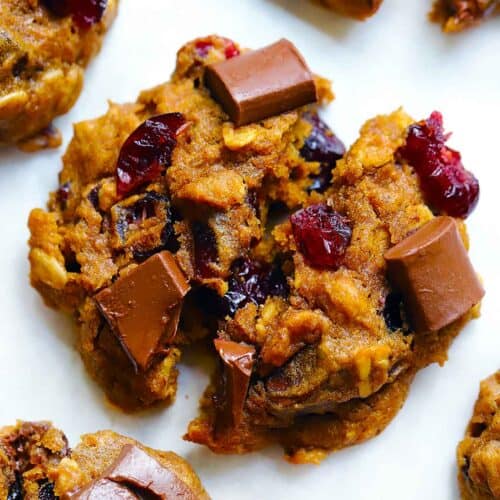
Recipes for the other half-can of pumpkin!
This healthy pumpkin bread recipe uses half a 15 oz. can of pumpkin. Unless you are doubling the recipe for two loaves, you’ll be left with the other half – a little less than 1 cup. Here are some ideas to use it up:


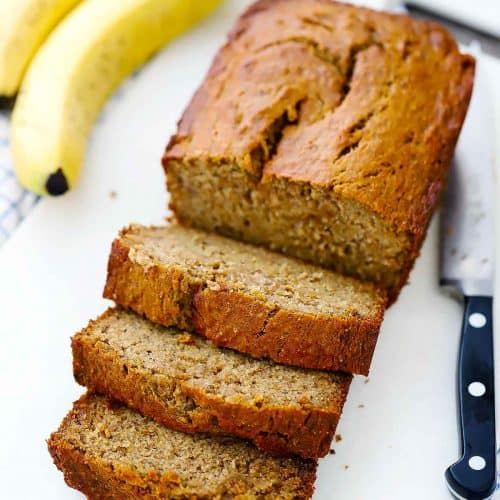
Other quick bread recipes
Did you know commenting and rating recipes is one of the best ways you can support your favorite food bloggers? If you made this recipe or have a question, please click the stars below to comment and Rate this Recipe and/or share photos on social media using the hashtag #bowlofdelicious or tagging @bowlofdelicious! I reply personally to every comment and I’m excited to hear what you think.
Healthy Pumpkin Bread
Equipment
- 1 Loaf Pan about 9" x 5" – I like using nonstick for recipes like this.
Ingredients
- 1 scant cup pumpkin puree about a half a can – I recommend Libby's, see notes
- ⅓ cup extra-virgin olive oil plus more for greasing the pan
- ⅓ cup pure maple syrup
- ¼ cup whole milk or plant-based milk for a dairy-free option
- 2 eggs
- 1 tablespoon pumpkin pie spice see notes
- 1 teaspoon baking soda
- ½ teaspoon fine grain salt
- 1 ¾ cups whole wheat flour
Want to save this recipe?
Instructions
- Preheat your oven to 325 degrees F. Grease a loaf pan with some oil (I pour a bit of olive oil in the loaf pan and use a pastry brush to coat the bottom and sides). Optionally, cut a piece of parchment paper to fit the loaf pan across in the short direction, allowing it to overhang the sides, and grease the top of that too (this will make the pumpkin bread extremely easy to remove from the pan after baking).

- In a large bowl, whisk together the 1 scant cup pumpkin puree, ⅓ cup extra-virgin olive oil, ⅓ cup pure maple syrup, ¼ cup whole milk, 2 eggs, 1 tablespoon pumpkin pie spice, 1 teaspoon baking soda, and ½ teaspoon fine grain salt until very well combined.
- Swap to a spoon or spatula and gently stir in the 1 ¾ cups whole wheat flour until just combined and there are no dry spots left (do not over-mix!).
- Bake at 325 degrees F on the middle rack for 50-60 minutes, or until a toothpick inserted in the center of the loaf comes out clean.
- Allow the loaf to cool for at least 10 minutes in the pan before removing. Slice into 8-10 pieces and enjoy!


Notes
- A 15-oz. can of pumpkin puree has about 1 ¾ cups in it. This recipe uses half a can, which makes it easy to use the other half in other recipes. You can use up to a full cup in this recipe and be fine. Or, use the whole can and double the recipe for two loaves of pumpkin bread!
- Canned pumpkin often varies depending on brand with how much liquid is in it. I find that Libby’s canned pumpkin puree (NOT pumpkin pie filling – that’s different!) is the best option for most recipes that require pumpkin puree where the amount of liquid matters, such as this pumpkin bread.
- If you don’t have pumpkin pie spice, you can make your own! Or for this recipe, use a combination of 1 teaspoon ground cinnamon, and ½ teaspoon each of ground ginger, nutmeg, allspice, and cloves. It’s not that serious – feel free to omit any of these or change the amounts depending on what ingredients you have in your spice cabinet.
- To make without eggs, you can likely use two flax egg replacements here. I haven’t personally tried flax eggs in this specific recipe, but it should work just fine for making this recipe egg-free or vegan (with plant-based milk or water in place of the whole milk).
- Loaf pans have quite a bit of variety both in size and material/color. I really love the USA Pan 1-lb. nonstick loaf pan – that’s what I used in this recipe and what you see in the photos. You may have to adjust your timing for baking based on these factors. A large pan will create a shallower loaf and may need less time to bake. A dark colored pan retains heat more than a light colored or glass pan, so you may need more or less time depending on the color. Just keep an eye on it and use a toothpick to test doneness – it’s not that serious, don’t worry!
Nutrition
Nutrition Information Disclaimer
The provided nutrition information is my best estimate and reflects one serving of the recipe (total servings indicated at top of recipe card). It does not include any added sodium from seasoning to taste, any optional ingredients, and it does not take brands into account. I use an automatic API to calculate this information. Feel free to calculate it yourself using one of these tools:
Rebecca
Excellent healthy pumpkin bread recipe! The only change I made was to sub diabetic honey for the maple syrup. Was curious about the olive oil and found it to be an excellent change-up to my usual veg or coconut oil. I doubled the recipe to use an entire can of pumpkin and made a loaf plus 12 muffins, which I added a square of cream cheese to as well as sprinkled with pepitas.
Elizabeth Lindemann
So glad you liked it! I also tried this recipe with muffins last time I made it, and they were so good. I used orange juice instead of milk and put orange zest into the batter, which was delicious. I LOVE the idea of the cream cheese and pepitas for some interesting textures and flavors – thank you for sharing this, I can’t wait to try it!