

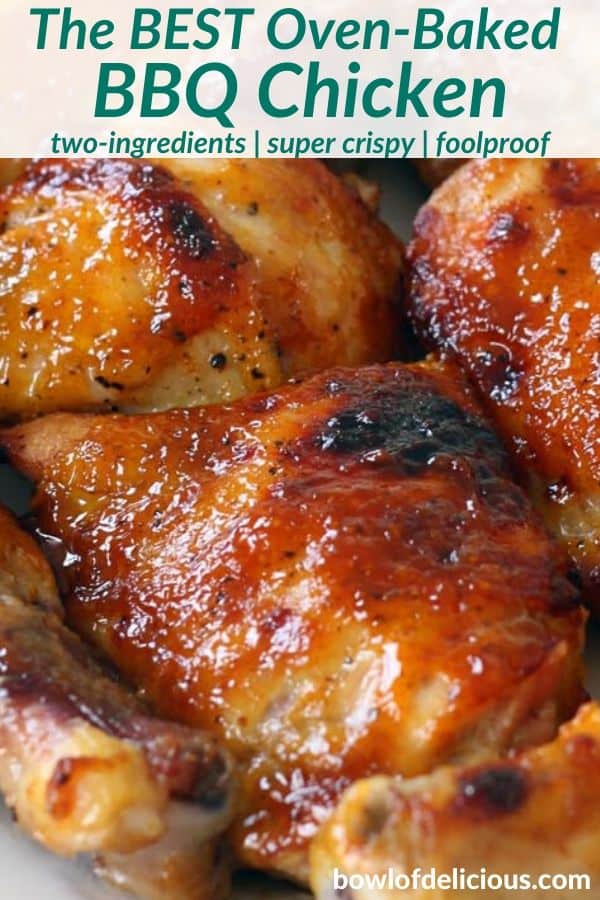

This crispy oven bbq chicken recipe uses only TWO INGREDIENTS – barbecue sauce and chicken (plus a little olive oil, salt, and pepper) – to make the crispiest, most perfectly glazed, sweet, sticky, and juicy baked barbecue chicken you will ever have.
Would you like to email yourself this recipe?
That’s right- only TWO INGREDIENTS! Your favorite BBQ sauce, and some chicken, along with a little oil, salt, and pepper.
And the other great thing- this recipe doesn’t require any marinating! You can just dive right in and cook it quickly.
There are a few tricks to getting the BEST, crispiest, juiciest oven bbq chicken with a thick, sticky, sweet glaze of bbq sauce on top. In this post, I’ll go over exactly how to make the best oven bbq chicken ever. There’s a reason why this recipe has been rated 5 stars by over 70 people and has been pinned almost 400K times!
What cut of chicken is best to use for oven bbq chicken?
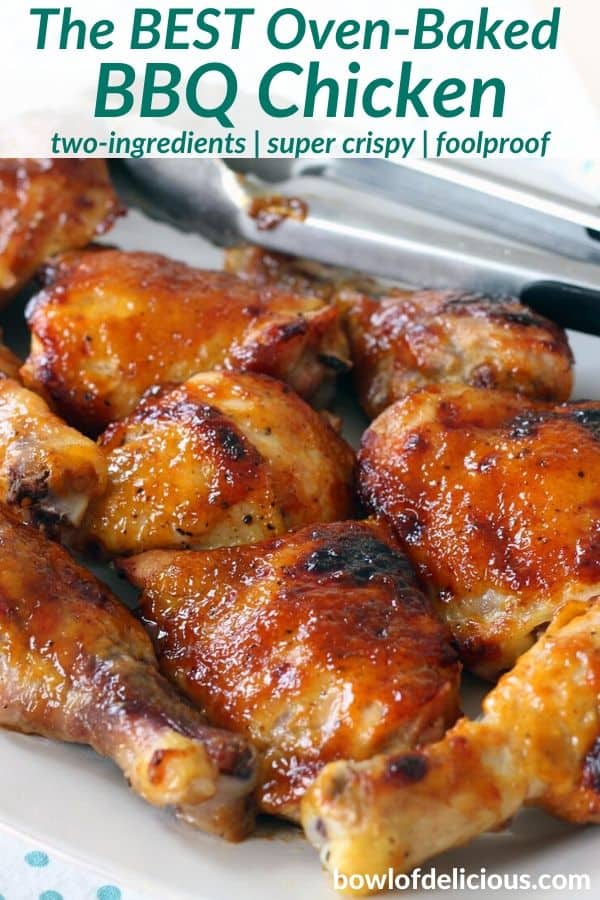
For the juiciest, most tender oven bbq chicken, you’re definitely going to want to use bone-in, skin on chicken pieces for this. I used a mix of thighs and drumsticks, and I do recommend using thighs and/or legs, since dark meat is harder to overcook and almost always tastes juicier than white.
Here’s a general run-down of which cuts are worst and best for oven bbq chicken:
- Worst: boneless, skinless chicken breasts
- Not quite as bad: boneless, skinless chicken thighs
- Better: bone-in, skin on chicken breasts
- Best: bone-in, skin-on chicken thighs and/or legs
If you want to use chicken breasts, I recommend making sure you get bone-in, skin on breasts. Or at the very least, bone-in. The skin and the bone both help keep the chicken super juicy. And if you use dark meat as well, you’ve hit the trifecta! Using bone-in, skin on dark meat guarantees juicy, tender chicken every time. As a bonus: these pieces are generally a lot less expensive!
If you really want to use boneless, skinless chicken breasts, make sure you cook them for less time. Check out the recipe notes for how to do it. For a recipe that uses bone-in, skin OFF chicken thighs, check out this Spiced Chicken and Rice with Apples and Raisins.
And if you’re looking for super high quality chicken at a reasonable price, check out ButcherBox!
How to get a super THICK BBQ glaze
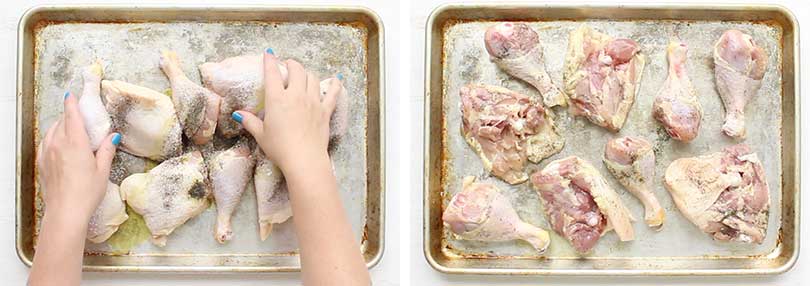
First, the chicken is seasoned with oil, salt and pepper, placed skin side down on a rimmed baking sheet, and roasted for 25 minutes.
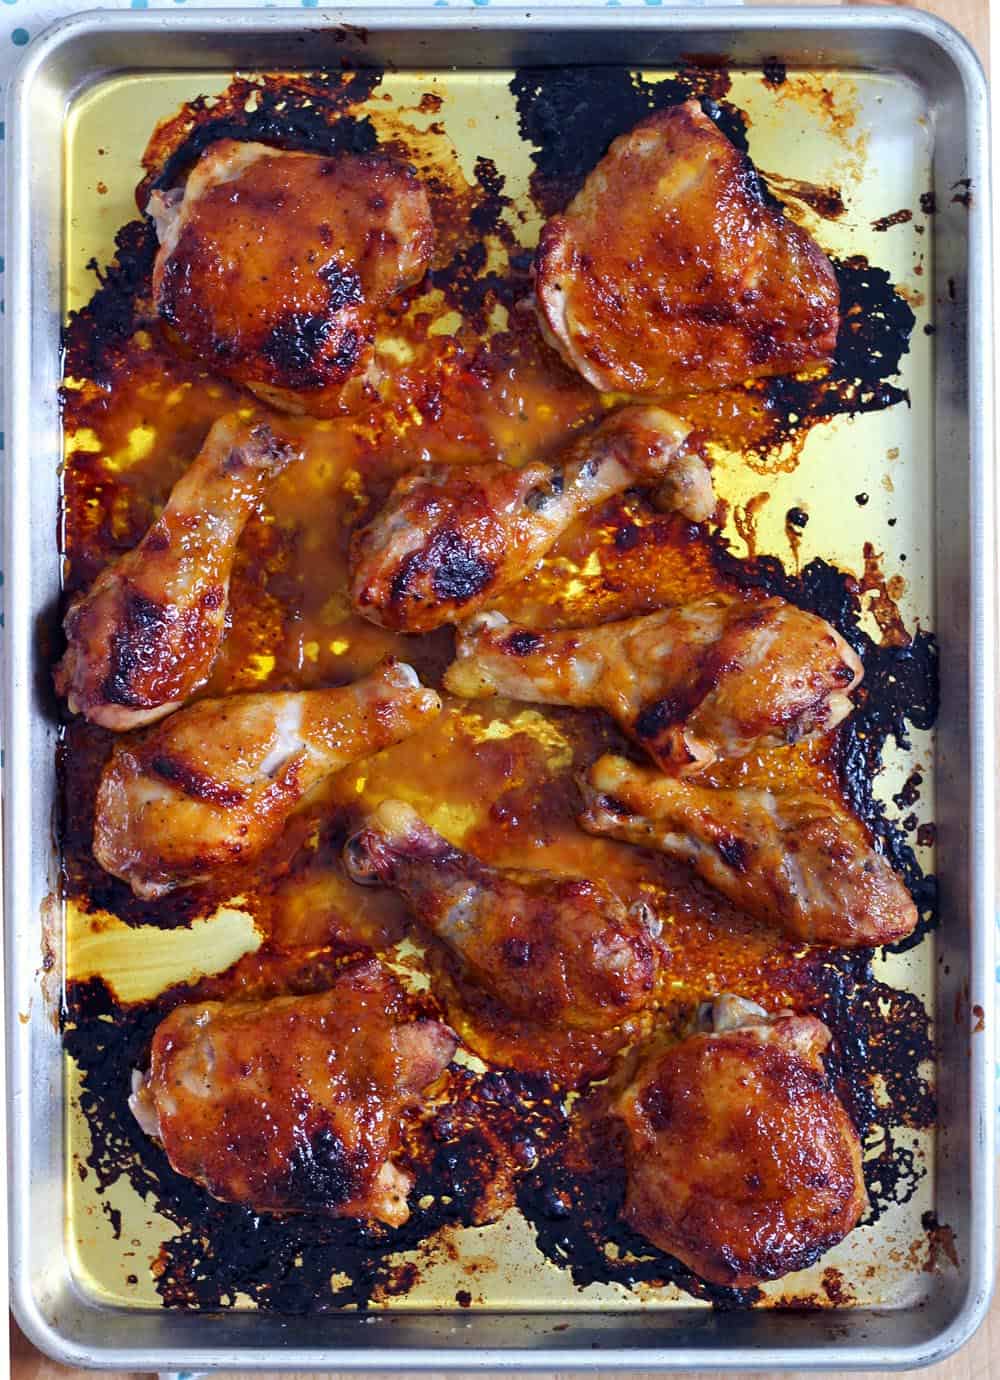
Then, the chicken is removed from the oven and basted with BBQ sauce THREE times.
Each time BBQ sauce is added, it thickens and caramelizes in the oven. By the time you’ve added that third layer, you’ve got a delicious thick, sweet, sticky layer of BBQ sauce on every inch of the chicken.
YUM.

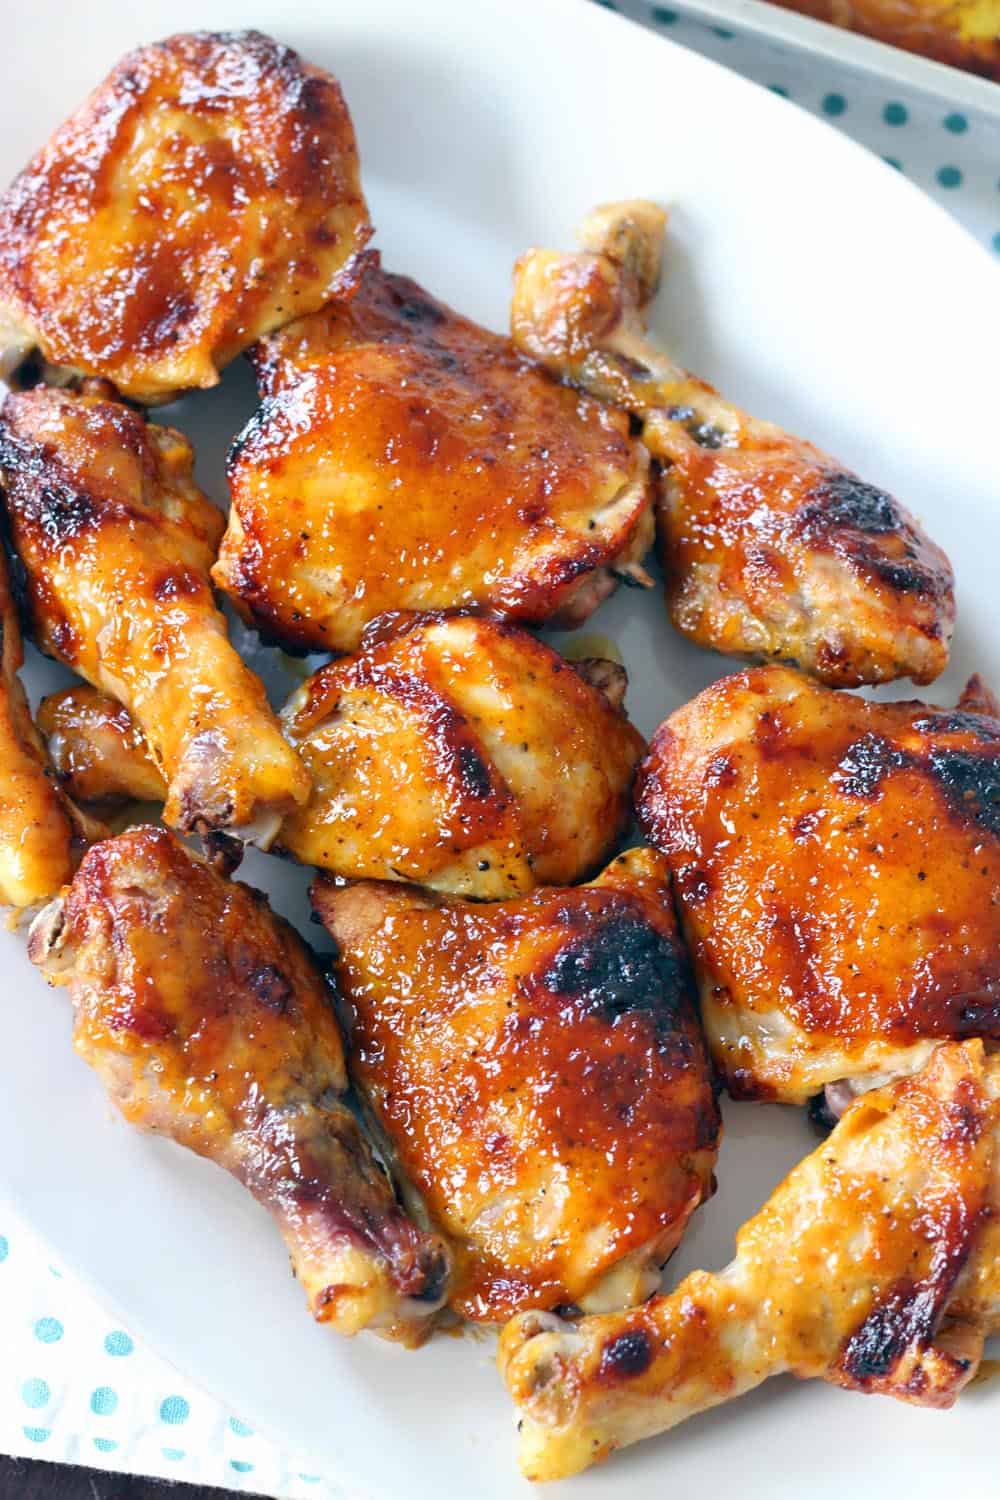
How to get CRISPY, CHARRED SKIN.
Oh boy, do I love some good crispy chicken skin. Those dark, charred parts of oven bbq chicken are the best!
Something to note: these chicken pieces are smothered in sauce, so the skin won’t ever be quite as crispy as when you roast it when herbs and butter, for example.
Here are some tips for getting that dark, charred, crispy skin:
- Broil the chicken at the end. After you’re done cooking it, if the skin isn’t as crisp as you like, move the oven rack up and turn on your broiler. Keep an eye on it- just a few minutes should do the trick!
- Cook the chicken on a baking rack. Using a rack nestled into your rimmed baking sheet will elevate the chicken and cause air to circulate around the whole piece, rather than having it sit in the juices. If you do this, just keep it skin-side up the whole time- no need to flip!
What kind of BBQ sauce should I use?
You can use any kind you want! I live right down the street from Salt Lick BBQ in Driftwood, TX, and I’m obsessed with their Spicy BBQ Sauce.
A lot of readers have commented that they’ve used Sweet Baby Ray’s with great results.
Something to keep in mind: a lot of store-bought BBQ sauces have a lot of added sugar. Frankly, it’s what makes it taste so good and sugar is vital for getting that thick caramelization. You can make your own homemade bbq sauce if you prefer.
Prepare yourself for finger-licking deliciousness.
What kind of baking sheet should I use?
I cannot recommend enough using a Nordic Ware Natural Aluminum Baker’s Half Sheet to make this oven baked BBQ chicken, and to roast literally anything you want. I have two and they are the ONLY baking sheets I will EVER use. They’re super sturdy, so they don’t buckle when the temperature changes (it’s the scariest thing ever when hot oil splatters when your pan buckles!). And they conduct heat well to make sure that your food is well cooked on the top and bottom, and they are really good at being non-stick, even though they don’t have any non-stick coating (it’s all natural!).
PLUS, they are only around $12! Go get one!
If you prefer to bake the chicken on a rack, so it doesn’t sit in the juices the whole time and crisps up a bit better, this rack nestles in perfectly to the rimmed baking sheet (see recipe notes for tips on getting the skin extra crispy).
Can I make this ahead of time and reheat?
While I’ve personally never done this, many readers have asked if this is possible so I wanted to make sure I answered this question! Here’s what I would do to make oven bbq chicken in advance and then reheat.
First of all, when reheating chicken, there is a risk of it overcooking and becoming dry. So if you are planning to do this, I would recommend making sure you only use dark meat (thighs/drumsticks) as white meat (breasts) tend to overcook easily. Dark meat can actually be more tender and delicious if it’s cooked to a higher temperature (around 180-190 degrees F, rather than the “safe” temperature of 165).
Cook the recipe as directed, then you can store the cooked chicken in the fridge for 1-2 days in an airtight container or covered in a baking dish with foil. When you are ready to reheat, place the chicken in a baking dish (if not done already) and cover tightly with foil. Bake in a 350 degree F oven for about 30 minutes. Check the temperature inside the chicken – it should be reheated to at least 165 degrees F (again, you can go a bit higher and should be fine).
With this reheating method, the skin will have lost any crispiness it had. Once it’s reheated, you can place on a broiler-safe baking sheet and broil for a little to re-crisp the skin a bit (though it will likely still be a little soggier than fresh after cooking – still delicious though!).
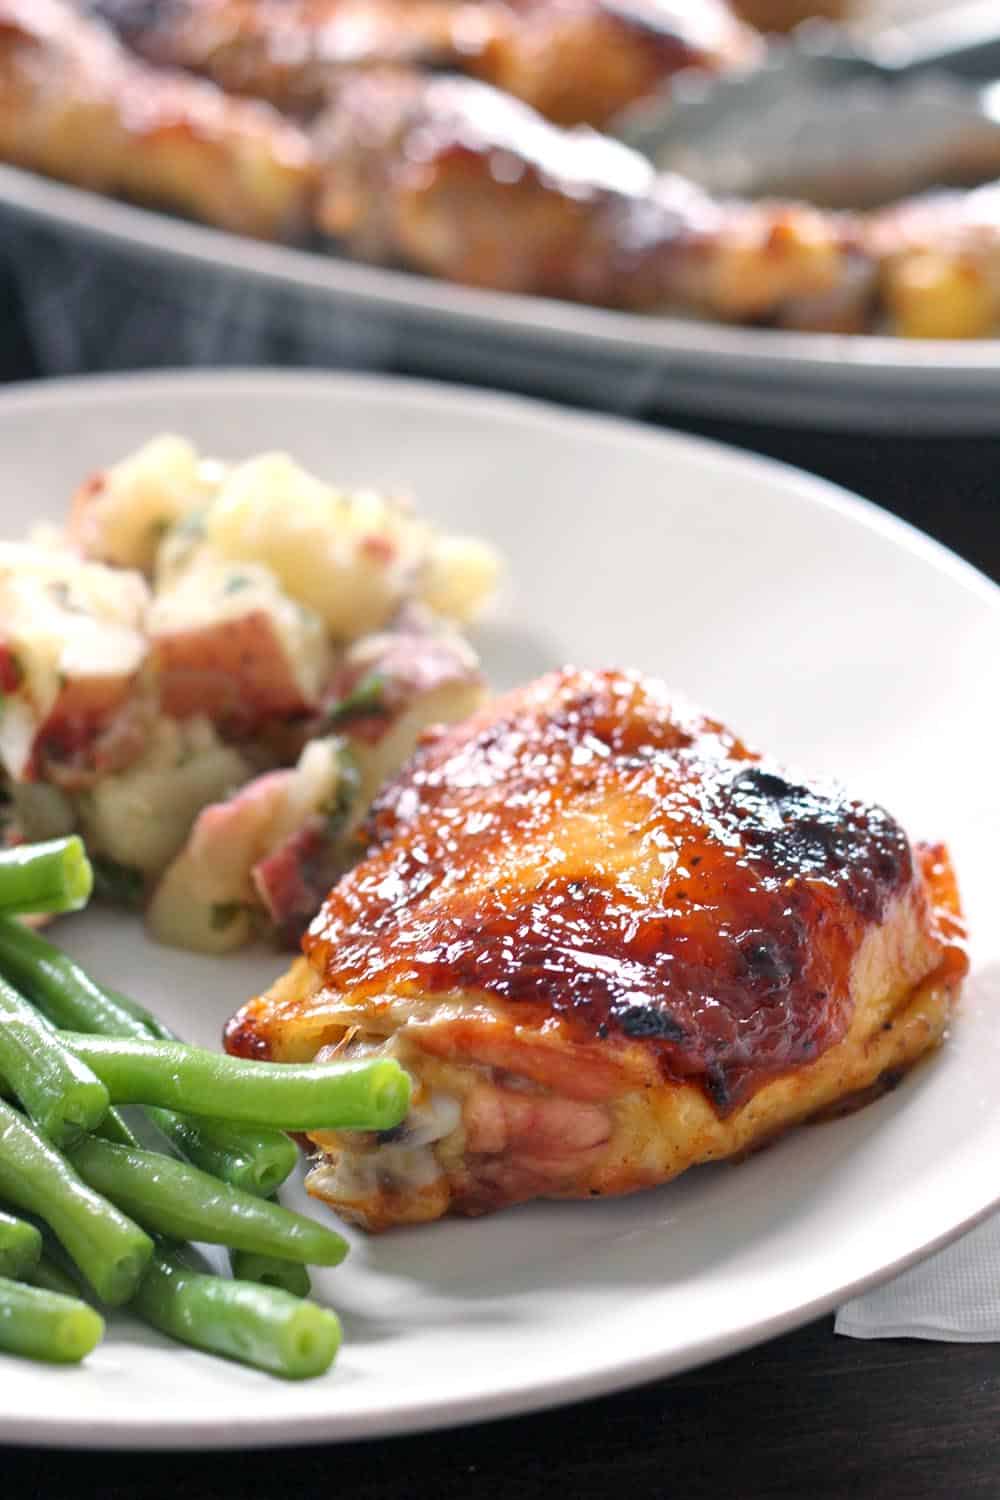
What to serve with oven baked BBQ Chicken
- Southern Style Green Beans
- Cold Potato Salad with Buttermilk Dill Dressing
- Mashed Cauliflower with Butter and Herbs
- 20-Minute Creamy Lemony Vegetable Pasta Salad
- Spicy Jalapeño Cilantro Slaw
Want a different take on the same recipe? This Oven BBQ Salmon uses a similar basting technique in only 10 minutes!
Did you know commenting and rating recipes is one of the best ways you can support your favorite food bloggers? If you made this recipe or have a question, please click the stars below to comment and Rate this Recipe. Share photos on social media and tag @bowlofdelicious! I reply personally to every comment and I’m excited to hear what you think.
Two Ingredient Crispy Oven Baked BBQ Chicken
Ingredients
- 8-10 chicken thighs and/or drumsticks bone-in, skin on
- 2 cups of your favorite bbq sauce
- 2 tablespoons extra-virgin olive oil or canola oil
Want to save this recipe?
Instructions
- Preheat oven to 400 degrees F.
- Coat the chicken on all sides with olive oil and season with salt and pepper.
- Place the chicken skin side down on a rimmed baking sheet. Bake for 25 minutes.
- Remove chicken from oven and turn the temperature of the oven up to 425 degrees.Tip: be sure to close the oven door every time you remove the chicken in this recipe, as you don't want the heat from the oven to escape!
- Coat the top of the chicken with barbecue sauce using a basting brush. Use a spatula to flip the chicken over, being careful not to tear the skin. Baste the other side of the chicken, and place back in the oven for 7 minutes.
- Remove from oven, baste top with barbecue sauce, and place back in oven for 7 more minutes.
- Remove from the oven again and baste again, for a total of three times, and place back in oven for 7 more minutes. The chicken will have cooked for a total of 46 minutes. This should be enough time for it to cook fully, but you should always double check temperature with a meat thermometer to make sure it's at least 165 degrees F.Tip: You should double check the temperature of the chicken at the thickest part of the meat using a high quality meat thermometer – it is fully cooked at 165 degrees F but dark meat is best at 180-190 degrees F, see notes for more on this). Give it more time in the oven to cook if it's not up to temperature. See notes for more troubleshooting.
- If the chicken hasn't crisped and browned to your liking, move the oven rack up and broil the chicken for 3-5 minutes, until it's more crispy.
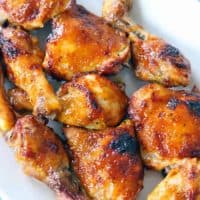
- I recommend letting the chicken sit for 5 minutes or so after cooking before serving so the juices redistribute.
Notes
- Crispy skin tips: Pat the chicken dry before cooking. You can also place the chicken skin side up from the beginning (skip the first, skin side down step) on a baking rack nestled into a rimmed baking sheet, to elevate it so it’s not sitting in its juices, resulting in more crispiness all around (and less fat!). Bake for 25 minutes, then add BBQ sauce as directed, do not flip.
- Baking skin-side up the whole time is a bit easier and less work, so feel free to do this! The reason for baking skin side down first is to ensure more even cooking and allow the fat to render off the skin, which can allow for crispier overall skin. However, it sometimes sticks to the pan. I recommend a nice thin sturdy metal spatula, slid under the chicken quickly with a sharp motion, when it’s time to flip it. But feel free to just bake skin-side up the whole time if you want an easier, less fussy solution!
- Water chilled vs. Air Chilled chicken: Water chilled chicken is cheaper, but it contains a high water content and a diluted flavor. I recommend using air chilled chicken if you can afford it. But if you need to use water chilled chicken (this is the most common kind) – here are my tips for making sure it’s not too soggy or watery:
- Dry brine it. Place the chicken pieces on a wire baking rack on a rimmed baking sheet and rub them with salt, and leave it uncovered in the fridge for 2-12 hours. Some of the water will be drawn out by the salt, and will collect in the bottom of the baking sheet. Elevating the chicken on the rack will ensure it’s not reabsorbing the liquid. As a bonus, this will also flavor the meat and help it retain moisture when cooking. You can also follow the advice above for crispy skin, baking the chicken directly on the wire rack. Give the chicken a rinse to remove the majority of the salt, pat dry, and don’t add much or any additional salt to the chicken.
- Bone-in, skin on chicken thighs and drumsticks are the best for juicy chicken every time. If you use chicken breasts, I recommend bone-in, skin on.
- If you really want to use boneless, skinless chicken breasts, I recommend baking them initially for only 10 minutes instead of 25, add some bbq sauce on the top, flip them, then continue to baste them in BBQ sauce every 7 minutes three times. This will result in a total cooking time slightly over 30 minutes. At this point they will probably be done cooking, but you should use a meat thermometer inserted into the thickest part to double check that they are 165 degrees F.
- Over-cooking the chicken – using thighs actually ensures you probably won’t overcook the chicken! Thighs are best when they are more around 185-195 degrees F, but safe to eat at 165 degrees F. But like other fattier cuts of meat, cooking it for longer can yield a more tender result.
- If you want to use wings, use the same timing and temp.
- Recipe and basting technique adapted from Ree Drummond’s Oven BBQ chicken recipe.
- Some users have commented that this recipe makes for a very messy oven. This has never happened to me, so I imagine it has to do with a specific oven and/or pan. But if you find that it is splattering a lot, you can tent it with foil to prevent a mess!
- Some users have had issues with the chicken being “fully cooked” in the given time. 46 minutes is MORE than enough time to cook chicken pieces, but here is some troubleshooting that might help:
- Make sure your chicken is fully defrosted if previously frozen.
- If using giant chicken thighs or larger pieces like legs, it may need more time.
- Measure the temperature in the thickest part of the meat, not the bone.
- Taking the temperature is the only safe way to gauge doneness. Chicken may look pink or even reddish depending on the type – if it’s organic, or a young chicken, this can happen with a chemical reaction with the hemoglobin. This is why the advice of looking for clear juices to indicate doneness is outdated and should not be used.
Video
Nutrition
Nutrition Information Disclaimer
The provided nutrition information is my best estimate and reflects one serving of the recipe (total servings indicated at top of recipe card). It does not include any added sodium from seasoning to taste, any optional ingredients, and it does not take brands into account. I use an automatic API to calculate this information. Feel free to calculate it yourself using one of these tools:
This oven bbq chicken recipe originally appeared on Bowl of Delicious in September 2015. It has been updated to include more detailed instructions, a video, tips and tricks, and process shots.
Jennifer Ramey
Loved this chicken. Sweet and sticky.
Elizabeth Lindemann
So happy you liked it :-)
Ita
Hi! This recipe looks great! Could I bake this in a glass dish and not on a pan? I just get everything so messy when using a pan or rack…
Elizabeth Lindemann
Yes, you can use a glass dish! I recommend cooking the chicken skin-side up the whole time rather than skin side down and flipping. You won’t be able to broil the chicken in the end, since glass pans aren’t broiler safe. And the chicken may be closer together in the pan. Both of these things will result in chicken that is less crispy, but it will still cook well with a sticky, thick BBQ glaze on top. Hope that helps!
Cherise
Really yummy! A hit with the family. I used drumsticks but the skin didn’t stay really crispy with all of the BBQ I slathered on. Maybe I overdid it? Doesn’t matter really – it was delicious!
Elizabeth Lindemann
So glad you liked it! The skin won’t get quite as crispy as, say, a roasted chicken with oil, because of the sauce. You’re right- the thick layers of sauce hinder the crispy factor. Did you try broiling them for the last few minutes? That helps get the crispy, charred black parts you see in the photos and video. Hope that helps!
TheresaS
Made last night for supper. Turned out great. The only change I would make would be to actually dry season and marinate it for at least an hour. The outside was perfect, but didn’t have the depth of flavor because of basically precooking the chicken before basting. I should also note, that I used a 9/13 baking dish, started with skin side up…and had no problem with it getting crispy. After the first 25 min, there was quite a bit of liquid..but that dried up by time it was done.
Elizabeth Lindemann
Glad you liked it, and thanks for this feedback- love the idea of letting it marinate! I’ll have to try this next time I have a little extra time/plan ahead to make this recipe. Thanks also for letting us know about having no problem getting it crispy leaving it skin side up from the beginning!
Scot
I only had boneless skinless chicken breast on hand, and though it’s your least recommended, I really appreciate that you included the modified directions. It came out great, but I will definitely heed your advice next time.
Elizabeth Lindemann
I’m so happy to hear the modified directions were helpful for you! Thanks for this feedback :-)
Devin
Approved!!
Elizabeth Lindemann
So glad you liked it!
Art
Cheap, quick, very tasty, so COOL!
Elizabeth Lindemann
So glad you liked it!
Tammy
Loved this recipe I used chicken legs 14 to be exact and added an extra 15 mins to the cooking times but did everything exactly as you said and the family is chowing down right now they love it thanks for the recipe
Elizabeth Lindemann
So happy you and your family liked it!! Thanks for the comment :-)
knitter4years
Made this for dinner. I used drumsticks. I washed the chicken and dried it completely with paper towels before seasoning it. I didn’t add oil. The barbecue sauce itself is making a sticky coating with some crispy browned sides and bits on the chicken.
Elizabeth Lindemann
So glad you liked it, and thanks for sharing it worked without oil! That’s really good to know.
Nukinka
I’m trying this tonight with Korean BBQ Sauce! It smells amazing!
Elizabeth Lindemann
Oh my goodness that sounds amazing!!
Abby
I’m making it for dinner tonight! My boyfriend and I are so ready to try it! I’ll post again after we eat! Thank you for the recipe!
Elizabeth Lindemann
Hope y’all liked it!
Brooke E Horan
These ROCK!!!!! A new staple w my boys!
Elizabeth Lindemann
Thanks so much! Glad you and your family like it :-)
Rachel Hulbert
Best oven recipe ever!
Elizabeth Lindemann
So glad you liked it!
Brittany
I love this recipe, but I have started marinating my chicken for 24 hours. It’s much better this way, but the instructions for this recipe are PERFECT. Thank you!
Elizabeth Lindemann
Oooooo wow I love that idea! Thanks for sharing, can’t wait to try marinating mine next time!
Mary Ossing
Like the big pictures
Elizabeth Lindemann
Thanks! :-)
Marilyn
I’ve got mine in the oven. After supper,l will let you know how much we love it.
Elizabeth Lindemann
Hope you liked it! :-)
Angela Anderson
This was so easy and so delicious. Followed recipe exactly…dried chicken, coated with olive oil, salt and pepper, baked on a rack (sitting in sheet pan) and basted with Sweet Baby Ray’s Honey Bbq sauce. It was perfect…juicy and tender. Skin never really crisped even under broiler but didn’t even notice because this chicken is THAT GOOD! Thank you for sharing such wonderful tips and tricks for baking chicken that actually has flavor and isn’t a mushy mess!
Elizabeth Lindemann
SO happy you liked it! Thanks for the comment :-)
Avi
Hi. Do you flip before each 7 minute session or just before the first 7 minutes? Thanks!
Elizabeth Lindemann
Just before the first one! Watch the video to see exactly how 😀
Chrissy
Fun to make and all the family said “delicious!”
Elizabeth Lindemann
Yay! Glad you and your family liked it :-)
Cheyenne
This is one of my families favorite dinners to make! Super simple and I use the cooking directions for any chicken thigh recipe I use. They turn out perfect every time!
Elizabeth Lindemann
So glad you like this recipe! :-)
Mrs. Grant
My children and I love this recipe. Turns out great every time!!!!
Elizabeth Lindemann
So glad you all like it!