I love me a good complicated cooking project, but the first time I made homemade gnocchi, I was petrified. I booked an entire afternoon, not sure of how difficult it would be.
Turns out, not only are ricotta gnocchi super easy to make (much easier than their potato counterpart)- they are super tasty, an excellent conduit to your favorite sauce, and very inexpensive.
Making ricotta gnocchi from scratch is NOT hard. It’s actually very easy, albeit a bit time consuming and a little messy. However, if you spend an hour or so making them in bulk and freeze them on the weekend, you can easily have enough for up to 16 servings (!!!) waiting for you in your freezer for quick and easy weeknight meals like baked gnocchi with mozzarella, basil, and marinara sauce.
Here is how to make them, step by step, with some tricks along the way to make the process more efficient, create the right consistency, and store in your freezer for meals to come.
This recipe is for a bulk batch. You can certainly cut this in half, or quarters, if you want to make a smaller batch.
The first step is making the dough. You will need a 32oz container of whole milk ricotta cheese, 4 eggs, 2-3 cups whole wheat flour, and 1.5 cups finely grated parmesan. First, check your ricotta to see how moist it is. You actually want it to be as dry as possible, so if there is any liquid lingering on the top, drain it off, then add the cheese to a large mixing bowl. (If you’re super worried about wet ricotta, you can leave it overnight in the fridge in a mesh strainer with a bowl underneath- the liquid will drip out and you will be left with dryer ricotta. You can use this same trick with regular yogurt to make it into Greek yogurt!) Beat the eggs in a separate bowl, then add to the ricotta.
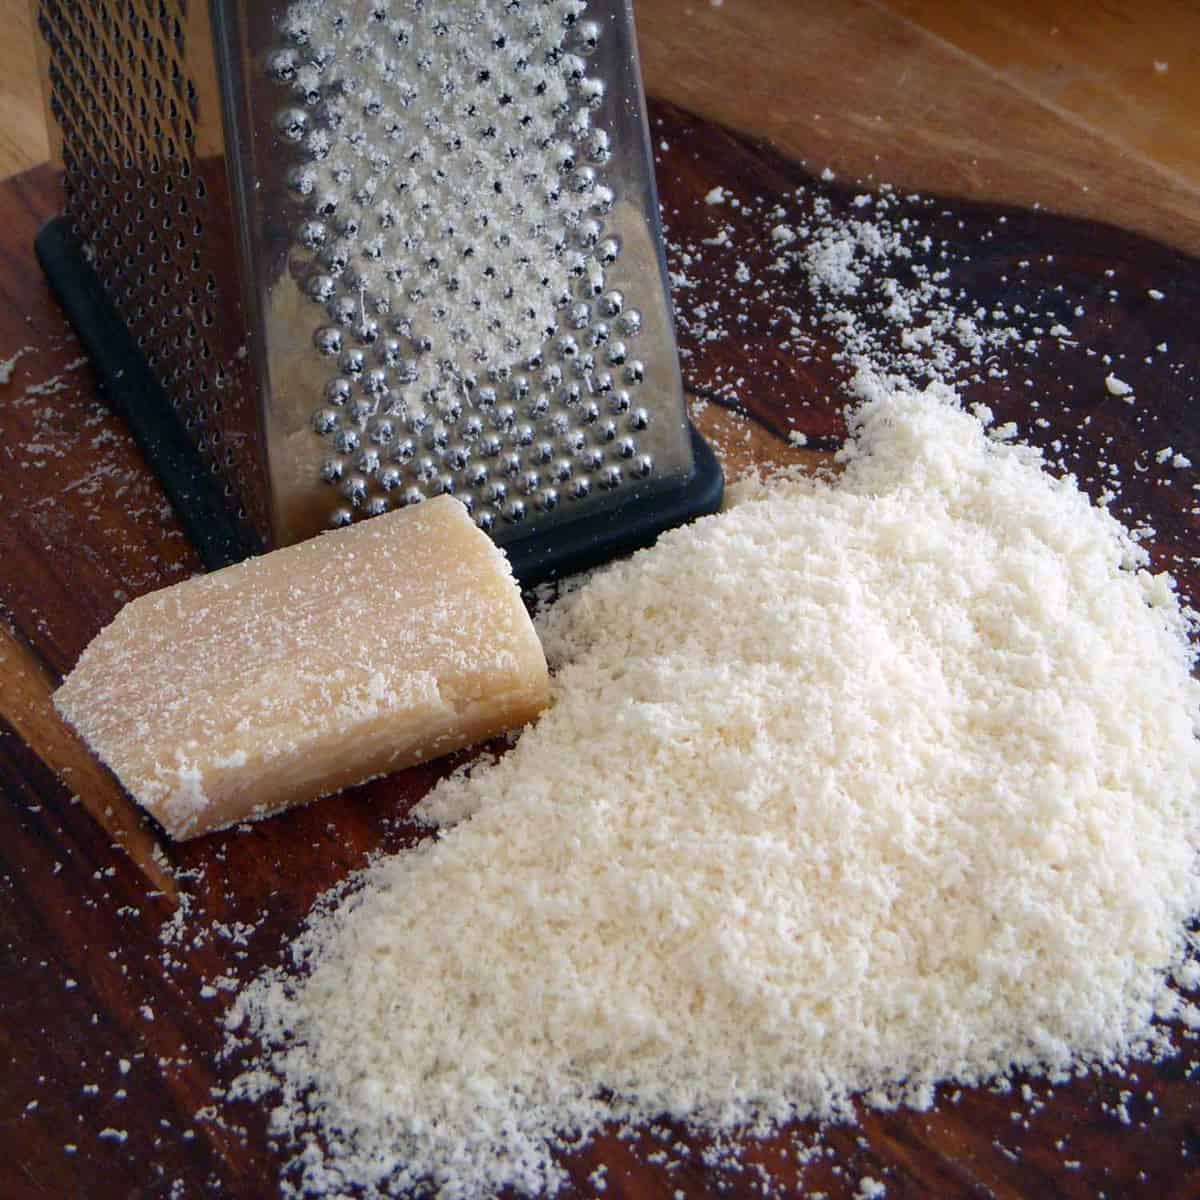
When you grate the parmesan, use that funky side part of your box grater to make it very fine. You know, the one you never use for anything ever. You want the dough to be smooth, so shredded parmesan will mess with the consistency. Add the parm to the bowl. Mix together.
To get the right consistency, you want to use just enough whole wheat flour to make the dough stick together in a ball. It may still be a little sticky, but after adding the flour, you should be able to take the whole thing in one ball and lift it out of the bowl and onto a floured surface. Start by slowly incorporating 2 cups of flour into the mixture. If it is still very sticky, add a few spoonfuls more until it starts to form a ball, even if it is still a little sticky. Move the dough to a floured surface.
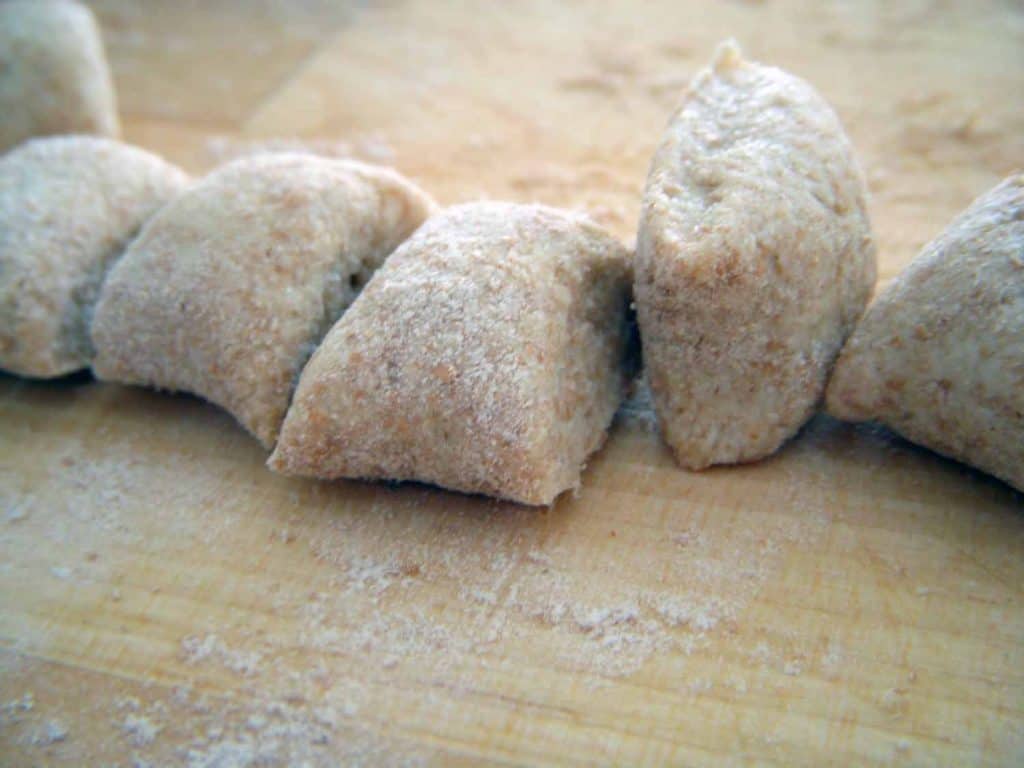
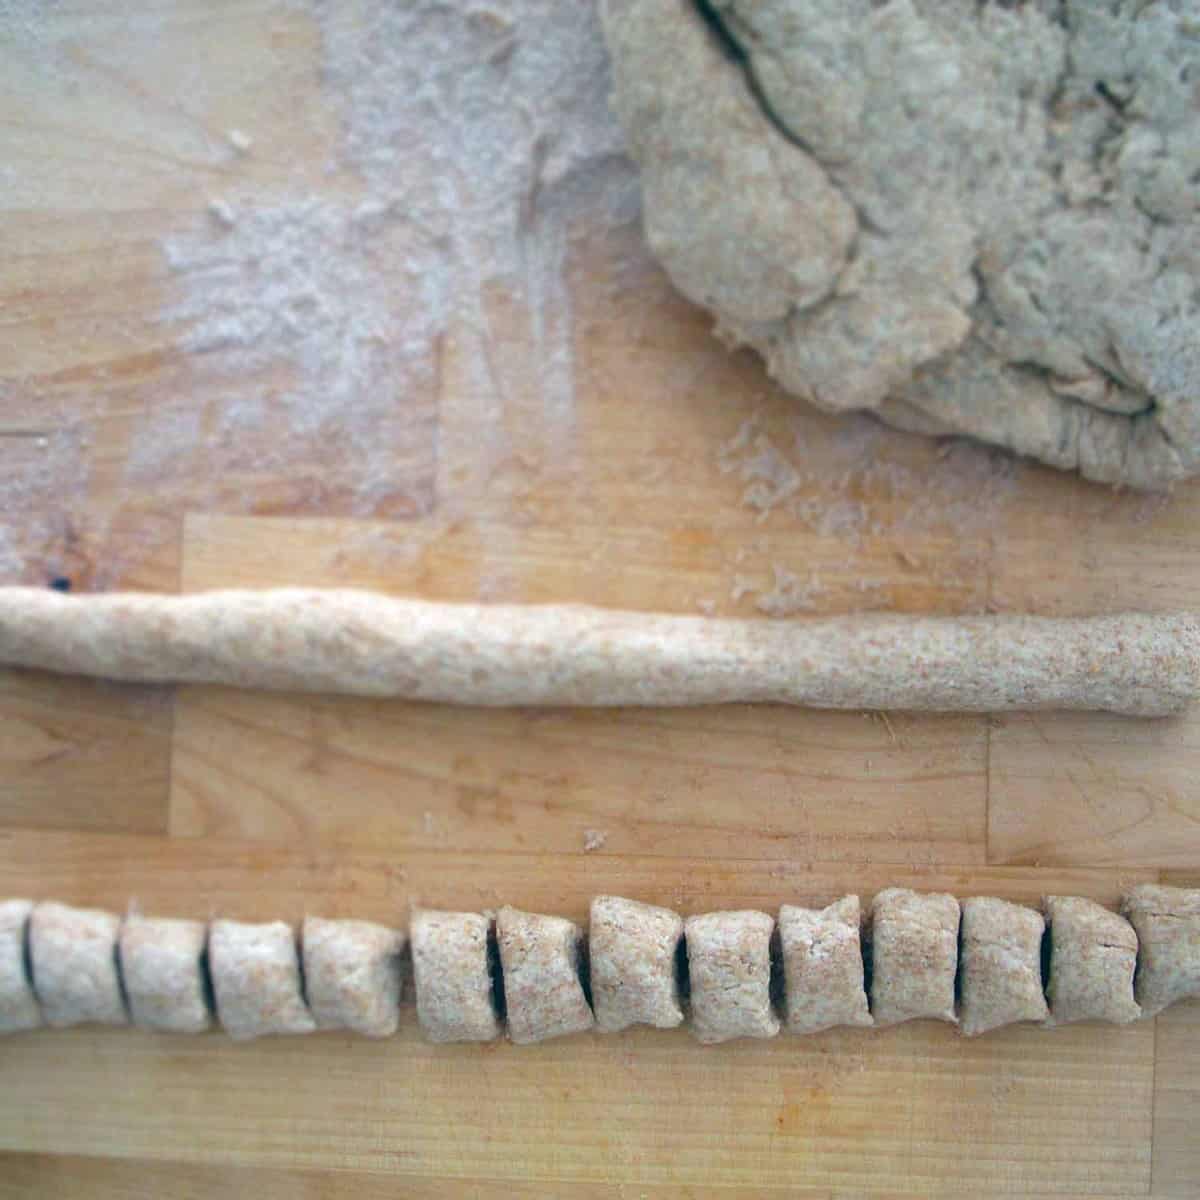
The second step is forming the gnocchi! The name and the shape are both extremely adorable. Right up there with ditalini or orechetti. Is it normal to think pasta shapes are cute? Well, I stand by my opinion.Take a piece of dough and roll it up into a ball, about the size of a baseball. Flour your working surface, and roll the ball into a log about as thick as your thumb. Using a very sharp knife, cut the log into slices that are just about as wide as they are thick. If your knife starts to get sticky, dip it into some flour or wipe it off in-between slices. And… that’s it. So easy! This batch makes a lot, remember, so this will take you some time. For me, this kind of tedious mindless task is actually very relaxing, especially after a long work of using my brain. Trust me, no brain-work involved with gnocchi-making. :-)
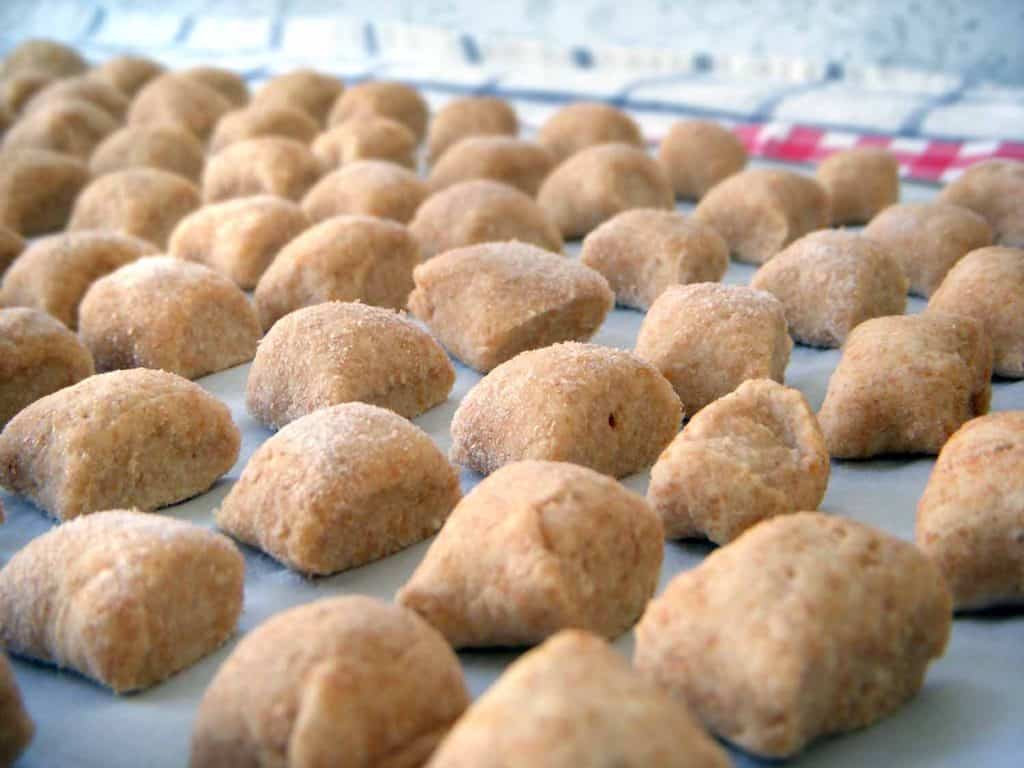
The third step is freezing the gnocchi. The first time I made this, I placed all the gnocchi portioned into plastic bags and froze them. When I tried to boil them, I realized they had all melded together into one doughy clump. Not ideal. This time, I flash froze the gnocchi before portioning them into plastic bags. Place your formed gnocchi on a parchment lined baking sheet so they aren’t touching, and put the baking sheet in the freezer for about 20 minutes. Then, divvy up the frozen gnocchi into meal-sized portions into plastic bags and place back in the freezer. One serving of gnocchi is approximately 20-25 pieces. So, when I divvy mine up, I put 40-50 pieces in each bag so I can make a quick meal for Zach and me when I need to!
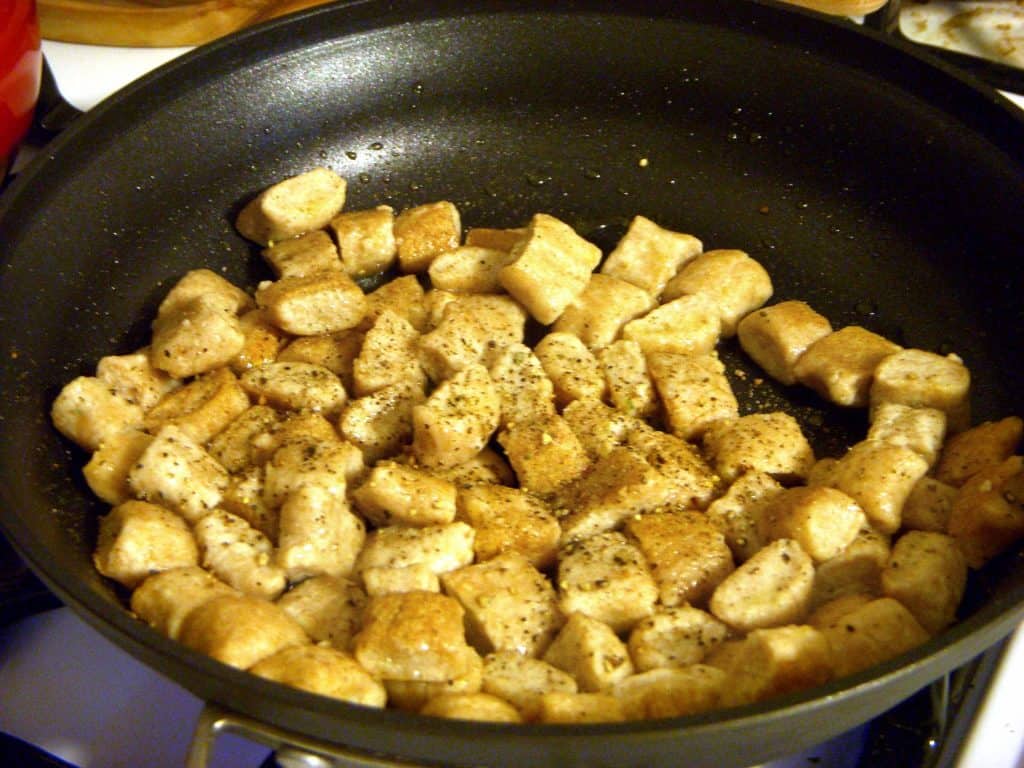
The fourth step is cooking (and eating) the gnocchi! The best part! Of course, you don’t have to freeze this- you can cook it right away. Whether you are cooking frozen or unfrozen gnocchi, the cooking process is simple- place the gnocchi carefully into boiling salted water and stir gently. When the gnocchi float to the top, take them out of the water with a slotted spoon. This is very similar to how you would cook ravioli or tortellini. Top with your favorite sauce or use in your favorite gnocchi recipe, and enjoy!
This batch made 8 meals’ worth of delicious fluffy gnocchi. I will try not to eat them every day of this week so they last for a couple of months, but no promises.
Next complicated cooking project: homemade pasta. If anyone has any tips on that, let me know in the comments section!
Try these whole wheat ricotta gnocchi with this easy chicken gnocchi soup, this four ingredient baked gnocchi and this crispy pesto gocchi with goat cheese and cherry tomatoes.
Whole Wheat Ricotta Gnocchi
Ingredients
- 32 oz. whole milk ricotta cheese
- 1.5 cups finely grated parmesan cheese
- 2-3 cups whole wheat flour
- 4 eggs
Instructions
- Mix together ricotta, parmesan, and beaten eggs in a large mixing bowl.
- Slowly add 2 cups of whole wheat flour, stirring together. If dough does not clump into a ball, add more flour slowly until it does. You want the dough to hold its shape, but it can still be a bit sticky.
- Turn dough out onto floured surface.
- Make a baseball-sized ball from some of the dough and roll it into a log on a floured surface about as thick as your thumb.
- Using a sharp knife, slice the log into pieces about as wide as they are thick.
- Continue to form the gnocchi, placing them onto a parchment lined baking sheet as you go.
- Flash freeze the gnocchi when the baking sheet fills up for 20 minutes, then divvy up into portions in plastic bags.
Notes
- When you are ready to cook the gnocchi, place into salted boiling water and stir gently. Remove with a slotted spoon when gnocchi start to float to the top (about 2-3 minutes) and top with your favorite sauce or use in your favorite gnocchi recipe.
- The provided nutrition information does not include any added sodium from seasoning to taste, any optional ingredients, and it does not take brands into account. Feel free to calculate it yourself using this calculator or by adding the recipe to Yummly.
Nutrition
Nutrition Information Disclaimer
The provided nutrition information is my best estimate and does not include any added sodium from seasoning to taste, any optional ingredients, and it does not take brands into account. I use an automatic API to calculate this information. Feel free to calculate it yourself using one of these tools:


Caitlin
I have been tempted to make gnocchi for years, but I’ve yet to take the plunge. I’m torn between this all-ricotta gnocchi, and a mix of potato and ricotta (found here: http://www.food.com/recipe/potato-ricotta-gnocchi-499895). I’ll probably just have to make them both – and then the sauce possibilities are endless!
This recipe looks great, I’ll let you know if I end up taking the plunge! :)
Elizabeth
Yes- please let me know which one you do! I’ve tried making potato gnocchi before and they are delicious… but definitely more time consuming and labor intensive. I like that ricotta gnocchi involves just mixing things in a bowl that are already made and ready to go. But I’m also dying to try to make sweet potato gnocchi! Good luck with your gnocchi adventures :-)