

Here’s my favorite EASY Black Bean Burger recipe – and it’s make-ahead and freezable, too! I’ve got a few tricks to make a black bean burger that STAYS TOGETHER and WON’T FALL APART(!) but it’s not dry or crumbly in texture, either. No sautéing veggies, pre-drying beans, or any of that “extra” work here! Adding soy sauce and olive oil adds umami and juiciness that veggie burgers are often lacking.
Would you like to email yourself this recipe?
I’ve made black bean burgers that taste great, but smush out the sides of the bun as soon as you bite down. Too soft. I’ve made some that hold their shape, but are dry and crumbly in texture. Too dry! This is my Goldilocks version of the Best Black Bean Burgers. Juuuuuussssst right, with a perfect hearty texture.
This is the perfect recipe to stock your freezer with something super easy to pull out on a busy night, or make a single serving if you’re cooking for one. This recipe also makes the entire mixture in your food processor so there’s minimal chopping and dicing.
One word of warning: the mixture is quite wet (so be prepared for this!) – I’ll talk about how to manage this below.
Why are these black bean burgers so tasty and EASY?
- They’re firm enough to hold their shape, but not dry or crumbly! The trick? Form patties and bake them first. The oven cooks through the burger slowly, firming everything up and dehydrating them a bit so they aren’t too soft. Then, before serving, sear the in a skillet with oil to make a delicious crunchy exterior and reheat the inside perfectly (this step is optional – you can just eat them as is – but highly recommended).
- They have healthy fat and umami flavor – Veggie and bean burgers often lack juiciness and umami compared to beef burgers. To compensate for that, this recipe adds some olive oil into the mixture itself, as well as uses soy sauce for a savory umami punch instead of salt.
- They’re easy to prepare! Everything is chopped up and mixed in a food processor in only a few minutes. You don’t need to sauté any peppers and onions or chop them up finely – saving you time and dishes.
- You can make them ahead and stock your freezer with them. This batch makes about 8-10 burgers, so you can stash them in your freezer and take out one or as many as you need, making them perfect for prepping a cheap, healthy meal ahead of time.
Ingredients and Substitutions
- Black Beans – I used canned, but you can use any cooked black bean. Or other bean for that matter – feel free to experiment with what you have on hand! Make sure they are drained and rinsed very well, and any excess water is shaken off before using.
- Onion – I used yellow, any will do.
- Bell Pepper – any color.
- Garlic – omit if you like, or use garlic powder instead.
- Eggs – flax or chia “eggs” or mashed sweet potato can be used for a vegan version – see more below on this.
- Breadcrumbs – panko or regular are fine, gluten-free if needed, or quick oats.
- Olive oil – or another oil of choice.
- Spices: cumin, chili powder, and smoked paprika – feel free to use what you have here or experiment!
- Soy sauce – this adds saltiness and umami, feel free to use salt if you don’t have any soy sauce, or tamari or coconut aminos for a gluten-free option.
- Hot sauce – optional, if you like things spicy!
- Things for serving – buns, sliced tomatoes, etc. See more serving suggestions below.
How to make The Best Homemade Black Bean Burgers (that won’t fall apart!)
The trick to making black bean burgers that STAY TOGETHER and WON’T FALL APART? Baking them! Baking ensures the burgers cook through completely, the eggs can work their magic at binding everything together, and they dehydrate a little bit so they aren’t squishy.
But the trick to making black bean burgers that won’t fall apart but are still juicy and not dried out? You have to start with a fairly wet mixture.
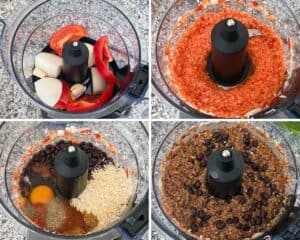
1) Make the mixture:
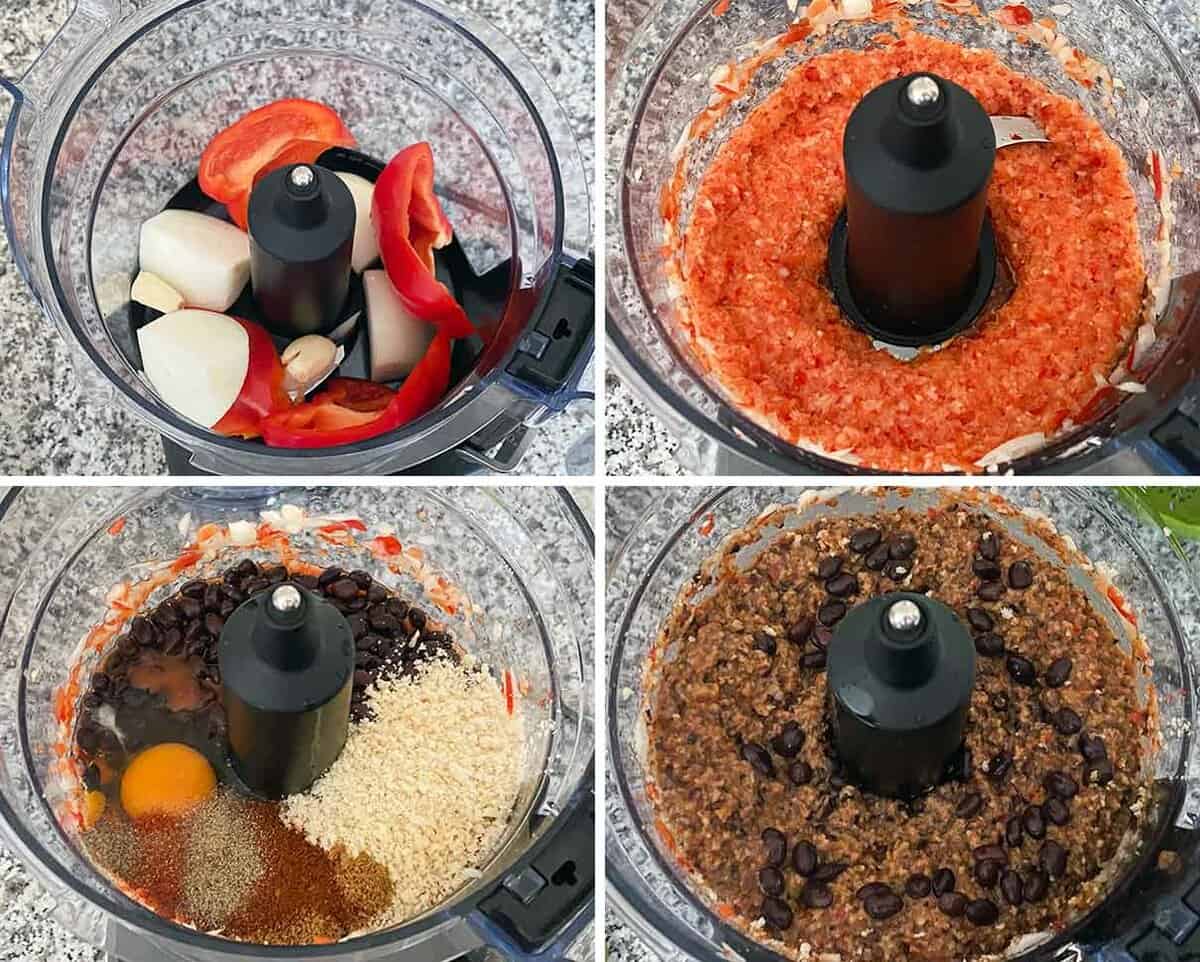
- First, in a food processor, add onion, bell pepper, and garlic (no need to chop anything!). Process until everything is finely minced. You don’t need to drain any liquid out at this point, it will be fine!
- Then, add half the black beans, spices, olive oil, eggs, soy sauce, hot sauce if using, and breadcrumbs. Pulse until everything is very well combined (but not completely pulverized).
- Finally, add the rest of the black beans and pulse only a few times. You want some of those beans to remain whole.
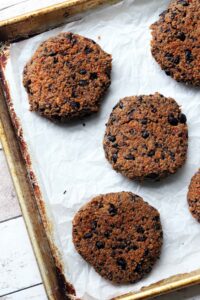
2) Bake the patties:
- Check the mixture. It should be fairly wet and soft, but if it’s too wet to hold its shape at all, you can refrigerate it for a while. Refrigerating it will help the breadcrumbs that are already in there absorb some of the excess liquid. If it still seems super wet, you can add some more breadcrumbs.
- Prep a rimmed baking sheet by lining it with parchment paper and preheat your oven.
- Form patties. I used a half-cup measure to get even amounts for each patty. Form the patties with your hands and place them onto the parchment paper on the baking sheet. Note, again, that the mixture will be quite wet. You should be able to form a patty, but once you place it on the parchment paper, it will be there for good – you won’t be able to move it until after its baked or it will smush out of shape!
- Bake! Bake for about 25-30 minutes. You can flip it halfway through carefully, but it’s not 100% necessary.
At this point, you can dive right in and eat them! OR, you can store them in your fridge or freezer once they are cooled off a bit. Tip: the longer you let them cool, the more firm and less likely to fall apart they will be.
You also have the option of searing them in a skillet for an extra delicious black bean burger – let’s move on to the final step!

3) Optional – but highly recommended – sear the burgers in a skillet
Searing the black bean burgers in olive oil in a skillet accomplishes two things – 1) it makes a crispy browned outer layer that’s delicious, and 2) it is the best way to reheat the burgers if you’ve made them ahead of time and refrigerated or frozen them. Alternatively, you can grill them if you want!
- Heat a couple tablespoons of olive oil in a skillet. I used nonstick but any kind will work.
- Sear on each side for 2-5 minutes, depending on their beginning temperature. If they were warm out of the oven, cook on medium-high heat for 2 minutes per side. If they were out of the refrigerator, cook on medium heat for 3-4 minutes per side. If they were frozen, cook on low heat for 5ish minutes per side so they completely warm through.
- Add cheese when you flip them, if you want to!
- Build your burger! See below for suggestions.

How to serve a black bean burger
You can serve black bean burgers like you would any burger – on a bun with whatever you want! But there are other options too:
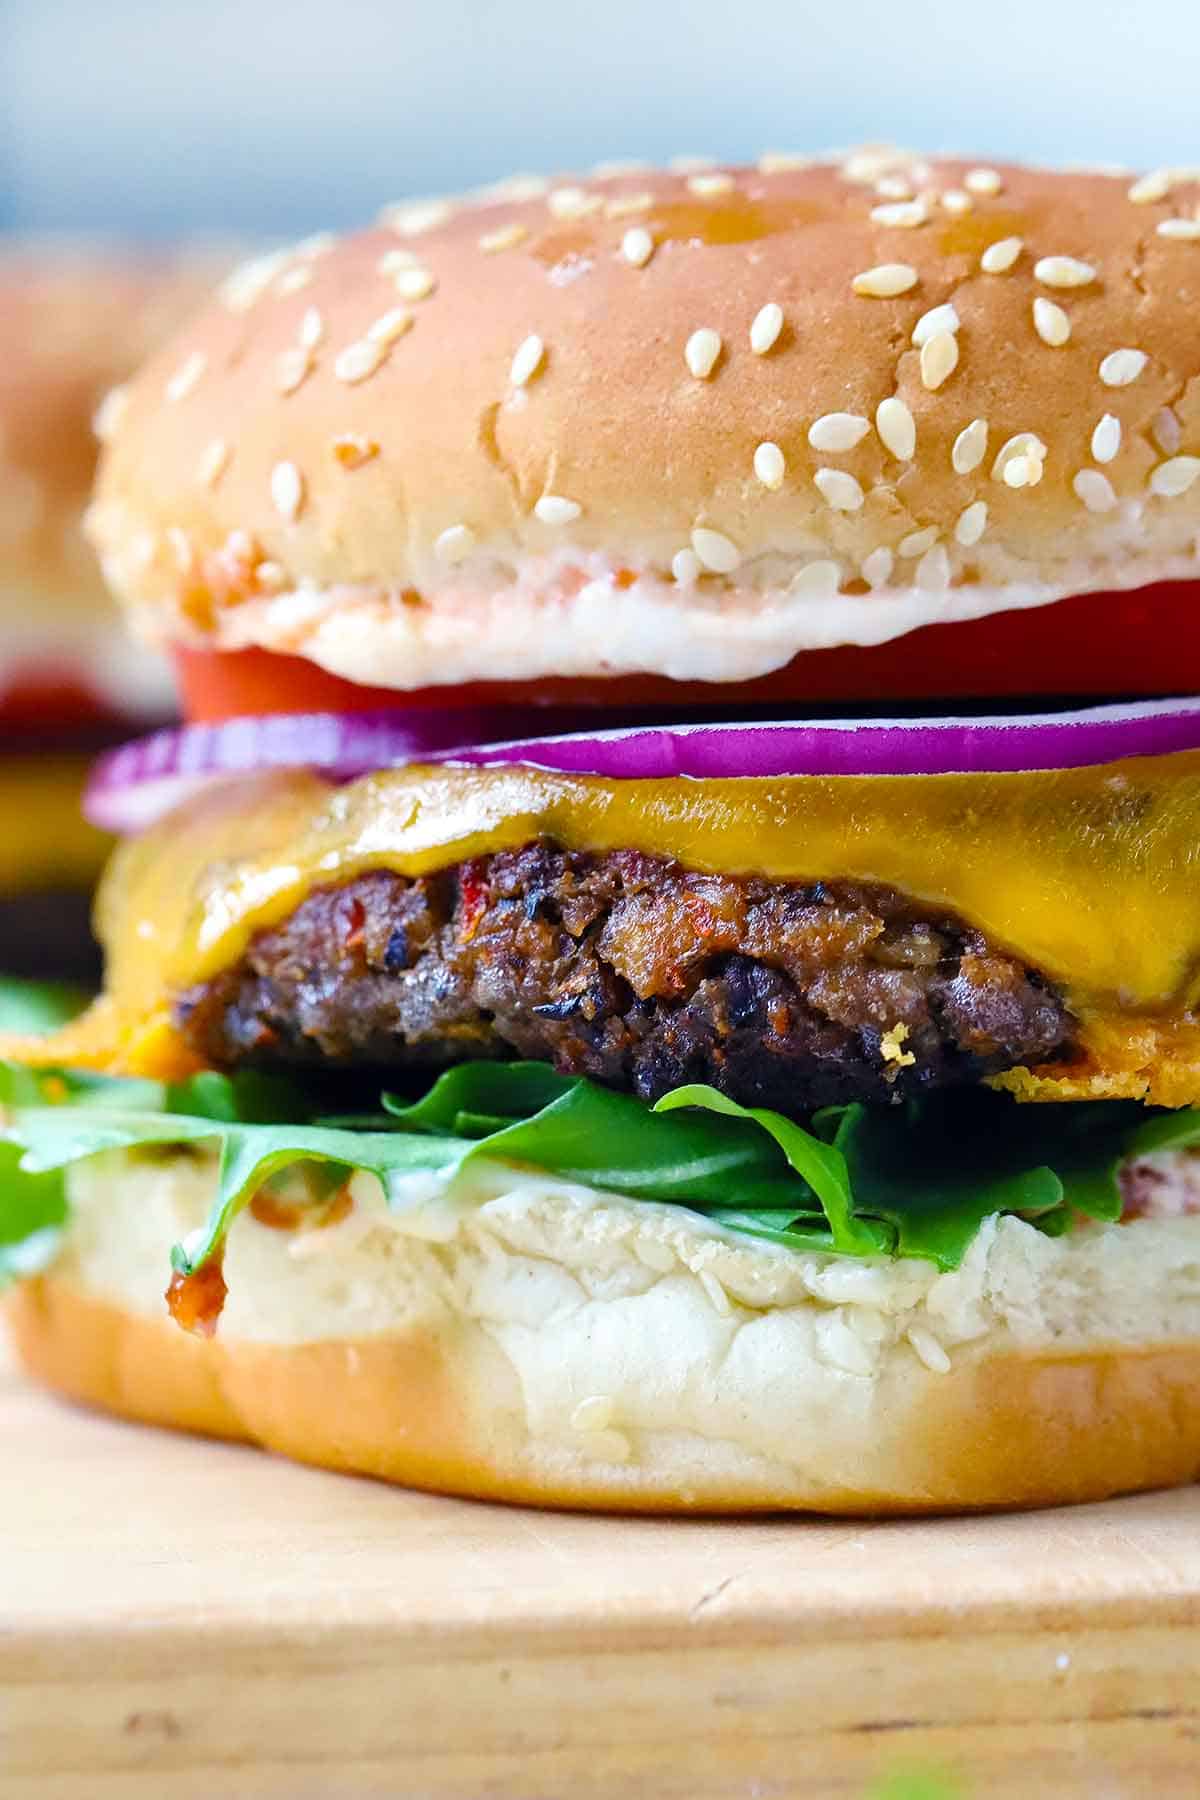
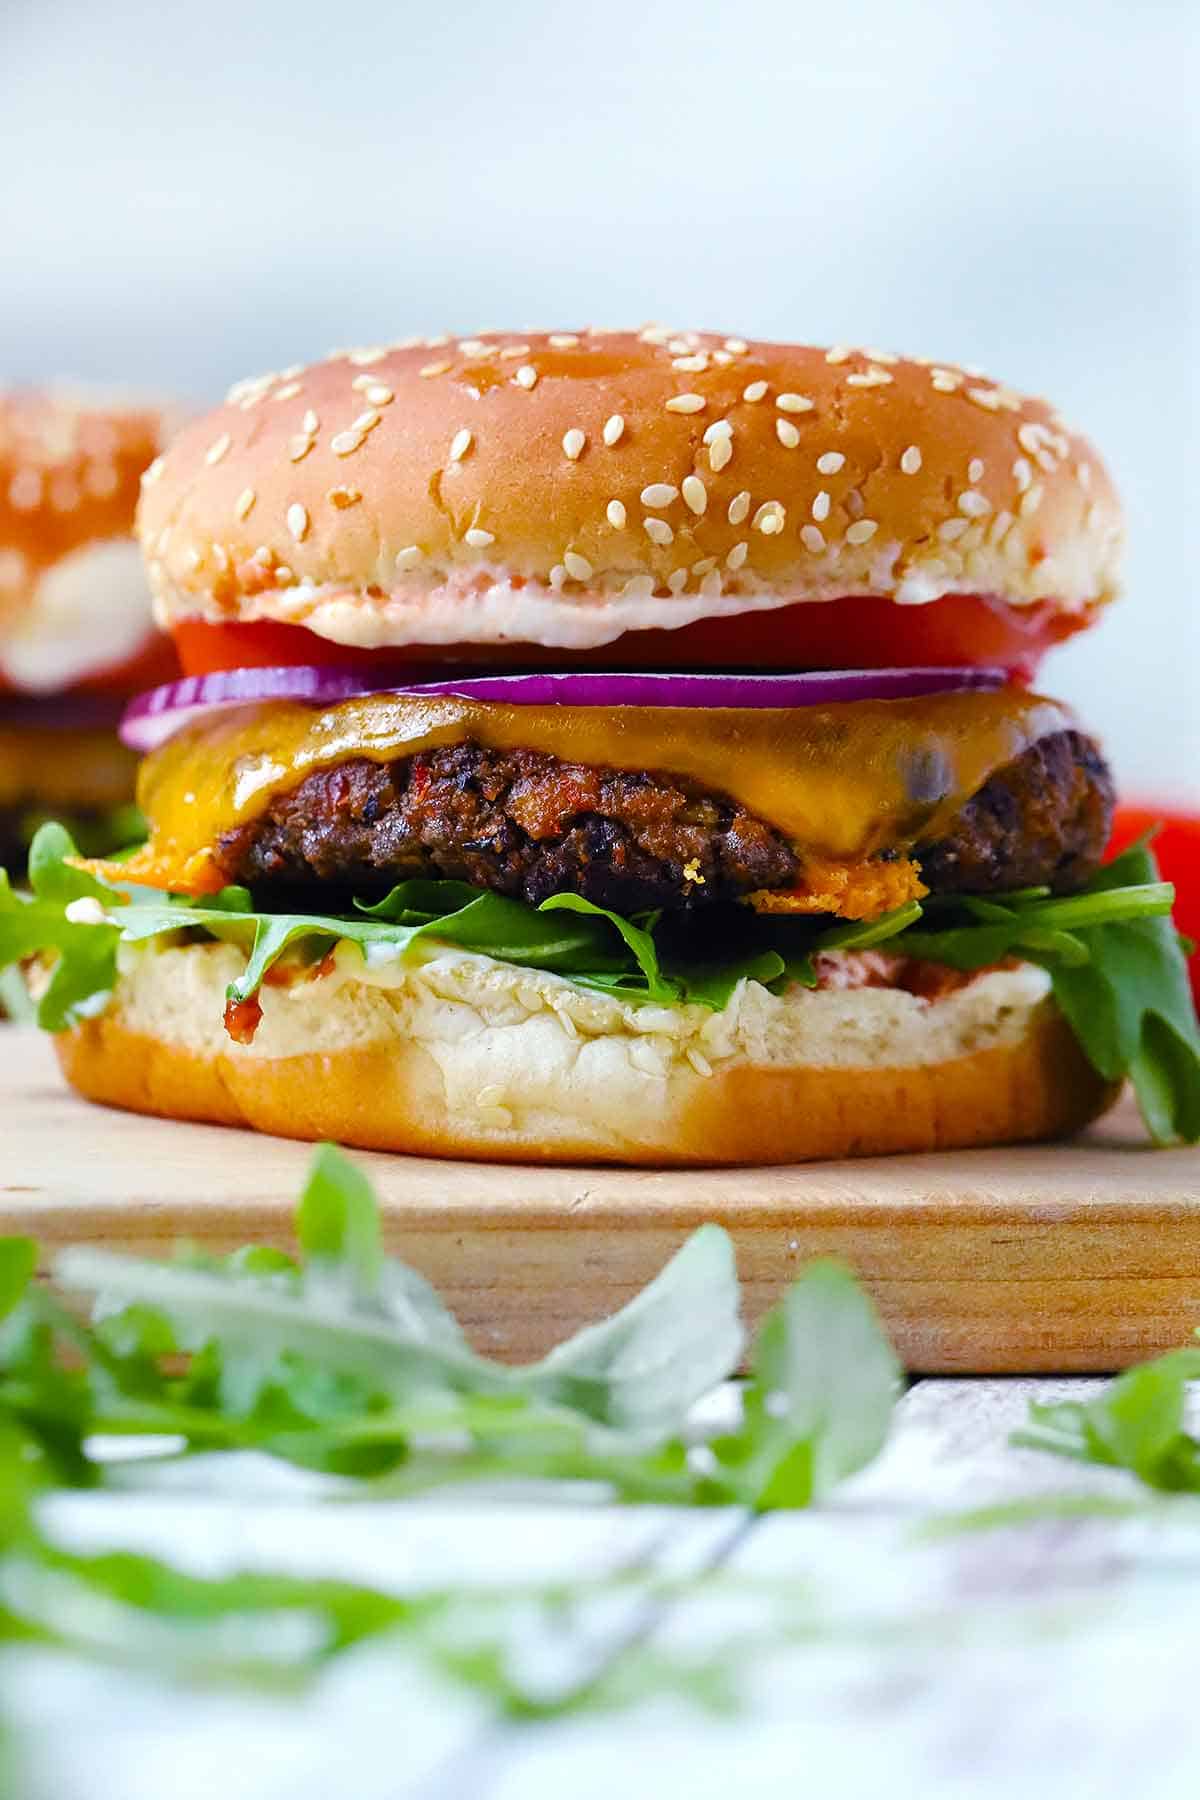
- I served them with spicy mayo, baby arugula, cheddar cheese, red onion, pickles, and sliced tomato.
- Have them for breakfast or brinner with a fried egg on top.
- Crumble them up and use in veggie burger hash browns or in tacos.
- Slice them up and add them to a salad.
- Serve in a pita pocket with sliced cucumbers and tomatoes and tzatziki sauce, like a vegetarian gyro.
- My favorite side with black bean burgers is sweet potato fries.
Do you have other ideas? Leave them in the comments below!
How to freeze them
Place the baked black bean burgers on a baking sheet in the freezer for 30 minutes to an hour, until they are solid. Then, transfer them to a zip-top bag or airtight container. You can take them out as needed for quick and easy meals!
Is there an egg substitute to make these vegan?
While I haven’t personally tried it, I’ve heard that you can use a flax or chia egg or mashed sweet potatoes in veggie burgers in place of eggs. Just swap out the egg in this recipe to make these into vegan black bean burgers.
Other veggie burger recipes
- Wild rice and black bean veggie burgers
- Quinoa, mushroom, and zucchini burgers
- Sweet potato and black bean veggie burgers
- Sun-dried tomato, mozzarella, and quinoa veggie burgers (from Jessica in the Kitchen)
Other black bean recipes
- One pot black beans and quinoa
- Black bean and corn salad
- Sweet potato and black bean enchiladas
- Slow cooker black bean soup
Did you know commenting and rating recipes is one of the best ways you can support your favorite food bloggers? If you made this recipe or have a question, please click the stars below to comment and Rate this Recipe. Share photos on social media and tag @bowlofdelicious! I reply personally to every comment and I’m excited to hear what you think.
Easy Black Bean Burgers
Equipment
- Food Processor (see notes if you don't have one)
Ingredients
- 1 small yellow onion peeled and quartered (or ½ large)
- 1 bell pepper any color, seeds and ribs removed
- 2 cloves garlic
- 2 14 oz. cans black beans drained and rinsed (or about 3 cups cooked black beans)
- 2 eggs (see notes for vegan option)
- 1 cup breadcrumbs panko or regular are fine, plus more if needed
- 2 tablespoons extra-virgin olive oil plus more for optional searing
- 1 teaspoon ground cumin
- 1 teaspoon chili powder
- ¼ teaspoon smoked paprika
- 2 tablespoons soy sauce
- ½ teaspoon black pepper
- a few dashes hot sauce optional, depending on spice level preference
Want to save this recipe?
Instructions
- Preheat oven to 350 degrees F. Line a rimmed baking sheet with parchment paper.
- Add the onion, bell pepper, and garlic to the food processor. Process for a few seconds until everything is very finely minced (no need to pre-chop any of these ingredients).
- Add half of the drained and rinsed black beans (shake off as much water as you can from them!), the eggs (2), breadcrumbs (1 cup), olive oil (2 tablespoons), ground cumin (1 teaspoon), chili powder (1 teaspoon), smoked paprika (¼ teaspoon), soy sauce (2 tablespoons), black pepper (½ teaspoon), and hot sauce, if using. Pulse until everything is well combined (but not completely pulverized).
- Add the remaining half of the drained and rinsed black beans to the food processor and pulse only a few times, until some of those beans are mashed but some remain whole.

- Form patties out of the mixture and place on the parchment- lined baking sheet. (The mixture will be quite wet, but you should still be able to gently form patties with your hand. If it's too wet to do this, you can refrigerate it for a while – as it cools and the breadcrumbs absorb the moisture, it will firm up. In addition, you can add more breadcrumbs if needed.) I used a ½ cup measure to measure equal portions of the mixture (8-10 patties). You can do ⅓ for more patties if you like. Because the mixture is fairly wet, once you place the patties on the baking sheet, they are there for good – it would be very difficult to move them and have them keep their shape – so make sure you plan ahead with spacing or use two baking sheets!

- Bake at 350 degrees F for 25-30 minutes. I recommend flipping once halfway through cooking, but that's not 100% necessary.
- At this point, you can store the patties in your refrigerator or freezer for later (see notes on freezer directions) after they've cooled a bit. You can eat them as is. Or, you can move on to the next step.
- Optional, but highly recommended: heat two tablespoons olive oil in a heavy skillet. Sear the patties on each side until browned and crispy. After you flip them, you can add a slice of cheese to melt on top if you like. See notes for directions on searing depending on starting temperature.
- Serve the burgers however you like. I like spreading mayo and hot sauce on a bun, adding arugula, sliced red onion, and tomato to the black bean burger patty. See notes for other ideas.

Notes
- If you don’t have a food processor, I recommend very finely chopping the onion, pepper, and garlic (or grating them on a box grater). Add to a bowl, add remaining ingredients, and use a potato masher to mash to a consistency that allows some of the beans to remain whole.
- Spices: this recipe is flexible. Feel free to experiment with what you have in your pantry or omit anything listed!
- Refrigerate patties for later: allow the patties to cool for a while after baking. Then remove to an airtight container and store in your fridge for up to 3-4 days.
- Freeze patties for later: allow the patties to cool for a while on the baking sheet. Then, place the baking sheet directly in the freezer to flash freeze the patties until they are solid, for about 30 minutes to an hour. Remove the patties and place in a zip top bag or airtight container and place in the freezer.
- To sear in the skillet: The time and temperature will vary based on starting temperature of the patty. Directly after baking while they are still warm: sear on medium-high heat for about 2 minutes per side. Cold from the refrigerator: sear on medium heat for about 3-4 minutes per side, so the inside warms up enough. Directly from the freezer: sear on medium-low or low heat for 5ish minutes on each side, so the inside completely defrosts and warms up without burning the outside. You can also cover the skillet to trap in the warmth to speed things up.
- Serving black bean burgers: Serve as you normally would any burger – on a bun with fixings. Or top with a fried egg for brunch or brinner, slice and add to a salad, crumble and add to tacos… get creative!
- Make them gluten-free: use gluten-free soy sauce alternative (like tamari or coconut aminos) and gluten-free breadcrumbs or quick oats.
- Make them vegan: While I haven’t personally tried it, I’ve heard that you can use a flax or chia egg or mashed sweet potatoes in veggie burgers in place of eggs.
Nutrition
Nutrition Information Disclaimer
The provided nutrition information is my best estimate and reflects one serving of the recipe (total servings indicated at top of recipe card). It does not include any added sodium from seasoning to taste, any optional ingredients, and it does not take brands into account. I use an automatic API to calculate this information. Feel free to calculate it yourself using one of these tools:
Emma
I’m looking for a recipe that could be frozen in a mold, then smoked from frozen. Do you think this would work well without the initial bake?
Elizabeth Lindemann
Oh wow I LOVE this idea! I think it would work well, since smoking is a low and slow method of cooking. They should firm up nicely. I’m unfamiliar with smoking, so I can’t speak to certain outcomes, and there is surprisingly almost nothing on the internet about it! But I did find this resource that might be helpful to peruse for additional information. Good luck! https://www.humphreysbbq.com/blogs/recipes-designed-for-you/smoked-black-bean-burgers
Kevin H
Just made these tonight. Veggie burgers are getting so expensive at the grocery store. This was a quick and easy to follow recipe. Will likely make again!
Elizabeth Lindemann
EVERYTHING is getting expensive at the grocery store! So glad these worked well for you as a more affordable solution – it’s one of those things that’s totally worth making yourself and is super easy, and I’m so glad you liked them!
Ana
Hands down the best black bean or any veg burger recipe! Confession: I’m not really a black bean kind of girl; I just prefer other beans but this burger looked so good and had the texture I was looking for so I had to make them and I am so glad I did. I swapped the green bell pepper for Anaheim chiles, and used chipotle instead of hot sauce because that’s what I had. I also added just a touch of toasted, chopped cashews (we’re big on texture in our casa) but followed everything else and aye dios mio are these baddies delicious! They were such a hit that the entire family decided they prefer these to a classic beef patty. That’s a huge win.
Elizabeth Lindemann
So glad you and your family liked it!! Thanks for taking the time to leave such a lovely comment, and for sharing your swaps!
Reyna
I took the time to post a long comment about how much I enjoyed and appreciated this recipe but I don’t see it. Not sure why…?
Elizabeth Lindemann
Hi! I see your comment and am just about to respond – I personally moderate and respond to each comment that’s left on my blog, and sometimes I get a bit behind since it’s just me! Thanks for your patience :-)
Reyna
Thank you for this perfect recipe! I followed everything exactly, down to searing the patties at the end, and these burgers are so delicious!!!
I was worried about the runnyness of the mixture when I was forming the patties, but they came out perfectly. I have several burgers to freeze and can’t wait to eat them. Next time I will top it with avocado!
Elizabeth Lindemann
So glad you liked them! I agree, I was skeptical about the runny texture of the mixture as well but isn’t it amazing how they bake up so well? Now I think I’ll add these to my dinner plan for this week!
Ginger Senner-Gross
Turned out great! Thank you for this recipe!
Elizabeth Lindemann
So glad you liked it!
Lisa
I just made these and they were so good! I used gluten free panko bread crumbs and gluten free soy sauce due to having Celiac disease. For the onion and bell pepper, I used the mixed frozen bag and it turned out perfect!
Elizabeth Lindemann
So glad you liked it! Glad to hear it worked well for a gluten-free version!
Martha
Added one small cooked sweet potato, instead of eggs. Also 1 small chopped jalapeño instead of hot sauce and they were fantastic! Made my own gluten free breadcrumbs.
Elizabeth Lindemann
So glad you liked it! Great to know it worked well with sweet potato instead of egg and with GF breadcrumbs!
Martha
Delicious and easy! Wonderful instructions and notes.
Elizabeth Lindemann
So glad you liked it!
Judy
Are the breadcrumbs fresh or dried? Thanks.
Elizabeth Lindemann
Dried. Hope you like it!
Kelly
Been using this recipe for a couple years now and it’s perfect as written. Thanks for sharing your recipes. They are fantastic.
Elizabeth Lindemann
So glad you like this recipe, and thanks so much for your kind comment!
Asha
These patties came out very well- The onions/peppers/garlic gave it great flavor. I used flax eggs and also added about 1/2 cup or more crushed walnuts for extra protein. They were still soft out of the over but they firm up considerably after 20 min or so on the sheet pan. Thanks!
Elizabeth Lindemann
Glad you liked them! Interesting idea to add the walnuts – I’ll have to try that sometime!
Shari Nettles
Used Worcester sauce in place of soy sauce. This recipe is fantastic!
Elizabeth Lindemann
So glad you liked it!
Mary
This recipe was easy to make and so delicious! I didn’t have smoked paprika so I used regular and added cilantro. I have leftovers and will have it later for brinner!! Wonderful!! Thanks for sharing recipe! :)
Elizabeth Lindemann
So glad you liked it!
Brenda J Thacker
I’ve made this recipe for years but I use chickpeas instead of black beans. I like the flavor better. They freeze great and I take out one at a time, microwave it for around 90 seconds and I’m good to go.
Elizabeth Lindemann
Great idea to use chickpeas!
Alisha C Nguyen
Well seasoned and tasty. Comes together quickly in the food processor. So much healthier than a beef cheeseburger!
Elizabeth Lindemann
So glad you liked it!
Micah Bergsma
My mixture seemed very gloppy and too liquid. Should I have blended less? More bread crumbs?
Elizabeth Lindemann
So this mixture IS a bit more gloppy and liquidy than other black bean burger recipes. The best way I can describe it is that it can be formed into patties and placed on the baking sheet, but once they’re on the baking sheet if you try to pick them back up again they will fall apart. If they are too soft to even form a patty, then yes, more bread crumbs, or even just more time for the breadcrumbs to absorb the liquid (this is a good time to stick the whole mixture in the fridge, since not only will the breadcrumbs absorb some of the liquid but also if the mixture is cooler it will be easier to form into patties). And you’re right, blending too much will also release more liquid it might help next time to leave everything a bit chunkier. Hope that helps!