

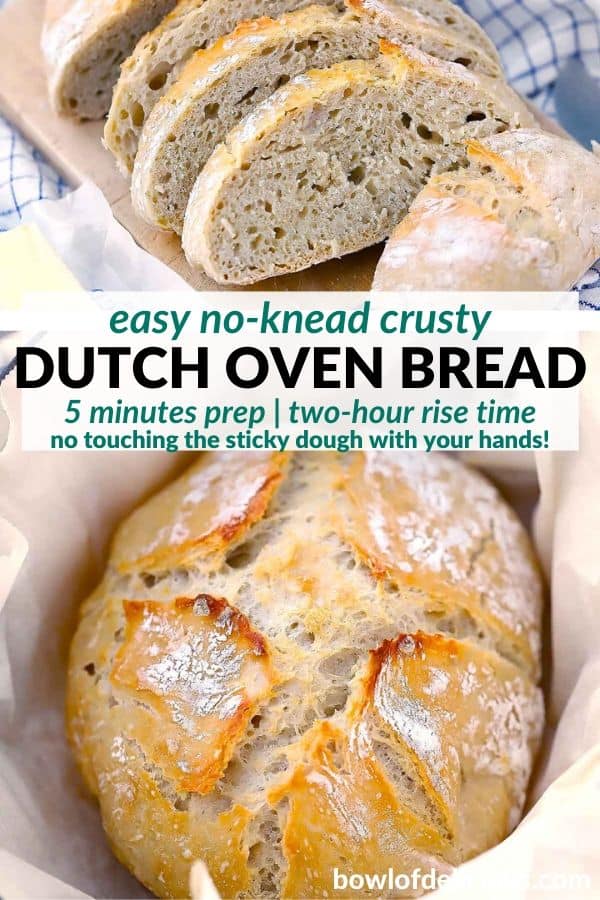
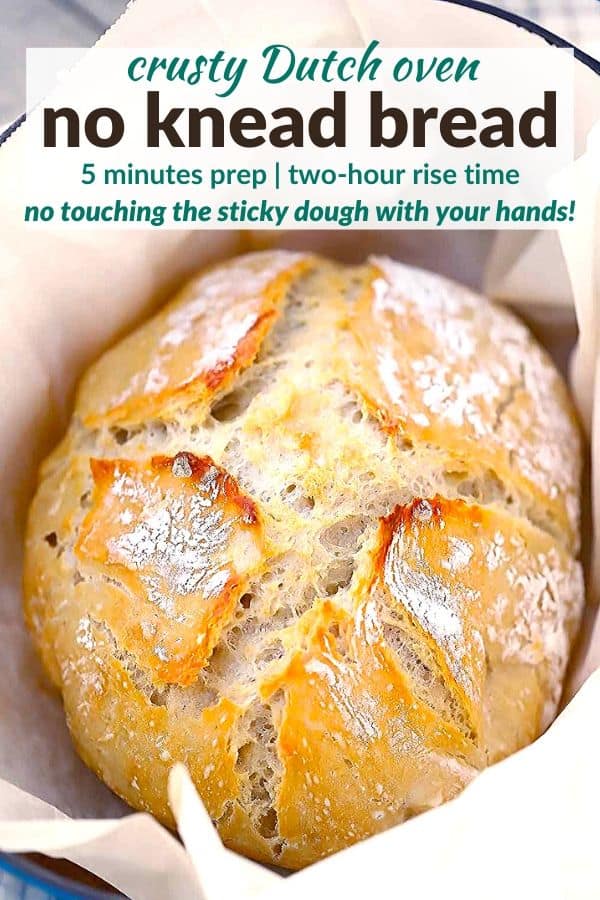
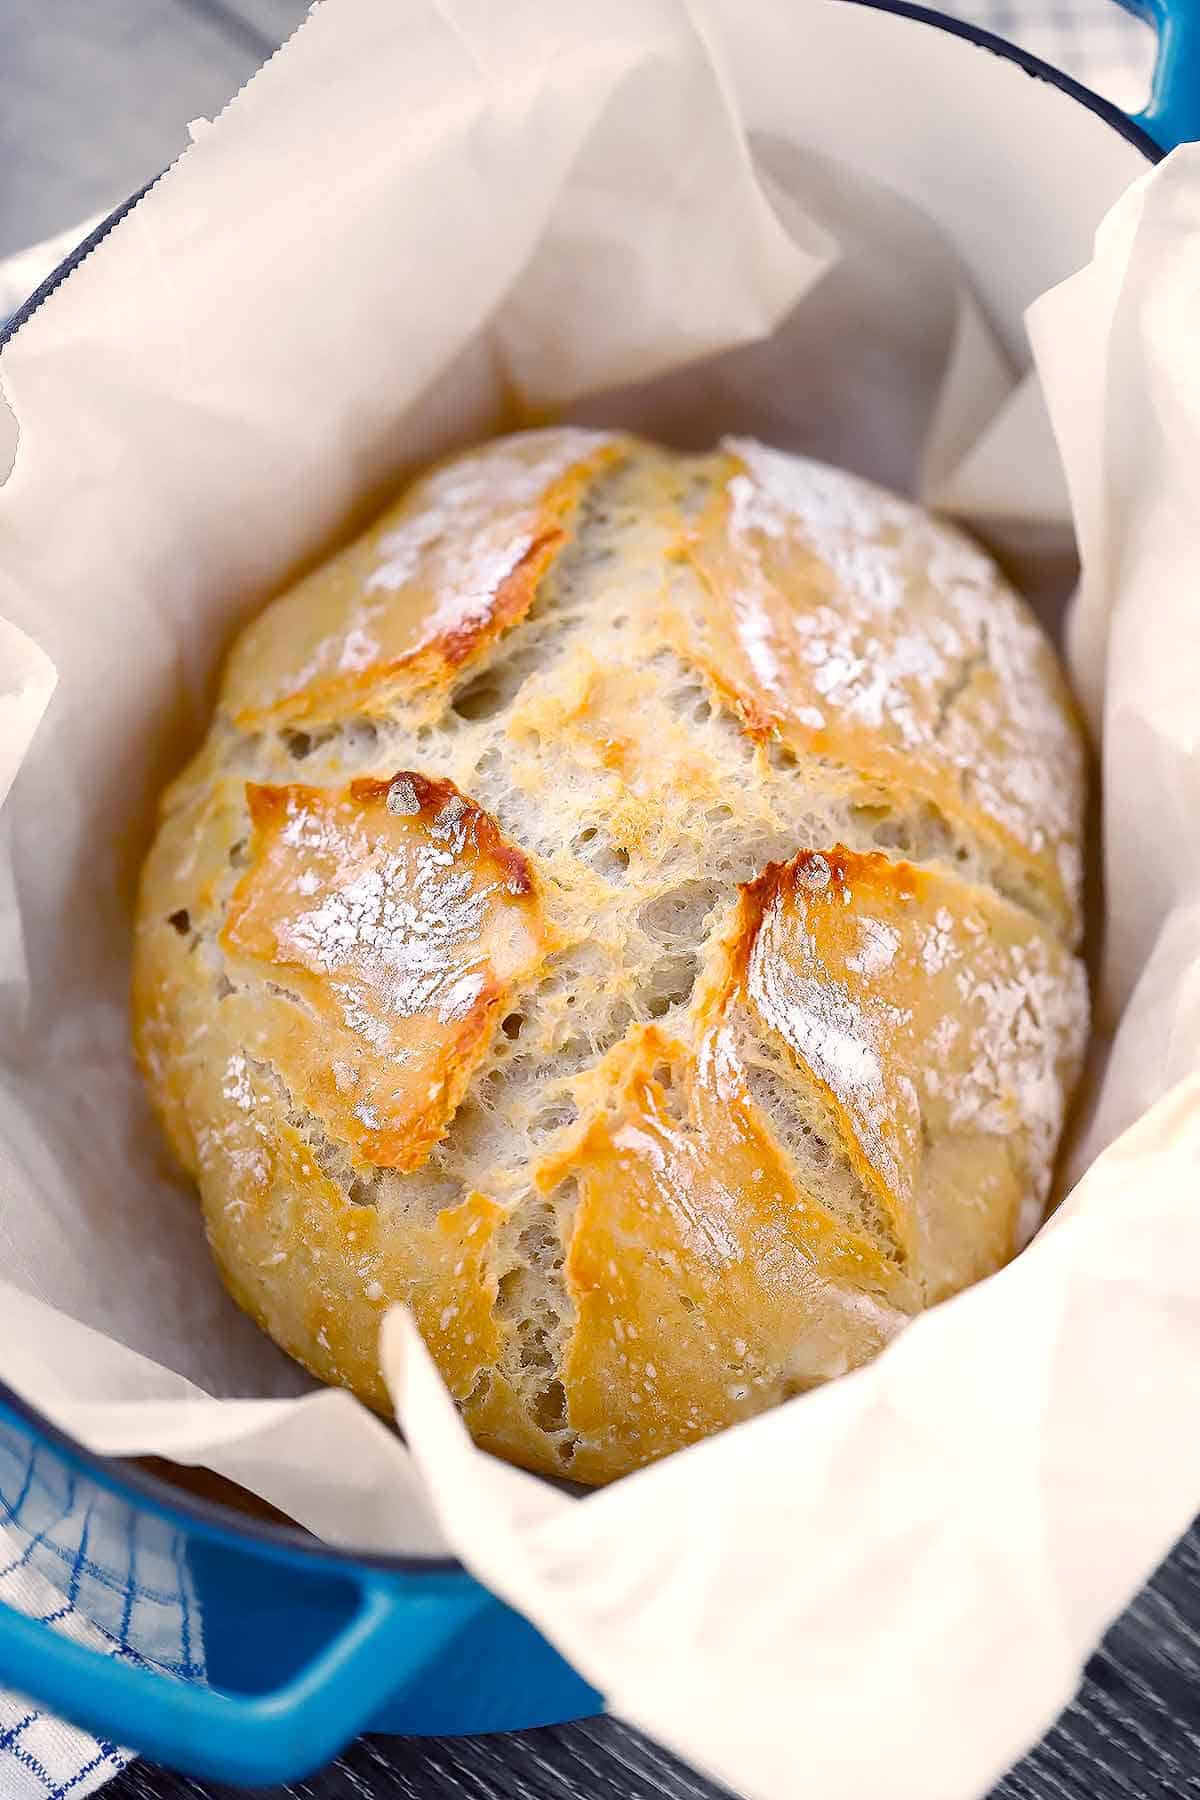
This Dutch Oven No Knead Bread is the perfect way to make a delicious, crusty artisan loaf in the comfort of your own home! Best of all? It takes only FIVE MINUTES of prep, and you don’t have to ever touch the sticky dough with your hands! With a short, two-hour total rise time, you can make this for dinner tonight.
Would you like to email yourself this recipe?
I’m a good cook. I mean, I’m allowed to brag about that… I’ve built a career out of it with this website. But until now, I’ve had the HARDEST time making a good homemade bread.
Am I alone in this? Homemade bread has always eluded me and been a real challenge. My homemade breads have always been too flat, too dry, too hard, too annoying and sticky to work with, etc.
UNTIL NOW.
YOU GUYS. I finally cracked the code for homemade bread that isn’t a hassle and is so amazingly delicious, moist, with fluffy holes, and with the perfect crusty crust!
You can use all-purpose flour – no need for fancy bread flour!
This is the only no knead bread recipe you’ll need, and it’s great for beginner bread bakers. The Dutch oven is key for developing a perfect crusty crust and keeping the inside perfectly moist, and best of all, you don’t EVER have to touch the super sticky dough with your hands!
You can let this dough rise for only 2 hours and bake it right away, OR you can keep the dough in your fridge for up to 7 days and use when you want to. Unlike other no-knead bread recipes that require 12 hours minimum rise time.
Here are all the details.
First of all, what is no knead bread?
No knead bread is, as the name suggests, bread that can be made without kneading the dough. No need to knead. Hah!
The dough is notoriously very loose and sticky, which can make it a little frustrating to work with (which is why I developed this method to not touch it at all- it takes a lot of that frustration away!).
No knead bread loafs do not need a second rise time, like a traditional loaf. The bread doesn’t have enough structure to rise “up,” and instead will flatten out and fill the shape of whatever you are making (Note: you CAN do a second rise time with no knead focaccia, which is a flatter bread type.)
The lack of a second rise results in two things: first, a faster overall time to make. And the second: it won’t have as many holes as a kneaded bread dough.
While I love a good fluffy artisan bread with holes for days, I think the pros here outweigh the cons. The bread DOES have some good holes, it’s got a great texture, and the fact that it’s so easy and hassle free is enough to make me never want to make a kneaded artisan loaf again!
How to make no knead dough
You only need water, yeast, flour, and salt for this no knead bread dough.
- First, warm the water (1.5 cups) to about 100 degrees F. A little more or less is fine. I usually measure it in my pyrex measuring cup and put it in the microwave for about 40 seconds, then take the temperature with a meat thermometer to make sure it’s the right temp. Don’t go any hotter than 110 degrees F – it might kill the yeast.
- Then, add the warm water to a large bowl, along with a packet of yeast, or 2.25 teaspoons (instant or active dry is fine) and 1/2 tablespoon of table salt (or 2 teaspoons kosher salt). Whisk together until the yeast and salt are dissolved.
- Finally, add the flour – 3.25 cups – all at once, and stir with a wooden spoon until everything is uniformly wet.
I like to use a silicone spatula to scrape the dough off the wooden spoon, as it will be quite sticky and loose.
Letting the dough rise
Once the dough is mixed, just cover it with a kitchen towel and let it rise in a warm-ish spot for two or three hours. It should double in size at least.
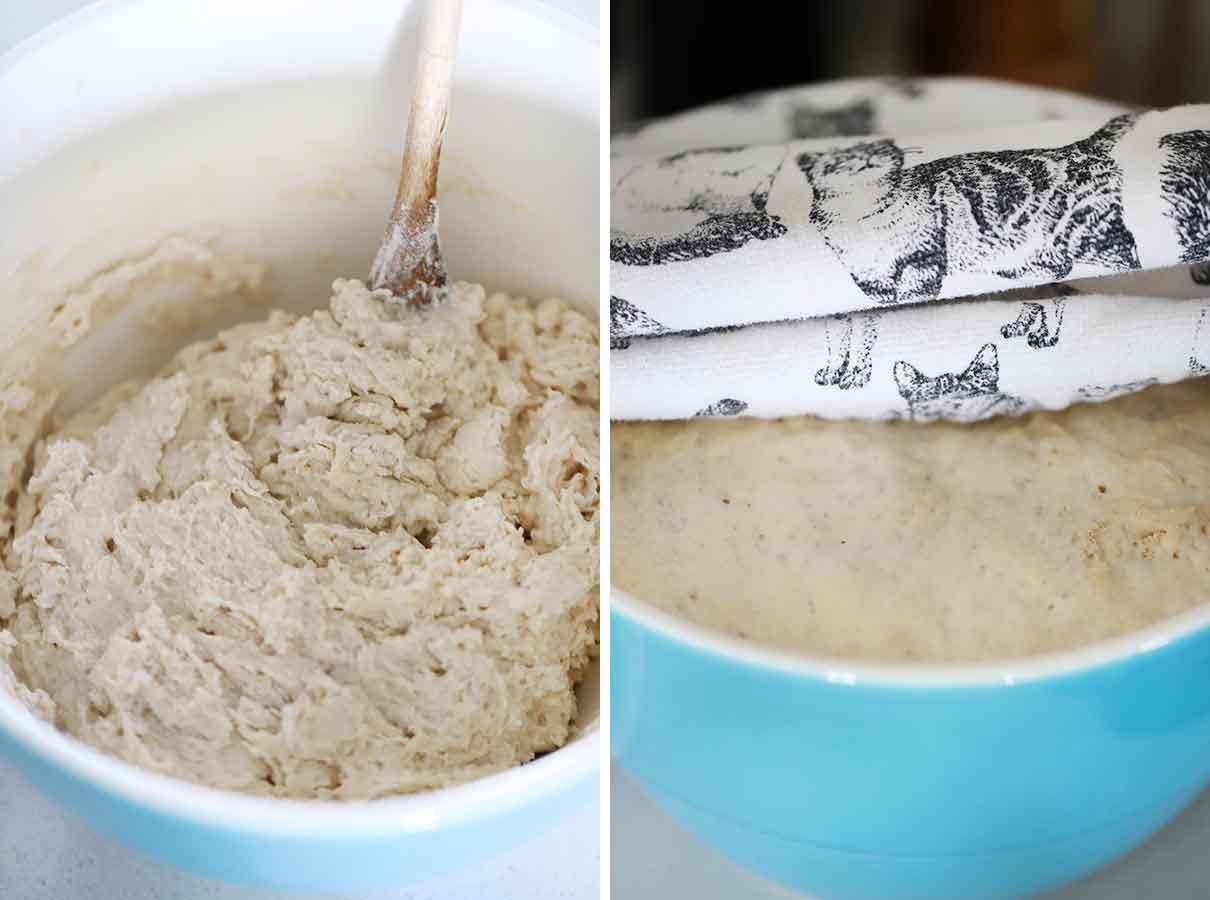
If your house is cold, I recommend turning your oven on for a few seconds, turning it off, and placing the bowl in the warm oven with the door closed to trap the heat in.
If you’re using your oven to cook something (or in the next step when you need to preheat your Dutch oven), you can leave the bowl on top of the stove- the vented heat at the top will help it rise well.
You can also get some really hot water in a mug or glass measuring cup, stick it in the microwave, and place the bowl next to it. Shut the door to the microwave- this will trap the warmth and steam inside.
If your house is warm, you can just leave it out.
If it’s warm outside, you can leave the bowl outside.
Storing the dough in your fridge
After the dough has risen for 2 hours, you can bake it immediately. But if you like, you can stick it in your refrigerator for up to 7 days until you’re ready to bake it!
Cold dough is a little easier to handle, so that’s a pro for this.
I recommend using plastic wrap or something more airtight to cover the bowl when you put it in the fridge. If you know you are making this dough days in advance, you can mix it up in a container, keep the lid on ajar while it’s rising and then seal the lid when you put it in the fridge.
The taste will get funkier as time goes on- by the 7th day, the bread will taste more like sourdough. And the dough will collapse over time- don’t worry about this.
Preheating the Dutch Oven
You want your Dutch oven to be good and hot for baking the bread so it gets a chance to crisp up properly on the outside.
About 30 minutes to an hour before you want to bake the bread, place the Dutch Oven, with the lid on, on the center rack of your oven and turn your oven on to 450 degrees F. Once it reaches 450, keep preheating the Dutch Oven for about 20 minutes.
Be very careful when handling the hot Dutch oven, as it’s very heavy and gets searing hot.
Forming the loaf
Here’s my favorite part! This is how to make the sticky mess of a dough into a loaf without having to touch it with your hands.
- First, lay a piece of parchment paper on your counter and sprinkle some flour on the bottom part closest to you.
- Then, use a silicone spatula to scrape the dough in a pile onto the floured part. Try to be gentle. The more you handle the dough, the more gasses escape, and the fewer fluffy holes there will be in the loaf.
- Use the silicone spatula to form it into a “loaf” shape, scooping up the dough from the bottom of the pile and placing it on top. You don’t need to do much of this- you just want it to be less of a “pile” and more of a “loaf.” You may also want to make it circular or oval shaped, depending on what shape your Dutch oven is.
- Finally, grab the corners of the parchment paper closest to you and use them to gently flip the loaf onto the center of the sheet of parchment. It may be a little misshapen, which is fine. If it bothers you, you can use the spatula to try to shape it some more but keep in mind, the more you handle it, the less fluffy the loaf will be.
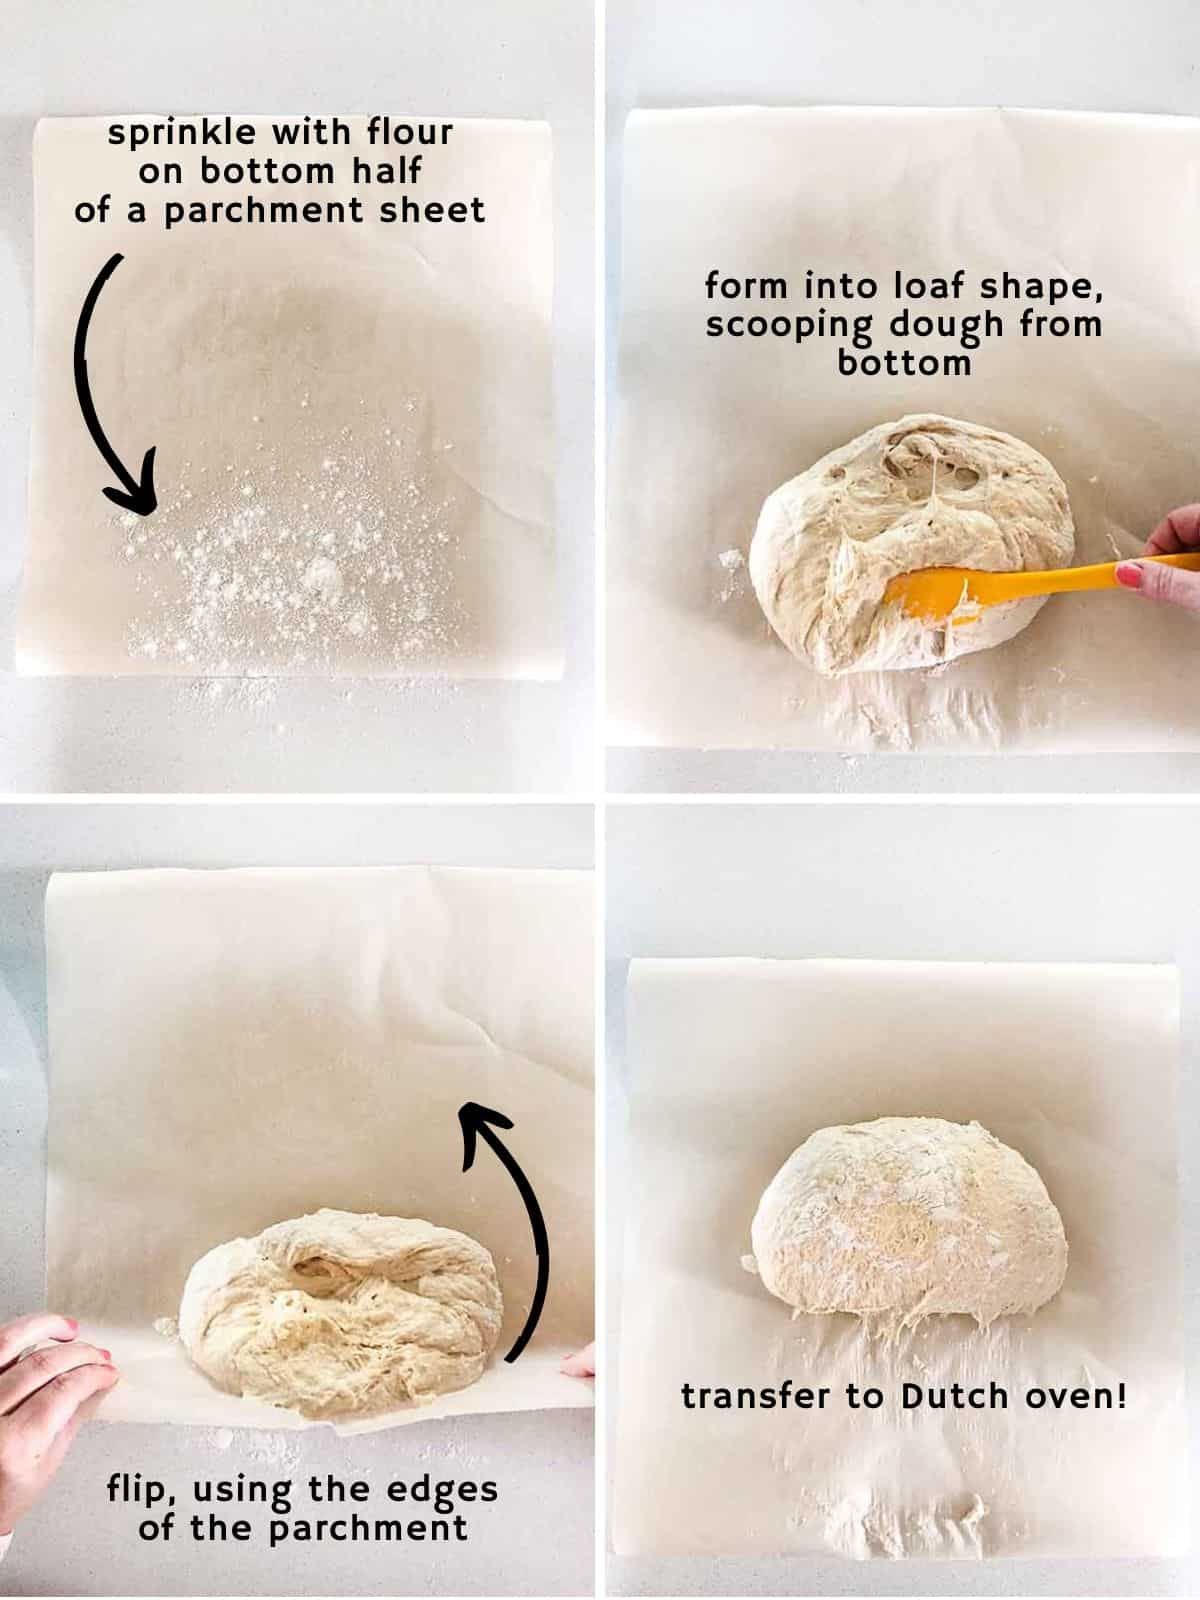
At this point, before putting it in the Dutch oven, you can use a very sharp knife or clean razor blade to make a few cuts about 1/2″ deep in the top of the loaf. I did this with mine in a cross shape from end to end in both directions. This will help it rise up a little more in the oven and get some browner crustier bits. But it’s totally optional.
Baking the bread
Once you have the loaf shape in the center of your parchment, open your oven door and take the lid off the Dutch oven (USING POTHOLDERS of course).
Then, grab the sides of the parchment paper and transfer the loaf to the Dutch oven. Place the cover BACK ON (USING POTHOLDERS FOR THE LOVE OF GOD), and bake at 450 degrees for about 35 minutes.
I know I keep yelling about potholders but too often I’ve reached absentmindedly for the lid of a Dutch oven thinking it’s going to be cool but it’s searing hot. It’s easy to make that mistake!
Once the 35 minutes are up, take the lid OFF, and bake for another 5-10 minutes, until it’s golden brown.
Stop for a moment, and inhale deeply. The smell of fresh-baked bread is one of the best things in the world.
Finally, remove the bread by holding the parchment paper, and place on a wire rack or a cutting board to cool. You want it to cool for at least 10 minutes before slicing.
AND YOU’RE DONE! Congrats on your gorgeous artisan Dutch oven bread!
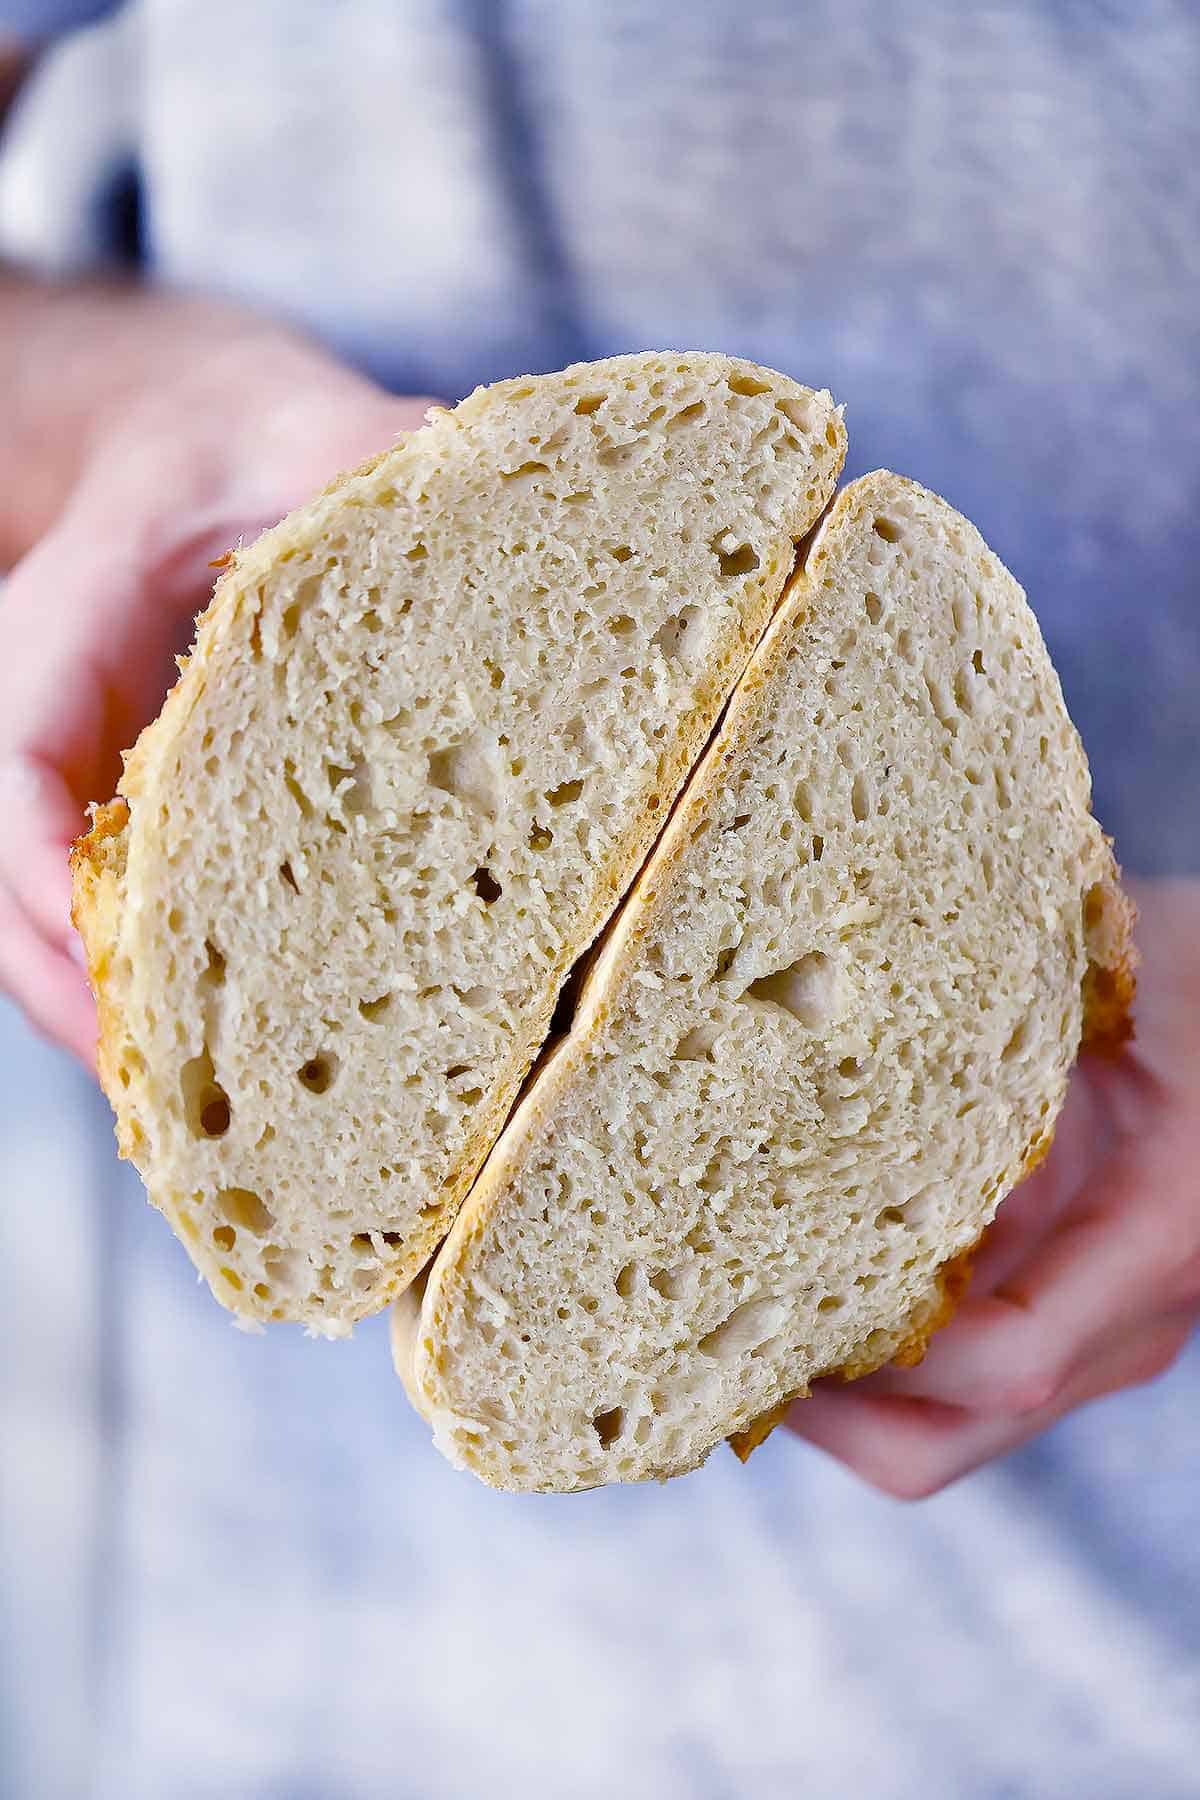
Why does the lid to the Dutch Oven need to be on while it bakes?
The key to moist bread with a perfectly crusty crust is that it needs to be baked in a humid environment. I know it seams counter-intuitive, but it really works.
The lid to the Dutch oven traps the steam from the sticky dough inside, making it a perfect bread baking environment.
Then, taking the lid off for the last bit of cooking helps really brown the top of the loaf without it over-drying.
It’s truly a miracle to behold. And it’s why we can call it “artisan bread!”
But what if I don’t have a Dutch Oven?
Glad you asked.
This bread is possible to make without a Dutch oven, but you won’t get the same amazingly crusty results. Don’t let that stop you- just temper your expectations a bit.
You can bake the bread, on parchment paper since the dough is so sticky, on a baking sheet or, preferably, in a preheated cast iron skillet.
Here’s what you can do to help make it extra tasty with a crusty crust.
Create a humid environment in your oven by placing a rimmed baking sheet on the bottom rack while the oven preheats. When you add the bread to the oven, pour about 4 cups of water onto the preheated baking sheet. This will create steam as the cold water hits the hot metal. Close the oven door as fast as you can to trap the steam inside.
Can I use another kind of flour?
I used all-purpose for this crusty artisan bread, but you can use bread flour if you like.
You can also use part whole wheat flour– I recommend substituting 1 cup of the AP flour with whole wheat. A 100% whole wheat loaf has not been tested, but it might work. You may also be interested in this multigrain no knead bread loaf.
I haven’t tried using a gluten-free flour mix for this and therefore cannot recommend it. Here’s a gluten-free artisan bread that might be helpful for you!
And finally, you should never substitute a non-flour flour, such as almond flour or chickpea flour, for AP flour. Those won’t work with this bread.
Wait- don’t I need sugar to make bread?
Nope! Some people thing you MUST use sugar in bread or dough recipes so the yeast have something to eat. While yeast do love sugar, and adding sugar to dough can cause a more rapid rise time, it’s not necessary. Yeast love to eat flour too (which is a carbohydrate just like sugar, so acts in a similar way). So you don’t need sugar in this no knead bread recipe at all!
Can I freeze it?
Yes!
The bread stays good at room temperature in a plastic bag or airtight container for about 2 days, and it will get staler as time goes on. Any longer than 1-2 days, and you should freeze it.
You can freeze the loaf whole if you like- you’ll just need to leave it out for about 12 hours before you can slice into it.
Or, you can slice it before freezing, which enables you to take out one slice at a time for toast or sandwiches.
Here are some tips for freezing:
- Store the whole loaf or sliced loaf in an airtight bag, squeezing out as much air as possible. This will help prevent freezer burn.
- Wait until it’s COMPLETELY cool before storing, especially if you’re slicing it before, as the slices may stick together if you don’t.
It should stay good for 2-3 months in the freezer if stored properly.
Why didn’t my dough rise?
If your dough doesn’t rise, it is likely an issue with the yeast itself. Yeast is a living organism and needs to be able to eat food and multiply in order to cause a rise. As they multiply, they release gasses, which causes the airy pockets in the dough. Here are three reasons why your dough may not be rising:
- The yeast is dead to start out with. This can happen if the yeast is old, or sometimes even if you get a dud pack of it. A new pack of yeast from the store can sometimes make all the difference!
- The conditions don’t allow for the yeast to multiply. This usually happens if the temperature is too cold. At cooler temperatures, yeast may multiply much slower, or not at all.
- If the yeast is killed by accident. This can happen if the water temperature is too hot when added to the yeast, which can kill the yeast and subsequently cause no rise. (Note: it is a MYTH that salt kills yeast in this way! If you were to use tons of salt, it may kill the yeast, but the amount of salt used in this recipe won’t kill the yeast – at worst, it may just slow the multiplication process a little bit.
If your dough won’t rise, my advice is to start anew with brand new yeast and make sure to measure the temperature of your water with a thermometer – I love the Thermoworks Thermapen for a super fast, accurate read! Alternatively, you can stick your finger in the water and it should be about body temperature, so if it feels neutral or slightly warm you should be good!
Why did my no knead bread come out dense/flat?
As is often the nature of no-knead bread, it sometimes turns out on the flatter side of things and can often come out a bit dense. This is because gluten doesn’t get developed as much (gluten develops with kneading) so the dough is less “strong” and it tends to deflate and not hold its shape as much.
With practice, it becomes easier to get a taller loaf from shaping the dough without handling it too much and smushing out those air pockets. That gentle handling of the dough while shaping is the most important factor here (and can definitely be tricky – keep practicing!).
Here are some other things that may help!
- Try mixing it together for a longer time initially. Stirring it a lot will help develop some more gluten. A standing mixer makes easy work of this.
- Try using a bread four. Bread flour is higher in gluten and will yield a stronger loaf. It’s also a bit “thirstier” than all purpose flour, so you may need a bit more water in the mix. (On a similar note, different brands of flours often have different gluten contents. I use King Arthur flour, both for all purpose and bread flour. Some people have made this recipe with other brands like pillsbury and had very different results. So do also check your brand!).
- You can try an overnight rise. This recipe is written to have a quick no knead bread within only a few hours. But more often, you see no knead bread recipes with an overnight rise, because time also helps develop gluten (and flavor from a bit of fermentation!). If you do this, use only 1/4 of a teaspoon of yeast, mix the dough, and let it rise overnight. Then, proceed with the recipe as directed.
- It might need more time rising, OR it may have been left rising for too long. It should double in size at least, but it can go a bit longer too. The longer it rises, WITHOUT over-proofing (which is when you let it sit for too long and it deflates because the yeast run out of food!), the more air pockets there will be and the likelihood of getting a taller, fluffier loaf is higher. It can take some practice to know when this sweet spot happens, and it can depend on so many factors like temperature and humidity of the house.
What should I adjust for high altitude with no knead bread?
There are two things to keep in mind when baking no knead bread at a high altitude: the dough may rise faster, and the dough may need more moisture.
I do not live at a high altitude, but many readers have chimed in that they added 1 Tablespoon more water to the mix and had great results. It may also help to ensure the dough stays moist while it rises. You can do this by making sure the towel stays damp during rise time, or using a plastic wrap to trap in the humidity inside the bowl while it rises.
Keep an eye on the dough rising, as well, since it may rise faster at a higher altitude. You can adjust for this by using less yeast, or by giving it a shorter rise time.
Here is a great resource from King Arthur on tips for high-altitude baking!
How to serve an artisan bread loaf
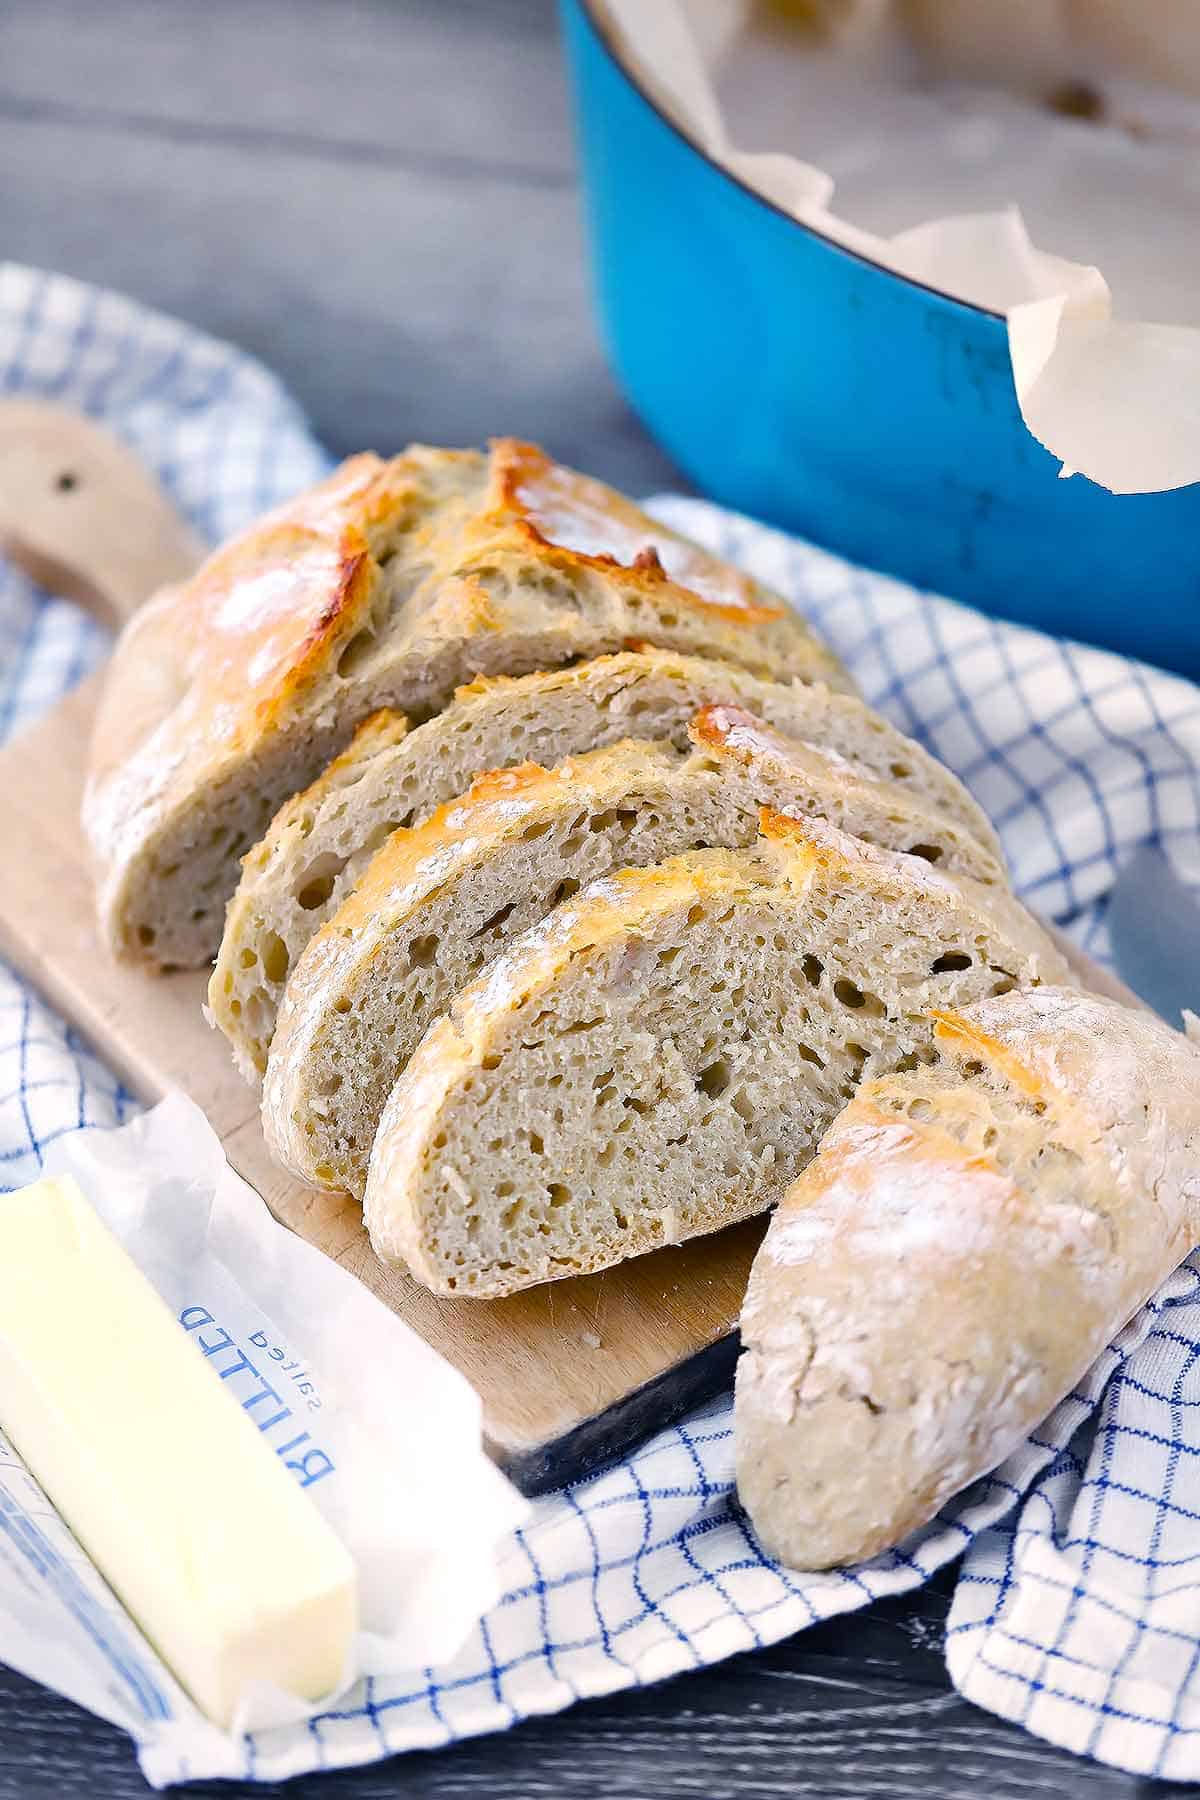
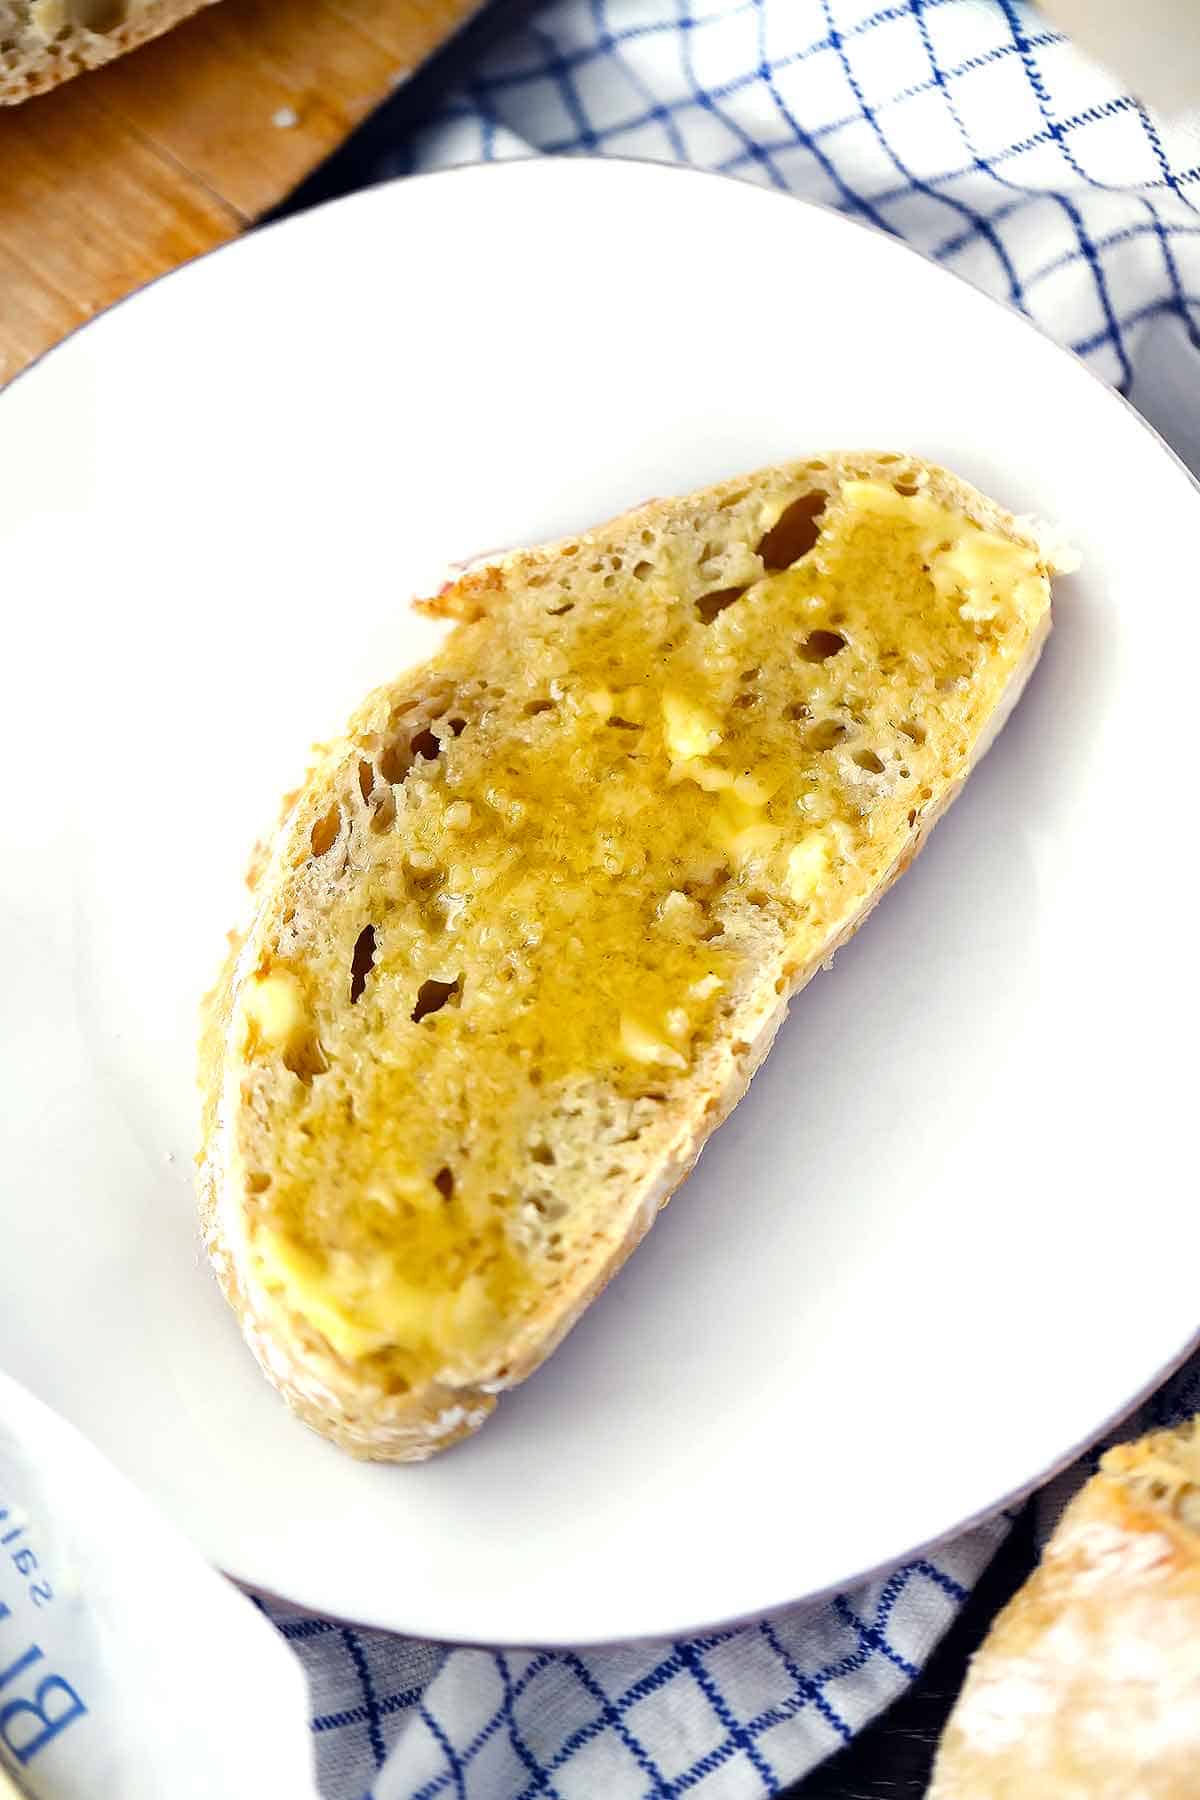
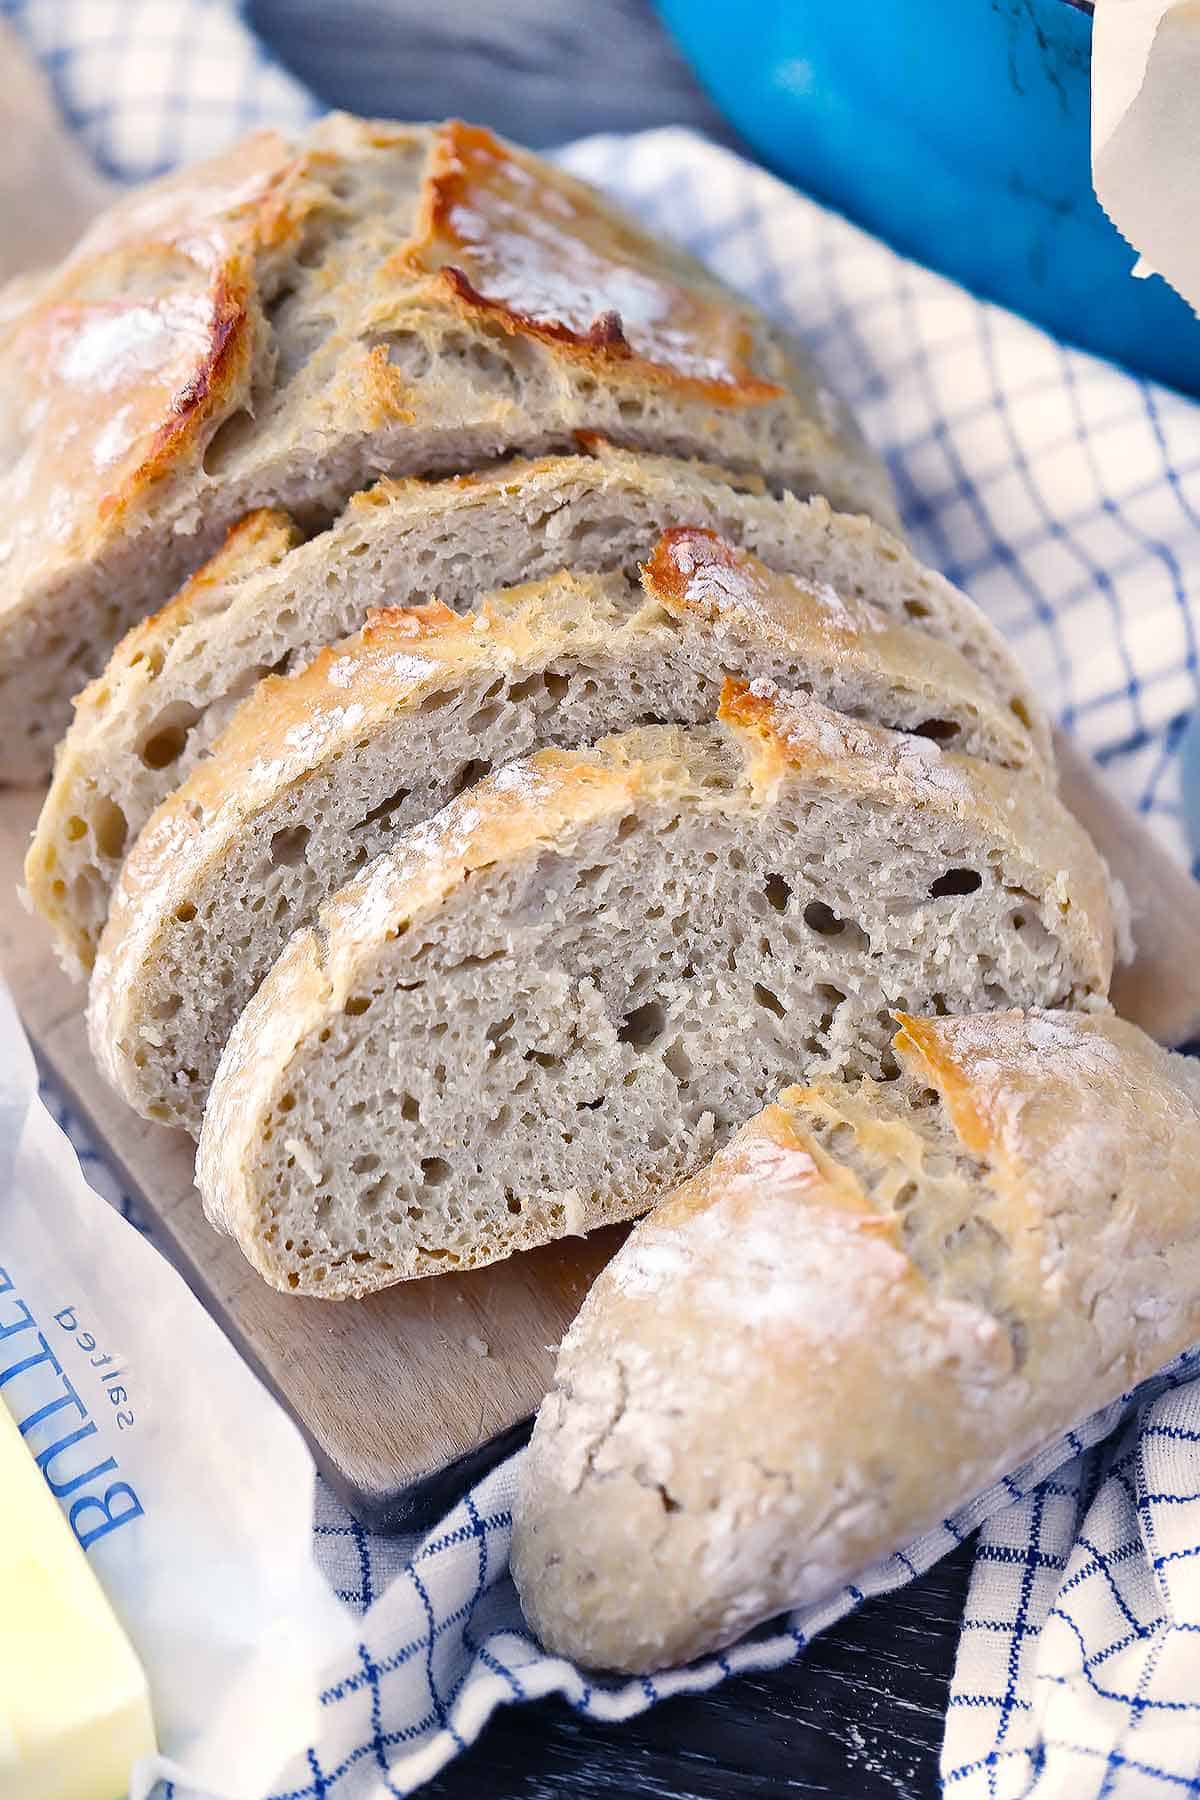
I’m a big fan of eating the bread smeared with salted butter and drizzled with honey, as pictured above. But this homemade bread would be delicious…
- Served with a hearty soup, like split pea soup or lentil soup.
- Used for a fancy grilled cheese, like this leek and gruyere grilled cheese.
- To make cold sandwiches, like this fresh mozzarella, tomato, and basil sandwich with balsamic glaze.
- Served sliced with a basic olive oil and balsamic bread dip, as a side to your favorite Italian pasta recipe (like this five-ingredient pasta with Bolognese sauce).
- Used to sop up the sauce from classic shrimp scampi.
What to make with the stale bread
If you forget about the bread and leave it out at room temperature for more than a couple days, it may go stale. I hardly ever have this happen, as my family and I inhale the entire loaf in one sitting usually. But there are a few things you can do with the leftover stale bread!
Here are my favorites:
- Make homemade croutons with it
- Use it in Panzanella salad
- Make a Tuscan Tomato and Bread soup
Do I HAVE to preheat the Dutch Oven?
No. I’ve made this plenty of times putting the loaf into a cold Dutch Oven and then baking for an extra 5-10 minutes with it covered. Preheating the Dutch Oven before baking the no knead bread can help get it a taller rise while baking, since it will start baking faster and more rapidly. But if you are concerned about preheating your Dutch Oven while it’s empty, as some manufacturers recommend not to do, or if you want it to just be a little easier/safer, feel free to skip this step!
How can I add other ingredients to the dough?
Once of the most common questions I get for this recipe is “Can I add herbs and cheese?” or “Can I add jalapenos and cheddar?” YES! It’s SO easy to add other ingredients to no knead bread.
Just add whatever other ingredients you want when you mix the dough together. Let it rise with all those ingredients, and then shape and bake as directed. You may even want to sprinkle the top with some extra ingredients. For example, sprinkle with grated parmesan or cheddar cheese, or brush with olive oil and sprinkle with rosemary and sea salt.
One thing to keep in mind: if you add ingredients with moisture, such as rehydrated dried fruit, olives, or pickled jalapeños, you will need to drain them very well and/or add less water to the mix. It’s not a huge deal, as this recipe doesn’t require a super exact ratio of liquid to flour, but keep in mind that extra moisture may affect outcome a little bit.
Here are some suggestions for no knead bread flavors:
- Jalapeño and Cheddar – add drained pickled jalapeños and grated or cubed cheddar cheese. Grated cheese will melt into the dough and flavor the whole thing, while cubed will maintain its shape and create melty pockets of cheese.
- Rosemary and Sea Salt – add chopped fresh rosemary to the dough, and before baking brush the top with olive oil and sprinkle with extra rosemary and a sprinkle of sea salt.
- Herb and Parmesan – add a medley of fresh or dried herbs to the dough, as well as grated parmesan. Sprinkle the top with extra herbs and parmesan after brushing with olive oil, if you want.
- Olive – add well-drained olives to the loaf. Whole or chopped, depending on how big you want them in the final thing. This is also great paired with the rosemary and sea salt or herb and parmesan combo above.
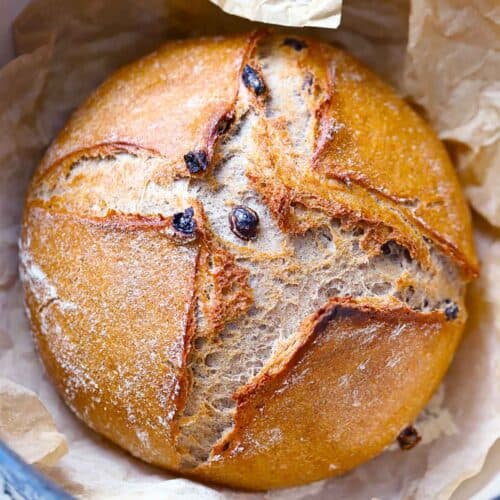
- Cinnamon raisin – let some raisins soak in warm water for a few minutes to plump up, drain well, and add them, along with some cinnamon, to the dough. You may want to add a little sugar to the dough as well here – this may cause a faster rise time, since yeast love sugar, so keep that in mind. Here’s a more detailed post on how to make cinnamon raisin no knead bread!
There are so many other ways to play around with other flavor combos- I’d love to hear about them in the comments!
Other easy yeast bread recipes
- Vasilopita (Sweet Greek New Year’s Bread)
- Whole Wheat No-Knead Focaccia with Rosemary and Sea Salt
- Honey Whole Wheat Pizza Dough
- White Sandwich Bread (from The Brown Eyed Baker)
Other no knead bread recipes



Check out all my homemade basic essential recipes here.
I also LOVE using my Dutch oven to roast a whole chicken.
Did you know commenting and rating recipes is one of the best ways you can support your favorite food bloggers? If you made this Dutch Oven No Knead Artisan Bread, please click the stars below to comment and Rate this Recipe
Dutch Oven No Knead Crusty Bread
Equipment
- Silicone Spatula
- Meat Thermometer for taking accurate temperature of the water
Ingredients
- 1 1/2 cups warm water (about 100 degrees F)
- 1 packet yeast (active dry, instant, or quick rise- 2.25 teaspoons)
- 1 ½ teaspoons fine grain salt (preferably NOT iodized, see notes, you can up the amount to 2 teaspoons if you like things really salty!)
- 3 1/4 cups all-purpose flour or bread flour, more if needed to get correct consistency, plus more for dusting (I use King Arthur AP flour – other flours may yield different results)
Want to save this recipe?
Instructions
- In a large bowl (or container), mix together the 1 1/2 cups warm water, 1 packet yeast (or 2.25 teaspoons), and 1 ½ teaspoons fine grain salt, until yeast and salt are fully or almost dissolved (I like using a whisk for this).
- Add the 3 1/4 cups all-purpose flour to the bowl all at once and stir together until a sticky dough forms. Don't worry about mixing it too much, just make sure everything is uniformly wet. It WILL be messy and sticky. You can scrape what's left on the spoon with a silicone spatula. (photo below provided for what the texture should look like – if it seems too wet, add 1-2 tablespoons more flour at a time until it is more like the photo. If it seems too dry, do the same thing with more water).
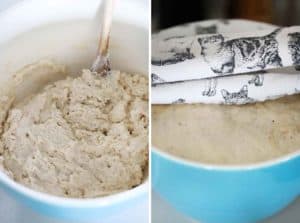
- Cover the bowl with a kitchen towel (or place the container to the lid on ajar). Leave it for 2-3 hours to rise in a somewhat warm place until it's doubled in volume, like photo in previous step (If it's cold out, I like to preheat my oven for a few minutes, then turn it off, then place the bowl in the oven, trapping the heat inside. If your house is warm just leave it out, or if it's warm outside you can place it there).
- After the two-three hour rise time when the dough has about doubled, you have two options: bake, or store in the fridge. See notes for how to store.
- 30 minutes to an hour before you are ready to bake, preheat your oven to 450 degrees F. Place your Dutch oven in the oven, with the lid ON, while the oven is preheating. Once the oven reaches 450, keep it preheating for another 20 minutes, so the Dutch oven gets good and hot.
- Scrape the dough into the edge of a piece of parchment paper dusted with flour. Make it into as much of a "loaf" shape as you can by folding the edges up on top of it (a silicone spatula works well for this).
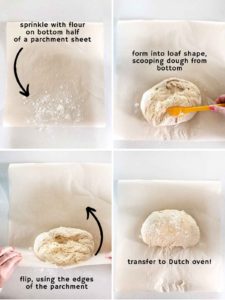
- Then, use the edges of the parchment paper to flip the loaf over so the floured side is on top and the loaf is in the center of the parchment paper. Don't worry about it looking beautiful or smooth on top. My Dutch oven is an oval, so I made an oval shape. You can do a circle if yours is round.
- Optional: use a very sharp knife or clean razor blade to cut a few slits across the top of the loaf about 1/2" deep, across the entire top. I did this in a cross shape for mine.
- Take out the preheated Dutch oven and take off the lid, carefully! Grab the parchment from the sides and place the loaf in your Dutch oven.
- Place the cover back on the Dutch oven and place in the preheated oven on the center rack. Bake for 35 minutes at 450 degrees F (40 minutes if dough was cold from the fridge). Remove the lid and bake for another 5-10 minutes, until a golden brown color forms- longer if necessary. Remove the loaf from the dutch oven (grabbing the sides of the parchment paper works well here) and place it on a wire rack or cutting board to cool for at least 10 minutes (preferably 30 minutes – an hour, if you have time) before slicing.
Notes
- Recent edit to the recipe instructions: I changed the amount of salt from 1/2 tablespoon to 1 1/2 (1.5) teaspoons, which is the exact same amount of salt (there are 3 teaspoons in a tablespoon), but there kept being confusion from readers from misreading tablespoons as teaspoons, resulting in too little salt being used. The recipe is the same, but the ingredient list has been changed from measuring in tablespoons to teaspoons! This is for anyone who has visited this recipe in the past and might be wondering why it says teaspoons instead of tablespoons now; if this is not you, you can ignore this :-)
- Dough too wet/dry: some readers have commented that the dough is too wet. This can happen based on a few variables, including type/brand of flour and accurate measurements. See photo in post and recipe instructions – if texture doesn’t seem similar, add 1-2 more tablespoons flour or water as needed.
- Make two small loaves instead: You can make two smaller by using only half the dough at a time, saving some in the fridge for later. Mix the dough, then divide evenly into two bowls to allow to rise separately. I recommend cutting the cooking time to 20-25 minutes covered if you do this. Alternatively, you can double the recipe to make two large or four small loaves, leaving the extra dough in your fridge for fresh bread every few days! If you want to make one batch of dough to divide, be sure to use a serrated knife to cut the dough into pieces, trying your best not to squish it down as you handle it, and make sure you use a very large container or bowl for this. It’s easier to cut the dough and have it not deflate when it’s cold from the fridge.
- Fine grain salt can be fine sea salt, Himalayan salt, or any other salt you prefer.
- Iodized salt is not recommended, but can be used if that’s all you have. The iodine in the salt may impart a bitter taste in the bread and it also may inhibit the growth of yeast, leading to a longer rise time.
- Kosher salt may be used instead of table salt- I recommend 2 teaspoons since it’s a larger grain. Same goes with coarse sea salt.
- Avoid “gummy” bread by allowing it to cool for a longer time. I often can’t resist and just tear into the thing after 10 minutes, but often the inside seems gummy, and almost raw, because it’s too steamy to cut into. Waiting a whole hour, if you can manage, is ideal.
- Super hard, tough bottom crust? Next time, try putting a baking sheet on the bottom rack of the oven. It will help divert some of that high heat away from the bottom of the Dutch Oven as it bakes.
- Some Dutch Oven manufacturers recommend NOT preheating an enameled cast iron Dutch Oven empty. It may result in the enamel cracking. I’ve never had a problem with my Lodge Dutch Oven, but if you’re nervous about it, you don’t have to preheat the Dutch Oven. Just put the dough in the cold Dutch Oven and bake for 5-10 minutes longer covered, and you should be good to go!
- How to store dough in fridge: If storing in the fridge, leave the lid ajar or use loose plastic wrap or something similar to cover the bowl so gasses can escape. Storing it in the fridge makes the sticky dough a bit easier to handle, and it also enhances the flavor, so I recommend refrigerating it for at least 12 hours. It can stay in the fridge for up to 7 days! After two days, you can seal the lid to the container or cover the bowl tightly with plastic wrap or something else airtight. The taste of the bread will get funkier the longer it stays in your fridge. By the 7th day, it will taste more like sourdough.
- Since cold dough is easier to handle, you can place the dough in the fridge for 30 minutes or so after the two hour rise time, just before baking, so it’s easier to scrape out and form.
- If using cold dough from the fridge, I recommend baking for 5-10 minutes longer with the lid on (40-45 minutes instead of 35 minutes).
- Dutch Oven Alternatives: The Dutch oven does a really good job of trapping the steam, ensuring a crusty, golden brown loaf. If you don’t have a dutch oven, you can bake this bread on a baking sheet or in a cast iron skillet. I recommend adding some water to a rimmed baking sheet, or other oven-safe dish, and placing it in the oven on the lower rack, to add steam to the oven and help develop a crusty crust.
- Freeze the baked bread by slicing it first, then storing it in a zip-top bag, squeezing out as much air as possible. The bread should be completely cool before freezing. You can also freeze a whole or half loaf without slicing, wrapped tightly in plastic wrap or other airtight wrap, but you’ll need to wait to defrost the whole thing before slicing into it.
- Dutch Oven Size: I use my oval 5.5 qt. Dutch Oven or my 6 qt. round Dutch Oven for this recipe. There is some wiggle room, so you can go a little smaller if you like, especially if the parchment paper comes up the sides to prevent sticking. And you can definitely go bigger if you want.
- Parchment paper trick: crumple up the parchment before using it, to help it mold to the shape of the Dutch oven better.
- Sticking to the parchment paper: A few readers have noted that their bread sticks to the parchment after baking. This usually does NOT happen, as parchment paper is non-stick. However, after doing some research, I found that sometimes using a very cheap brand of parchment paper can result in the bread sticking. I recommend using a “nicer” brand of parchment paper, or brushing or spraying it with a little bit of oil or nonstick spray before placing the shaped loaf on the paper and baking it.
- Parchment paper at high temperatures: Some readers have expressed concern over the high temperature used for parchment paper. I’ve used parchment rated to 420 degrees for this recipe with no issue, but you can buy a parchment paper rated to 450 degrees if you are concerned. Here’s a great article about using parchment paper at high temperatures. As a general rule, keep an eye on what you are cooking, for any recipe!
- Avoid too much flour on the outside of the bread: You can use a pastry brush to brush away any thick layers of flour – before baking is best but after works too! You can also spritz the outside of the loaf with some water from a spray bottle, which also can add some lovely blisters to the crust.
- For a hard, too crusty bottom of the loaf: try putting a baking sheet on the bottom rack of the oven while baking. It helps deflect some of that direct intense heat away from the bottom of the Dutch Oven, resulting in a softer bottom to the loaf.
- Dry dough? Some readers have commented that their dough is dry, not wet and sticky. If this happens, it may have something to do with the brand or type of flour, or measuring discrepancies. Jut add a little more water until it’s a little looser and you should be good to go!
- High Altitude? A reader did this at a high altitude and she said she just added a little more water to the dough (about 1 tablespoon) and kept the towel damp during the rise time.
- Adding other ingredients: Feel free to mix in other ingredients, like herbs, roasted garlic, parmesan cheese, etc. with the rest of the ingredients! Then let it rise, shape, and bake according to instructions. See more about this in the body of the post with flavor suggestions.
- Dough not rising? This is likely a yeast issue. Yeast is a living organism. Sometimes, if using an old batch of yeast, or just a dud batch, the yeast is not alive anymore and won’t work. Also, if using too hot water, the yeast may die and cause the dough to not rise. If you are unsure if your yeast is good, there are two things you can do. 1) You can go buy a fresh batch! or 2) You can test it. Just add 2.25 teaspoons (1 packet) of yeast to 1.5 cups warm (100-110 degrees F) water, as directed in the recipe. Don’t add the salt yet; instead, add 1/2 – 1 teaspoon of sugar or honey. Stir until the yeast is dissolved and leave for 5-10 minutes. If the mixture turns foamy and has a bready aroma, your yeast is good, and you can continue with the recipe by adding the salt and flour. If it does not, your yeast is not good anymore, and you should go buy another fresh batch.
- Recipe inspired by the no knead bread process made famous by Jim Lahey. It’s important to note that while Lahey made the recipe popular, no knead bread existed long before as a result of mostly domestic home labor by women. Here’s an interesting article about the history of no knead bread origins!
Nutrition
Nutrition Information Disclaimer
The provided nutrition information is my best estimate and reflects one serving of the recipe (total servings indicated at top of recipe card). It does not include any added sodium from seasoning to taste, any optional ingredients, and it does not take brands into account. I use an automatic API to calculate this information. Feel free to calculate it yourself using one of these tools:
Kenzie Long
Would you say this is kind of a cheat code for sour dough? I just had to re-start my starter because it warmed to quickly one day by our oven and got mold :( so I am looking for quick, easy bread recipes to make while my new starter gets strong!
Elizabeth Lindemann
Oh I am sorry, I’ve been there myself with sourdough starter, what a bummer! So, kind of. This bread is super no fuss and no need to traditionally knead it, similarly to sourdough loaves. It’s actually easier, since you don’t have to stretch and fold (though I suppose you could, if you wanted to!). The thing that’s different about it is the taste. It won’t have that fermented, tangy taste, especially because this recipe has a short rise time. If you have the time, you can also do an overnight rise for no knead bread like this, using only 1/4 teaspoons (yes, that little!) which will rise in about the same time as a loaf would if you used 50g of sourdough starter. This will also help develop more flavor, more in line with using a sourdough starter. So in summary, this recipe is like a SUPER cheat code for a quick loaf of bread, and if you want to have it be more similar to the loaves you’ve been making with your sourdough starter, I’d try the overnight rise with 1/4 teaspoon of yeast. Hope that helps!
Peggy LaBarge
can I add cheese in the bread dough?
Elizabeth Lindemann
Yup! There’s a bit about this in the post, with the recommendation to do the combination of pickled jalapeños and cheddar cheese. Feel free to just follow the cheese advice if you want, or do other things like cheese and herbs, etc. Keep in mind different kinds of cheeses are more melty than others, so something like parmesan is best added as flavoring/grated, or even sprinkled on top for a crispy layer. Hope that helps! Here’s the part of the post I’m talking about, copied and pasted below.
Jalapeño and Cheddar – add drained pickled jalapeños and grated or cubed cheddar cheese. Grated cheese will melt into the dough and flavor the whole thing, while cubed will maintain its shape and create melty pockets of cheese.
VM
I just LOVE your nod to the history of no knead bread it’s origins in woman’s labour! So many famous (by men) dishes are nothing new at all and have been made in some way or another by women for generatiosn!
Elizabeth Lindemann
I’m glad you noticed that and appreciated it! I went down quite the rabbit hole one day researching this and it was all so interesting. It’s a tale as old as time, and it’s even happening in the food blogging world – it’s an industry built by women, and nowadays, now that people have gotten wind that you can make money from it, there are a lot of men who have come in and started producing AI-generated food blogs and other low-quality recipe sites, piggybacking off the labor of women for the past two decades in an effort to make quick money. I digress – but I could talk about this stuff all day!
Kay
The comes out perfect every time, it is very easy to make and my family loves it.
Elizabeth Lindemann
So glad you liked it, and thanks for taking the time to leave a comment!
Tk
Wonderful recipe. Just what I was looking for. Made a loaf of plain white and it turned out super fluffy and just right. Looks beautiful too! I did try to make a loaf with 100% wheat and not mix any white in with it. Turned out very small and dense. Will try mix in just a cup as suggested and see how it turns out next time!
Elizabeth Lindemann
So glad you liked it! Yes, try just partial whole wheat flour – I think you’ll have much better results!
Amanda
I cannot bake bread to save my life, this was super easy and delicious, thank you!
Elizabeth Lindemann
So glad you liked it! It seems that now you CAN bake bread to save your life :-)
Dallas Rodriguez
Where did you get your oven mitt?
Elizabeth Lindemann
I’ve used these KitchenAid oven mitts for years – though I’ve been wanting to upgrade, I find that those will get a bit too hot for comfort sometimes, especially if they are slightly damp (the fabric absorbs water and steam easily).
Anne Spataro
Excellent recipe. It’s the first time I’ve ever made bread and it comes out perfect every time. Any questions you may have are all answered in the notes which I really appreciate. The family loves it.
Elizabeth Lindemann
So glad you and your family liked it! And I’m glad the notes were helpful (and not overwhelming!). Every time I add another I think it’s going to be too much – but there really is so much that goes into bread baking, so I like to be as thorough as possible!
Leslie Day
I love this idea of no knead bread! I retired a few years ago and have been kind of bored and this is my new motivation! i just got a cast iron dutch oven and bread bags. I will make a few loaves as my boyfriend is a good guinea pig lol. I live in a retirement community, and when I am confident, I’m going to give them to new and sick neighbors. I’ll keep you posted!
Elizabeth Lindemann
Hope it comes out great for you! Your boyfriend sounds like he has a tough job, taste testing all the fresh baked bread you’re going to make 😉
Andrea
I can’t make enough of this bread. As soon as it comes out it’s gone. I might try doubling it up this time. This recipient doesn’t seem to make a big enough loaf for what I need it for. I also add I tablespoon of olive oil which makes it super moist and crust really crunchy.
Elizabeth Lindemann
So glad you liked it! Some readers have said they’ve had success with doubling it but I haven’t tried it myself yet. Just be sure to give it some more cooking time, and I think maybe lower your expectations for a tall, fluffy loaf since it will be a bit heavier with double the amount. And yes, adding olive oil is great, you can brush it on top too!
max contax
So very, very regrettable that this wonderful recipe is in a very obscure measurement system requiring a lot of recalibration to SI or what you might refer to as Metric System. Lost me there. Hoping you will redo this very great recipe for the other 95% of the world and not just USA, Liberia and I forget the third country using the older sytem. It is about the Bread! and ti looks fantastic!
Elizabeth Lindemann
You can click the word “metric” in the recipe card for measurements in weight.
Mal
This recipe has always, to my knowledge, been listed in metric. It is all I use for baking, and I’ve been making this recipe since it was released. Your comment is off the mark in addition to being overwhelmingly rude.
Liz
Made exactly as written. Bread rose well and looked good but had no flavor.
Elizabeth Lindemann
A common factor here is that people accidentally use too little salt. I’ve tried to make it as clear as possible, but do make sure you use 1.5-2 teaspoons of salt! Other than that, I’ll say that because this is a quick rise bread, it doesn’t have the added bonus of time making the bread more flavorful. Some no knead bread recipes call for an overnight rise, which helps lightly ferment the dough and gives it more flavor, akin to a sourdough. Less time rising means less of that “bready” flavor. You may also try to add some flavors – even adding partial whole wheat flour can give it a nutty, earthy taste. Or herbs/garlic/cheese… play around with it. Hope that helps!
Monica Scott
It taste great but is very soft, not crispy on top. Maybe I need to cook it longer.
Elizabeth Lindemann
So glad you liked it! Yes, I’d give it a bit more time uncovered to cook. You can also take it out of the Dutch Oven for the last part of cooking, so the heat from the oven directly hits all sides of the bread. Hope that helps!
alexis acker
Love your receipe. I saw this on Facebook reel and have not stopped making it. I get compliments every time. I’ve been hesitant to experiment, but I finally did it today, using a loaf pan. It’s still cooling, so I’m not sure of the outcome yet. I want to make a bigger round. If I double the ingredients, do I need to double the baking time?
Elizabeth Lindemann
So glad you liked it! I’m so interested to hear how it came out in the loaf pan – I’ve been wondering about that myself! Some readers have commented that they have doubled the recipe with success. It would need more baking time but double the time would likely be too much. I would add 10 minutes to the baking time covered, then uncover and keep an eye on it. Using a meat thermometer is a good way to test doneness of bread – it should be about 200 degrees F in the center. Hope that helps!
Robyn Cramer
Why in your recipe are you only Rising the bread once? All bread is supposed to be done twice so I’m confused. Its really dense when you only let it rise once as a rule. Just making sure im reading your recipe correctly. Thank you
Elizabeth Lindemann
This is a great question. It’s one of the great things about no knead bread – you don’t have to worry about letting it rise twice!
When bread rises twice, it’s for two reasons. First, for an artisan loaf like this, you often let it rise in a proofing basket or flour coated towel lined bowl after shaping it so it rises a bit more before baking. This helps it get a bit more airy before baking and can have a lighter interior texture. This usually happens with traditional sourdough baking methods. For this recipe, feel free to place the loaf in a proofing basket or bowl if you want, for like 20 minutes or so, before flipping it out and baking it. That might add to the fluffiness of the loaf.
The second reason why you’d want bread to rise twice is for a sandwich style loaf where you don’t want huge air pockets – just a light and fluffy interior. In that case, the dough is usually punched down and the air pockets knocked out, before shaping and letting rise in the loaf pan.
No knead bread like this takes a lot of shortcuts to make baking a bread loaf super easy. It does sacrifice a bit in terms of texture because less gluten is developed (which occurs with kneading) and because it’s baked immediately after shaping. It’s not a hard and fast “rule” that bread needs to rise twice – and you can definitely get an airy result with this no knead bread, it’s just a little more difficult to achieve and you need to handle the dough very delicately when shaping so too many air pockets aren’t pushed out. Otherwise, it’s kind of just the nature of no knead bread to expect a bit of a denser loaf.
Hope that helps!
Lu
This recipe is soo simple yet yields a delicious, crusty loaf of bread! It never lasts long in my house and I would recommend it to any bread baker—beginner or pro! My loaf has yet to turn out as pretty and tall as the pictures, but I am sure with practice I can achieve that!
Elizabeth Lindemann
So glad you liked it! I’ve made this loaf a hundred times and even mine don’t often come out as pretty as the one I photographed! Keep practicing :-)
Jamie Nelson
My teenager and I use this recipe weekly!
Elizabeth Lindemann
So glad you liked it! What a fun thing to bake with your kiddo!
Debbie Bowen
My bread came out hard as a rock on the bottom and paper stuck to the bread. I’ve tried 2X. Rise did not double both times. Was a little wet this time and rose more than the 1st time. What I could salvage tasted good.
Elizabeth Lindemann
There are recipe notes and information in the post about all of these concerns. Here, I’ll copy and paste them below:
Regarding the hard bottom:
Super hard, tough bottom crust? Next time, try putting a baking sheet on the bottom rack of the oven. It will help divert some of that high heat away from the bottom of the Dutch Oven as it bakes.
Regarding parchment paper sticking:
Sticking to the parchment paper: A few readers have noted that their bread sticks to the parchment after baking. This usually does NOT happen, as parchment paper is non-stick. However, after doing some research, I found that sometimes using a very cheap brand of parchment paper can result in the bread sticking. I recommend using a “nicer” brand of parchment paper, or brushing or spraying it with a little bit of oil or nonstick spray before placing the shaped loaf on the paper and baking it.
As for the dough not doubling or rising all the way, there are many reasons why this could have happened and they are addressed in the post and in other responses to comments. My guess for your situation, since it rose a little bit but not all the way, was that it just needed more time. Yeast love warm, humid environments, and if it’s a bit chilly in your house it may take longer to rise. The environment factors a lot into this. It may also have been that your yeast was old – with no rise at all, it would indicate that the yeast was fully dead, but it could have just been that some of the yeast had died in the batch you used, causing them to multiply slowly.
Please refer to the post for more information about this – there are tricks for how to let your dough rise in a warm place or for using fresh batches of yeast or proofing yeast to check its viability. I’m always happy to help troubleshoot or answer questions, but in the future, for my or other recipe sites, please make sure to read thoroughly before leaving a negative review. Thanks!
Rowan
So strange how this recipe was posted less than a month after Nagi posted hers.
Elizabeth Lindemann
Oh yes, many of us were baking bread during that time – peak quarantine! I’m not surprised that our recipe posts coincided. I do want to address your (not so subtle) accusation :-)
First of all, I understand that Nagi is going through an exceptional battle right now with plagiarism and I do hope that for her sake – and all of our (food bloggers) sakes – that there is some kind of decision that comes out of this with regard to recipe development a more specific definition of what constitutes recipe copyright infringement.
Recipes are an interesting thing here with regard to copyright! They exist on a spectrum of creativity. There are some recipes that are low on this spectrum – some just *are* – for example, there are only so many ways you can make scrambled eggs. And then there are some recipes that are high on the spectrum and extremely creative (for example something like a peach cobbler pecan ice cream cake with cinnamon glaze) that are clearly new and novel ideas.
This no knead bread recipe is relatively low on the spectrum of creativity (though I’d love to be able to take credit for it!). There are thousands of recipes that are very similar to mine and Nagi’s on the internet. This general method to making no knead bread was made famous by Jim Lahey. Perhaps I’ll add a segment to this post about the history of the origins of the method! But even he, who did make it trendy and famous, garnered much of his inspiration for his recipe from old, traditional bread baking techniques. Since his recipe and the resulting trend, there have been many, many deviations and interpretations of the recipe. There’s actually a great article on this that brings up a great point – is this recipe’s origin, made famous by Jim Lahey, a result of the invisible labor of domestic women throughout history, who don’t get the credit for their ingenuity? Fascinating stuff! https://www.eater.com/22537151/who-invented-no-knead-bread-recipe
Back to your specific point. Nagi and I seem to have a similar situation where we use a larger amount of yeast to result in a shorter rise time (though not exactly the same for ingredient amounts). Our recipes differ in the process, with mine offering a method to shaping with parchment paper without touching the dough (something I do take credit for originality with!).
All that to say – the issue of recipe “copying” or plagiarism is absolutely fascinating, often tricky to define, and extremely important to condone when done intentionally or maliciously. Rest assured, absolutely NONE of the recipes on Bowl of Delicious meet the criteria of the latter – every single recipe is original on some level with ingredients, ingredient amounts, or cooking process. We all try (well, we all SHOULD try!) to give credit where credit is due in terms of adapting or inspiration from original recipes (and upon reflection perhaps my post does need to credit Jim Lahey – I went ahead and added a note about that!).
Hope that helps address some of your concerns.
Amber
This is a super easy and versatile recipe, especially for a novice bread maker like myself. Thank you for sharing! It is a huge hit in our house.
Elizabeth Lindemann
So glad you liked it!