

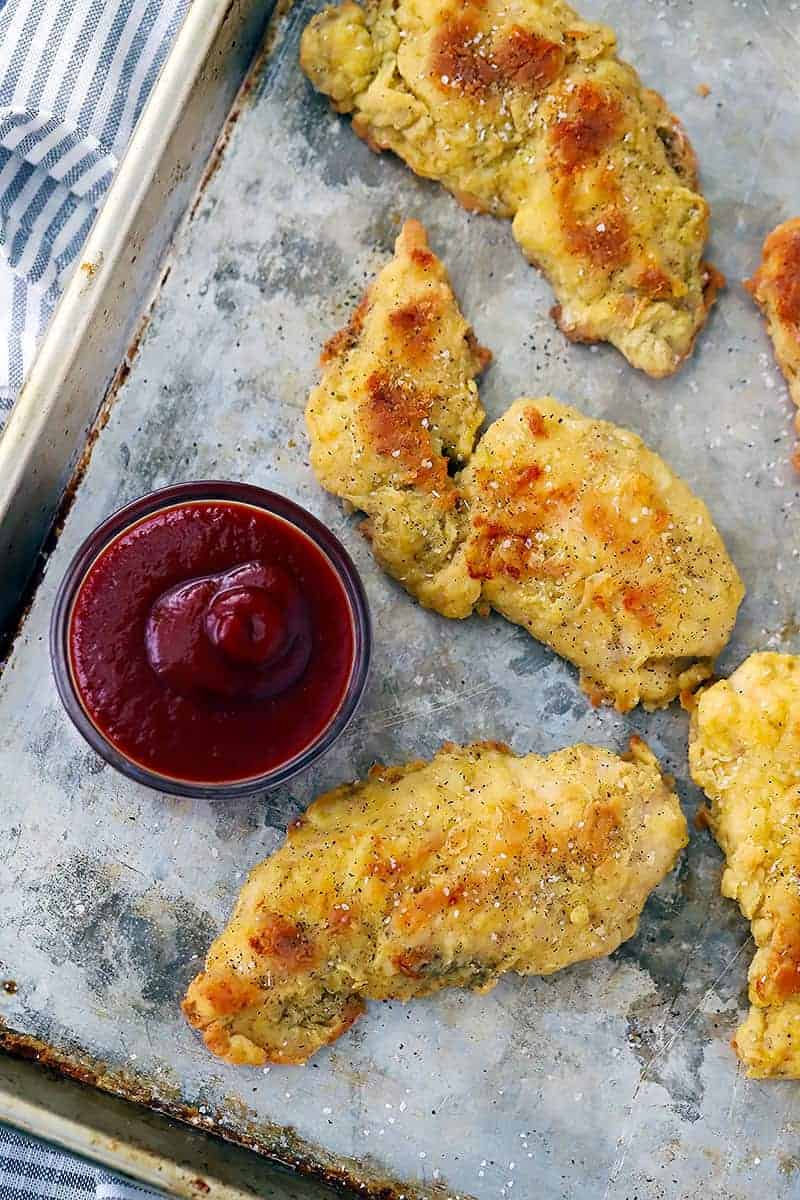
I can’t believe these oven-fried chicken tenders take only thirty minutes, use only THREE INGREDIENTS, and come out perfectly golden, crispy, and with all the taste of fried chicken without the hassle of deep-frying. They’re perfect for kids and adults alike!
Would you like to email yourself this recipe?
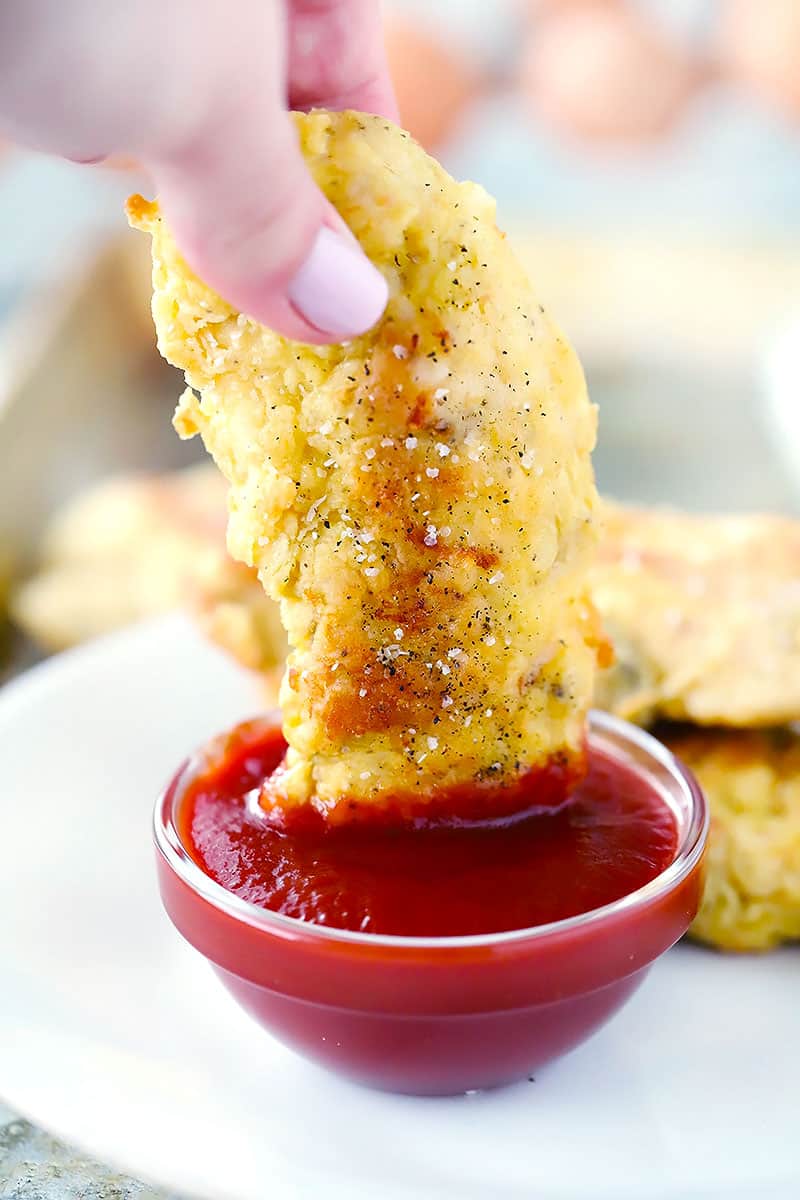
You can cut them up and throw them in one of those salad kits from the store for an easy dinner. Or toss them in buffalo sauce and make the best buffalo chicken sandwich in the world. You can eat them with fries and ketchup. Or can cut them up and put them in chicken salad.
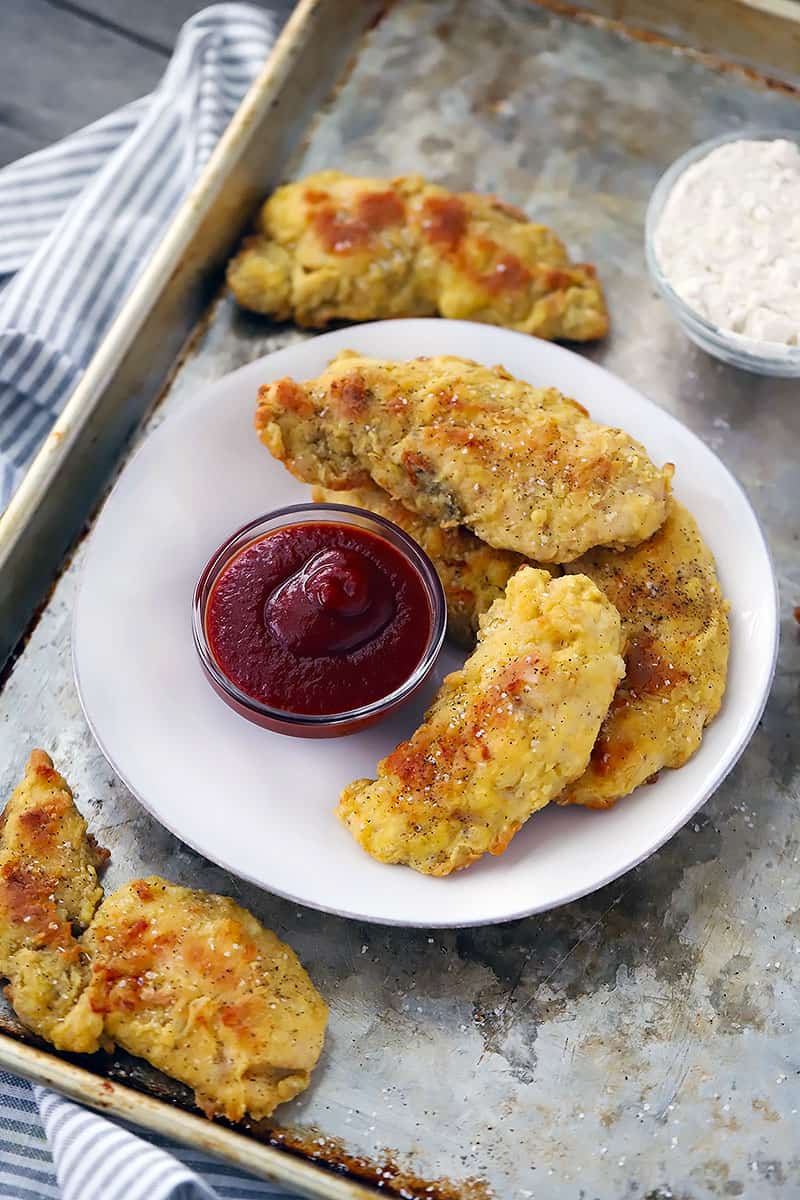
These oven-fried chicken tenders are SO versatile, and SO delicious.
And they’re simple- super simple. I don’t want you going into this recipe thinking you’re going to get some gourmet delicacy. These chicken fingers are like what you get in your traditional state-fair “chicken tender basket.” The kind you get at a ski lodge or theme park.
Because sometimes, you just need some simple kid-friendly comfort food in your life, no matter how old you are.
If I’m being honest, I didn’t even give one bite of these to my kids. Zach and I ate them all. And I have no regrets.
How to make Oven-Fried Chicken Tenders with only THREE ingredients!
The only three ingredients you need for these oven-fried chicken tenders are: chicken (duh), flour, and eggs. I’m not counting oil, salt, and pepper in there, since I’m assuming you already have them.
Told you these were simple.
Since there aren’t a lot of ingredients happening here, you need to make sure you use PLENTY of salt and pepper to ensure they are seasoned enough. In fact, I seasoned these chicken fingers three times!
First, I seasoned the chicken directly with some kosher salt and black pepper. It’s easiest to evenly distribute the seasoning if you use your hands to rub it into the chicken.
But if getting that intimate with raw chicken weirds you out, you can always use a spoon, or sprinkle the salt and pepper evenly over the surfaces of the chicken.
Then, I beat two eggs and added salt and pepper to them as well.
Coat each piece of chicken in some egg, then dredge in plain flour. Then, back into the egg, and back into the flour, shaking off any excess.
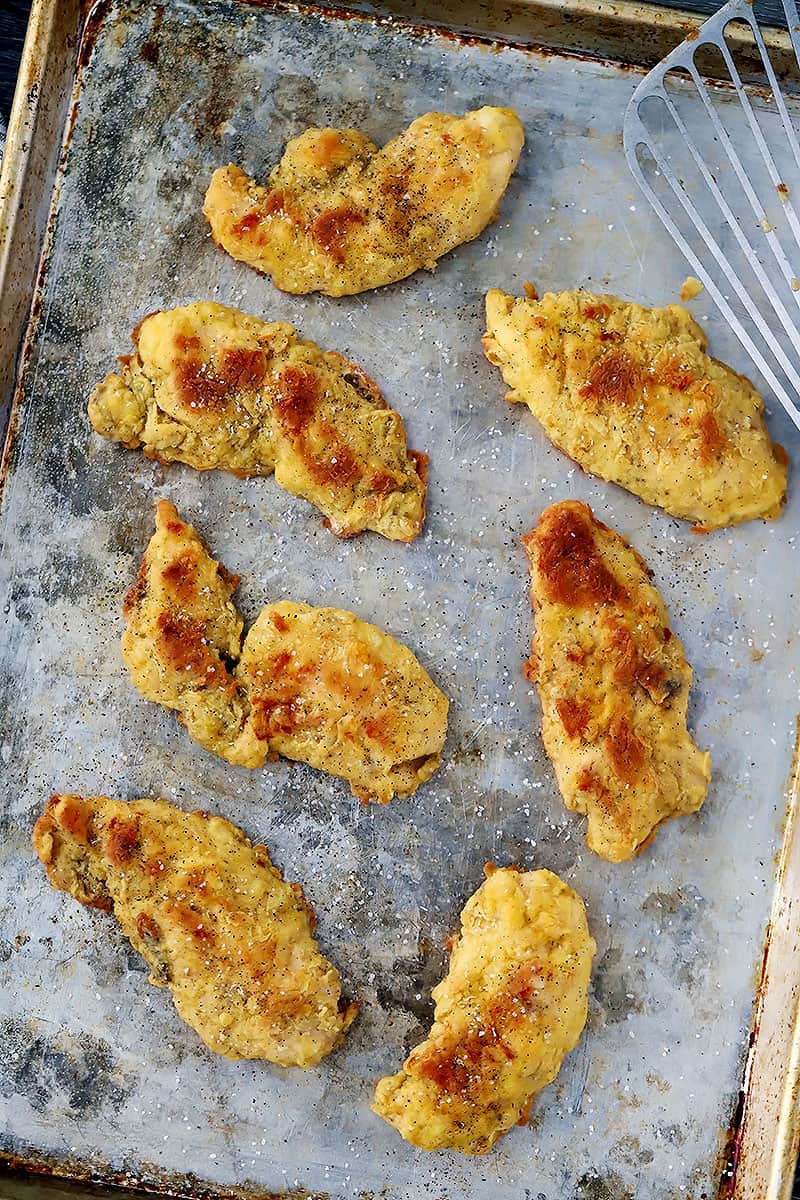
Place the chicken on a well-greased rimmed baking sheet, then flip it over so the top is oiled. This will help crisp it up- more on that in a moment.
Bake them for 10 minutes, flip ’em, then bake for 10 more minutes. Done! SO easy!
And when they’re out of the oven, go ahead and give them a little bit more salt and pepper love. Just in case.
How to get CRISPY oven-fried chicken tenders
It IS possible for these oven-fried chicken tenders to get nice and crispy and golden!
But first, a disclaimer: NOTHING will make chicken tenders as crispy as actually deep frying them. So go ahead and temper your expectations just a tad.
The key to crispy oven-fried anything is using plenty of oil and high heat. I use this same trick for my oven-fried catfish.
Place 1/4 cup canola oil on the bottom of a rimmed baking sheet. Spread it around just a little, but no need to coat the whole thing, only the part where the chicken is going to be in the center.
Then, when you place the chicken on the baking sheet, press it down into the oil and flip it over, so the top AND bottom are oiled. This will help each side crisp up as it bakes at a really high temperature in the oven.
You can also add other ingredients to your flour mixture that are naturally more crispy, such as breadcrumbs or parmesan cheese. Personally, I think that although these add a bit of a crunch, it’s a different kind of crispy than you get from that “fried” crisp. They are delicious, though!

What else can I add to these chicken tenders?
While we’re on the topic of adding ingredients to these simple chicken tenders, here are a few suggestions.
Add herbs, like parsley, thyme, or oregano, or spices like garlic, minced onion, creole seasoning, etc. to the egg or flour mixture to spice things up a bit.
Add hot sauce to the egg mixture if you like heat.
After you’re done cooking them, toss the chicken fingers in buffalo sauce or BBQ sauce. YUM.
This is such a simple, basic recipe, that it’s really easy to go in and make it your own!

And if you’re looking for a gluten-free, grain-free, lower-carb, paleo version of these, you can use almond flour instead of all-purpose. Try these Paleo Oven-Fried Chicken Tenders.
If you like these Three-Ingredient Crispy Oven Fried Chicken Tenders, you’ll love these other minimalistic recipes: Two-Ingredient Cripsy Oven Baked BBQ Chicken, this Four Ingredient Southern-Style Oven Fried Catfish, and Two-Ingredient Dairy Free Rice Pudding.
And here’s an awesome homemade honey mustard sauce for dipping.
Here’s the recipe!

Three-Ingredient Crispy Oven Fried Chicken Tenders
Ingredients
- 1 lb. chicken breast tenders about 8 tenders
- 2 eggs beaten
- 3/4 cup all-purpose flour
- kosher salt
- black pepper
- 1/4 cup canola oil
Want to save this recipe?
Instructions
- Preheat oven to 425 degrees F.
- Pour oil (1/4 cup) onto rimmed baking sheet and spread around so it coats the center- no need to go all the way to the edges. You want it to be a thick coating.
- Season the chicken with 1/2 teaspoon kosher salt and 1/4 teaspoon black pepper. Make sure it’s evenly coated on the chicken by using your hands to mix it together, or stirring thoroughly with a spoon.
- Beat the two eggs well with the 1/2 teaspoon kosher salt and 1/4 teaspoon black pepper in a shallow bowl.
- Put the flour (3/4 cup) in another shallow bowl.
- Coat one chicken tender in the egg, then dredge in the flour, shaking off any excess. Then, coat again in the egg and dredge again in the flour.
- Add the chicken tender to the prepared baking pan, pressing down to coat the bottom in the oil. Then, flip it over, so the top is covered in oil.
- Repeat with remaining chicken tenders.
- Bake for 10 minutes at 425 degrees. Flip each chicken tender, being careful to remove each with a spatula thoroughly so you don’t lose any batter. Bake for another 10 minutes.
- Season lightly with a little bit more salt and pepper right after they come out of the oven.
- Serve with ketchup or your favorite dipping sauce, like this five-minute avocado sauce.
Notes
- Money Saving Tip: You can use chicken thighs instead of breast cutlets if you want- just cut them lengthwise into thin pieces.
- Time Saving Tip: I recommend buying chicken breast tenders already cut so you don’t have to spend time doing it yourself.
- You can add herbs, breadcrumbs, or parmesan cheese to the flour mixture, spices or hot sauce to the egg mixture… this recipe is very basic and can be modified easily!
- Looking for a paleo, lower carb, or gluten-free option? Try these Paleo Oven-Fried Chicken Fingers.
- The provided nutrition information does not include any added sodium from seasoning to taste, any optional ingredients, and it does not take brands into account. Feel free to calculate it yourself using this calculator or by adding the recipe to Yummly.
Nutrition
Nutrition Information Disclaimer
The provided nutrition information is my best estimate and reflects one serving of the recipe (total servings indicated at top of recipe card). It does not include any added sodium from seasoning to taste, any optional ingredients, and it does not take brands into account. I use an automatic API to calculate this information. Feel free to calculate it yourself using one of these tools:
Jeannie john
Have not tried it yet. Is that dry ranch or liquid ranch?
Elizabeth Lindemann
Ranch is not listed as an ingredient here nor mentioned on this post at all. Are you perhaps thinking of another recipe? Let me know if I can help further!
Lisa
This recipe was a joke. Followed it to the tea, and the chicken was too wet and coding fell off with the very first flip after the oven. Did not get brown and was just a hot mess. Would not recommend.
Elizabeth Lindemann
I’m happy to help troubleshoot this. First, do make sure you are using enough oil on the baking sheet – don’t skimp there, as the chicken will tend to stick a lot more (and the coating more likely to fall off) if not enough oil is used. Second, if your chicken is wet so the coating isn’t sticking to it, I recommend patting it dry before seasoning with salt and pepper. If you are talking about the coating itself being too wet, you may just need a little more flour in the batter. Sometimes measurements can be off depending on the size of the eggs or how compacted the flour is in the measuring cup. As for browning, you can broil at the end for a little longer if needed (though if the batter was too wet, that may also have affected browning). Hope that helps, and better luck next time!
Jimmy M.
I’m an older man learning to cook a wider variety of dishes. This is a wonderful recipe! I added a few more seasonings and the tenders were delicious indeed.
Elizabeth Lindemann
So glad you liked it!
Shea
Turned out okay. Hard to get coating to stick even when flipping tenders. Also had difficulty getting it to properly crisp up and brown on 425. Had to cook longer than suggested. But taste good! Made it with chicken Alfredo.
Elizabeth Lindemann
Thanks for this feedback and glad you liked it!
Tori
Can’t wait to try these! Do you think it would work in the air fryer? :)
Elizabeth Lindemann
Probably! I’ve actually never used an air fryer (food blogger fail haha!) so unfortunately I can’t help you with the specifics. But I don’t see why not! Maybe this chicken nuggets air fryer recipe will help point you in the right direction (My Forking Life is the blog I go to for all my air fryer questions) https://www.myforkinglife.com/air-fryer-chicken-nuggets/
Autumn B.
Hands-down THE BEST oven-fried chicken recipe that I have tried — and I’ve tried many! 👏🏻 I used boneless, skinless chicken thighs. Did NOT cut them lengthwise, as suggested, but we cut them into halves (after resting just a moment) for Hawaiian Sweet slider buns, three sauce options, and sandwich-sliced green veggies. This recipe is now saved in my own (very picky and thoroughly tested) recipe folder. Bowl of Delicious, indeed!
Elizabeth Lindemann
So happy to hear you liked it! Sounds like those were some delicious sandwiches. And I love the idea of using chicken thighs.
Gianella Middleton
So crispy & tasty, my family requested me to make them again. Really pleased, Thank you
Elizabeth Lindemann
So glad you and your family liked them!
Wally King
To start with, the order of operations for dredging is wrong! The directions say egg, then flour, then egg which is what I did. The tenders ended up looking and tasting like eggy chicken. No crunch at all. After some research I am sure you meant flour, then egg, then flour like everyone else does. Please fix this so other people don’t ruin their tenders!!!
Elizabeth Lindemann
Hi Wally! Sorry for the delay- I wanted to try this method before replying :-) Personally, I didn’t have great luck doing the flour, then egg, then flour. The breading was too thin and slid right off of the tenders and didn’t firm up at all. That said, this recipe has been hit or miss for multiple readers, and I’m going to keep tweaking it to make sure I get it right. I appreciate the feedback and suggestion.
Elle
You left out the 2nd round of flour! The directions say egg, flour, egg, flour
Elizabeth Lindemann
Oh my goodness you are right! I didn’t catch that mistake in the comment left here. Thank you- that must have been the issue!
Gary
Fan from the UK here! Made with gluten free flour added some jerk seasoning. Weren’t browning that well so put the oven on fan with grill setting (I prepared them ahead so that was probably why, too long sitting and soaking, my fault) nevertheless, absolutely delicious. Am I allowed to say it was like eating healthy KFC! I had a pack of skinless chicken breasts and cut them in half lengthwise before coating. Worked perfectly. They were totally yum. Thank you!
Elizabeth Lindemann
Oh wow I LOVE the idea of using jerk seasoning in this! Glad to know it worked for you with gluten-free flour, and yes, they are totally like healthy KFC! :-)
Jake
I’m gluten free and made these with GF All-Purpose Flour and they were PHENOMENAL. We made them as chicken parm dippers, too, and covered them with mozzarella and served with marinara on the side. Delicious!
Elizabeth Lindemann
So happy you liked them, and thanks for the tip that it worked with GF flour! That’s really great to know. That sounds DELICIOUS with mozzarella and marinara!
Pritta Paratore
Amazing Recipe. So easy to make and delicious, My husband like it a lot. Thank you for sharing Elizabeth
Elizabeth Lindemann
Yay! So glad you and your husband liked it :-)
M
Actually the worst chicken I’ve ever tried to eat. Thin chicken strips, cooked for longer than this said, and it was still raw.
Elizabeth Lindemann
Hm, thin chicken breast strips cooked at 425 degrees F for 20 minutes should absolutely have been cooked through, especially if you cooked for a longer time. If the chicken was not fully cooked, I think perhaps something may be wrong with your oven- it might run way too cool- or maybe you forgot to press “start” on your oven (mine has a start button that I needed to get used to when I first started using it- there were a few times when I didn’t and wondered why things weren’t cooking haha!). So sorry you had a frustrating experience, and if you want to troubleshoot this issue more please feel free to shoot me an email!
Mindy V
This recipe is PERFECT! My daughters (15 & 10) decided they were going to step in and cook for us as both my husband and I were running late. I shot them a text with the link since I wanted to try out this recipe. A couple things that might be helpful, I’m gluten intolerant and tinkering with ANY gf flour should be approached with caution. lol. Anywho, the girls stepped in and made these. SO DELISH! Even with the GF flour. You cannot screw this up. Now…..we may have taken the “plenty of salt and pepper” a little too close to heart and slightly over seasoned these….but that’s on us. (tee-hee)
Thank you so much for sharing this with us. It’s so simple and will make lots more yummy gf tenders in our home.
Elizabeth Lindemann
Oh I’m so happy to hear this recipe worked well for you! And thank you for letting me know that GF flour worked well for it, that’s super helpful.
Roo S
Attempted this recipe because I didn’t feel like pulling out my cast iron tonight. I couldn’t get the reading to turn a pretty brown so some users may need to kick the heat up a bit if your oven is notorious for not heating on target. Otherwise, it was okay!
Elizabeth Lindemann
Glad you liked it, and thanks for the suggestion for readers to kick up the heat to get more browning!
Teresa Givens
Coating fell off and were gummy. No flavor.
Elizabeth Lindemann
Oh no! So sorry you had this frustrating experience. When I made this, the coating stayed on perfectly. I think it might have had to do with both the amount of oil I used, and also the kind of pan. But I want to make sure I troubleshoot this recipe so this doesn’t happen to other people! I’m adding this recipe to my list of things to recook, so I can hopefully get to the bottom of this. Again, so sorry it didn’t work out for you!
Kheia Sanchez
Soooo good! I added paprika to the flour and followed the directions exactly. Turned out great the first time and was a hit with the kids. The key is making sure the oven is HOT and having enough oil and not to skip the pressing step. Thanks for the recipe!!
Elizabeth Lindemann
So glad you liked it! Love the idea of adding some paprika!
Hadley
I followed the instructions to a tee, when I flipped the chicken the breading all fell off or was stuck to the pan. Really disappointed :(
Elizabeth Lindemann
Oh no! SO sorry this happened to you. I’m sure that was very frustrating after spending the time to put it together. If you followed the instructions to a tee (used a while 1/4 cup of oil and high heat), I wonder if it instead has something to do with the tools used. I used an aluminum rimmed baking sheet- I’ve found that things just don’t stick as much to it, as opposed to other pans I’ve tried in the past. They’re great for roasted vegetables because of this. I swear by nordicware half bakers sheets. Second, I used a metal spatula to flip the chicken. Mine didn’t stick at all when I made this, but it does help to use a metal spatula (like this one) because they are so thin and sturdy, so it doesn’t disturb the coating as much (again, this is also great for roasted veggies or other recipes). I hold it as parallel to the surface of the baking sheet as possible and slide it under the chicken quickly, pressing down onto the surface of the baking sheet as I slide. It’s taken me a lot of practice to get this technique right- I’m not sure what your cooking level is, but I remember being really frustrated a lot by situations like this when I was first starting out until I got the hang of it. My final suggestion- perhaps a nonstick baking sheet would be better next time, or even lining the pan with parchment paper (which won’t result in quite as crispy of an outcome, but would hopefully save some heartache)! Again, so sorry this caused disappointment for you, and I hope this was at least a little bit helpful and that you have better luck next time you make this or a similar recipe.
Barbara Metcalf
Wow I love this took me a couple of tries at it but it’s getting better it just Taste like flour and I use coconut flour
Elizabeth Lindemann
Glad you liked it! Coconut flour is a great alternative to all-purpose flour. I like to dust catfish with it before pan-frying it :-)
Sue
I prepared this chicken dish for dinner tonight for me and my husband. I am sensitive to egg yolks so I just used egg white. I used almond flour rather than all purpose flour. It turned out great. Very easy to make. The chicken was most delicious. I will make this again.
Elizabeth Lindemann
So glad you liked them!! Great substitution ideas, thanks for sharing :-)
Penny giddens
I just made these for dinner. Followed recipe as written. They did not brown up at all. I put them under broiler for s few minutes, which made them a bit tough. I made 7 tenders; we had two left, and my husband didn’t say “i’ll Have them tomorrow.”. In the trash they went. Very disappointed.
Elizabeth
Oh no!! So sorry this happened to you. I have a few ideas about why they didn’t brown up. First, your oven may be a little colder than most. To compensate for this, I recommend doing 450 degrees instead of 425 degrees, and/or moving the oven rack up closer to the top of the oven so it’s hotter. Second, not sure about what kind of material your baking sheet is made of, but mine is aluminum. Maybe that had something to do with it? And finally, I will say that these chicken tenders don’t get SUPER brown when you bake them. Personally, I’d take less brown on them than risk overcooking them by baking for more time or broiling. Hope this helps, just in case you try to give them another try or if you decide to try a similar recipe somewhere else!
Ester kocht
Wow, this recipe sounds amazing Elizabeth! I’m Drooling Right Now. I can’t wait to make it for my family!
Elizabeth
Thanks Ester! Hope you and your family like it!