

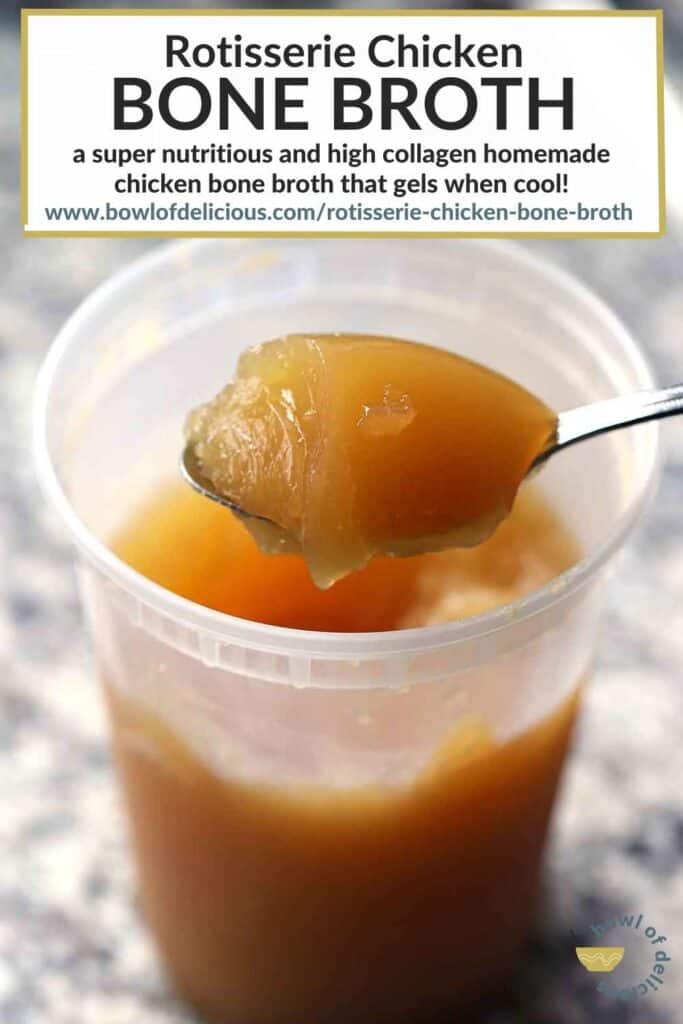
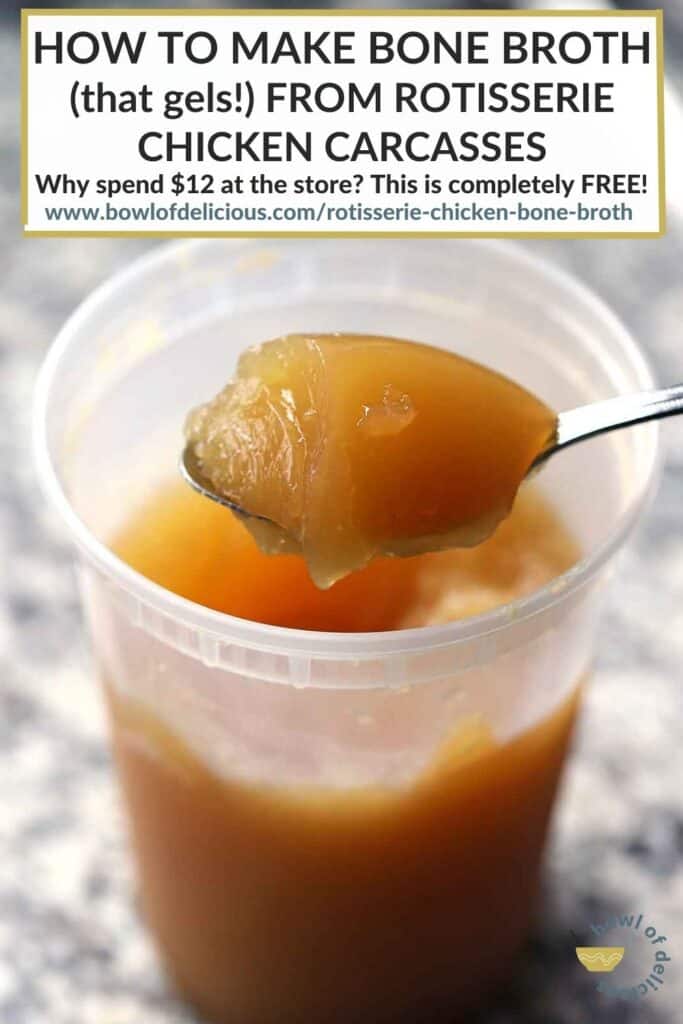
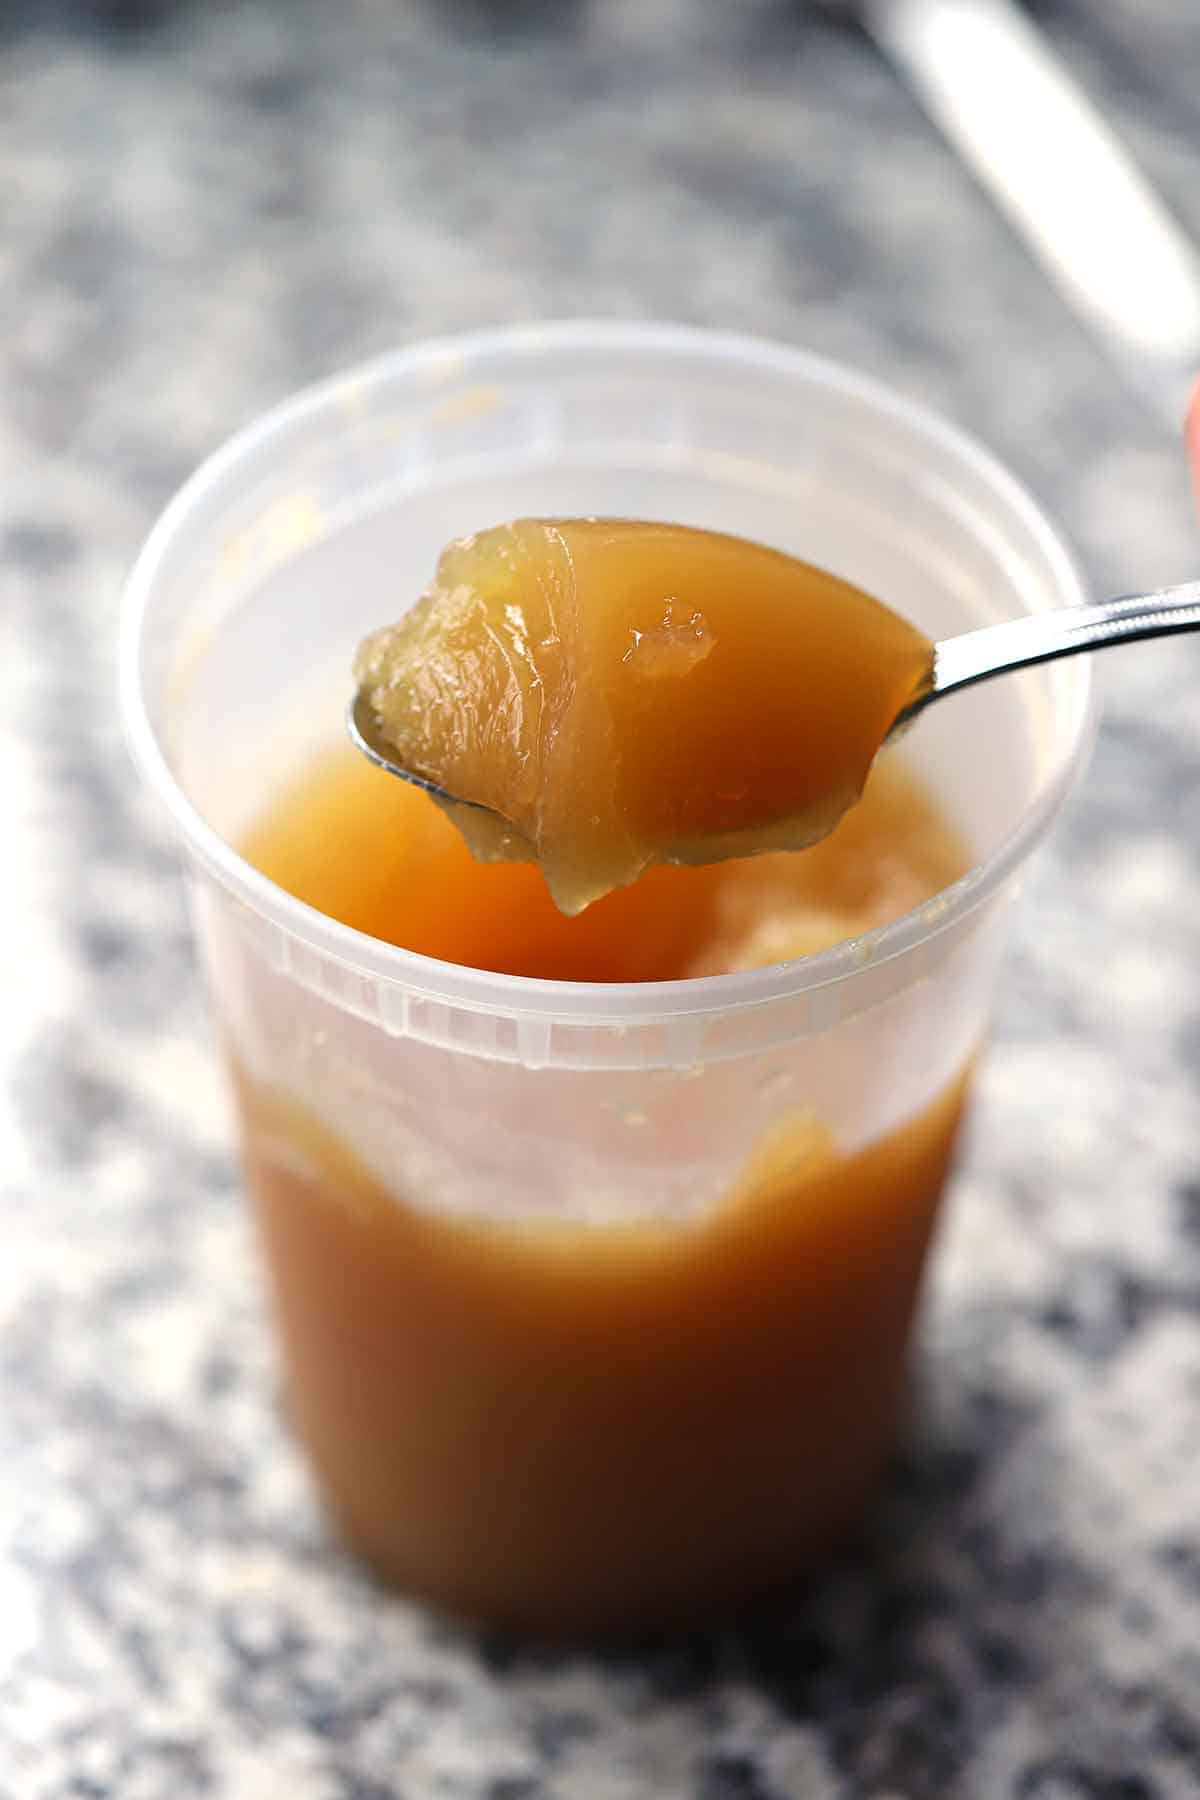
This is your public service announcement to NEVER throw away your rotisserie chicken carcasses – you can make an absolutely delicious, rich, homemade chicken bone broth out of them that GELS! When homemade chicken stock gels up (yes, exactly like jello) that means it’s a nutrient-dense bone broth, which is very high in collagen. The stock has a rich, unctuous, and viscous texture. Not to mention it’s high in protein, and the collagen is beneficial for your joints, skin, and overall well-being. And it’s essentially free since we use scraps that would otherwise be thrown away!
Would you like to email yourself this recipe?
I don’t know about you, but I use rotisserie chickens all the time. Why go through the hassle of cooking a chicken when you can get one fully cooked and super flavorful for like $7 at the store? I use shredded rotisserie chicken meat for all kinds of things. Like chicken salad, chicken and dumplings, and healthy chicken mushroom stroganoff.
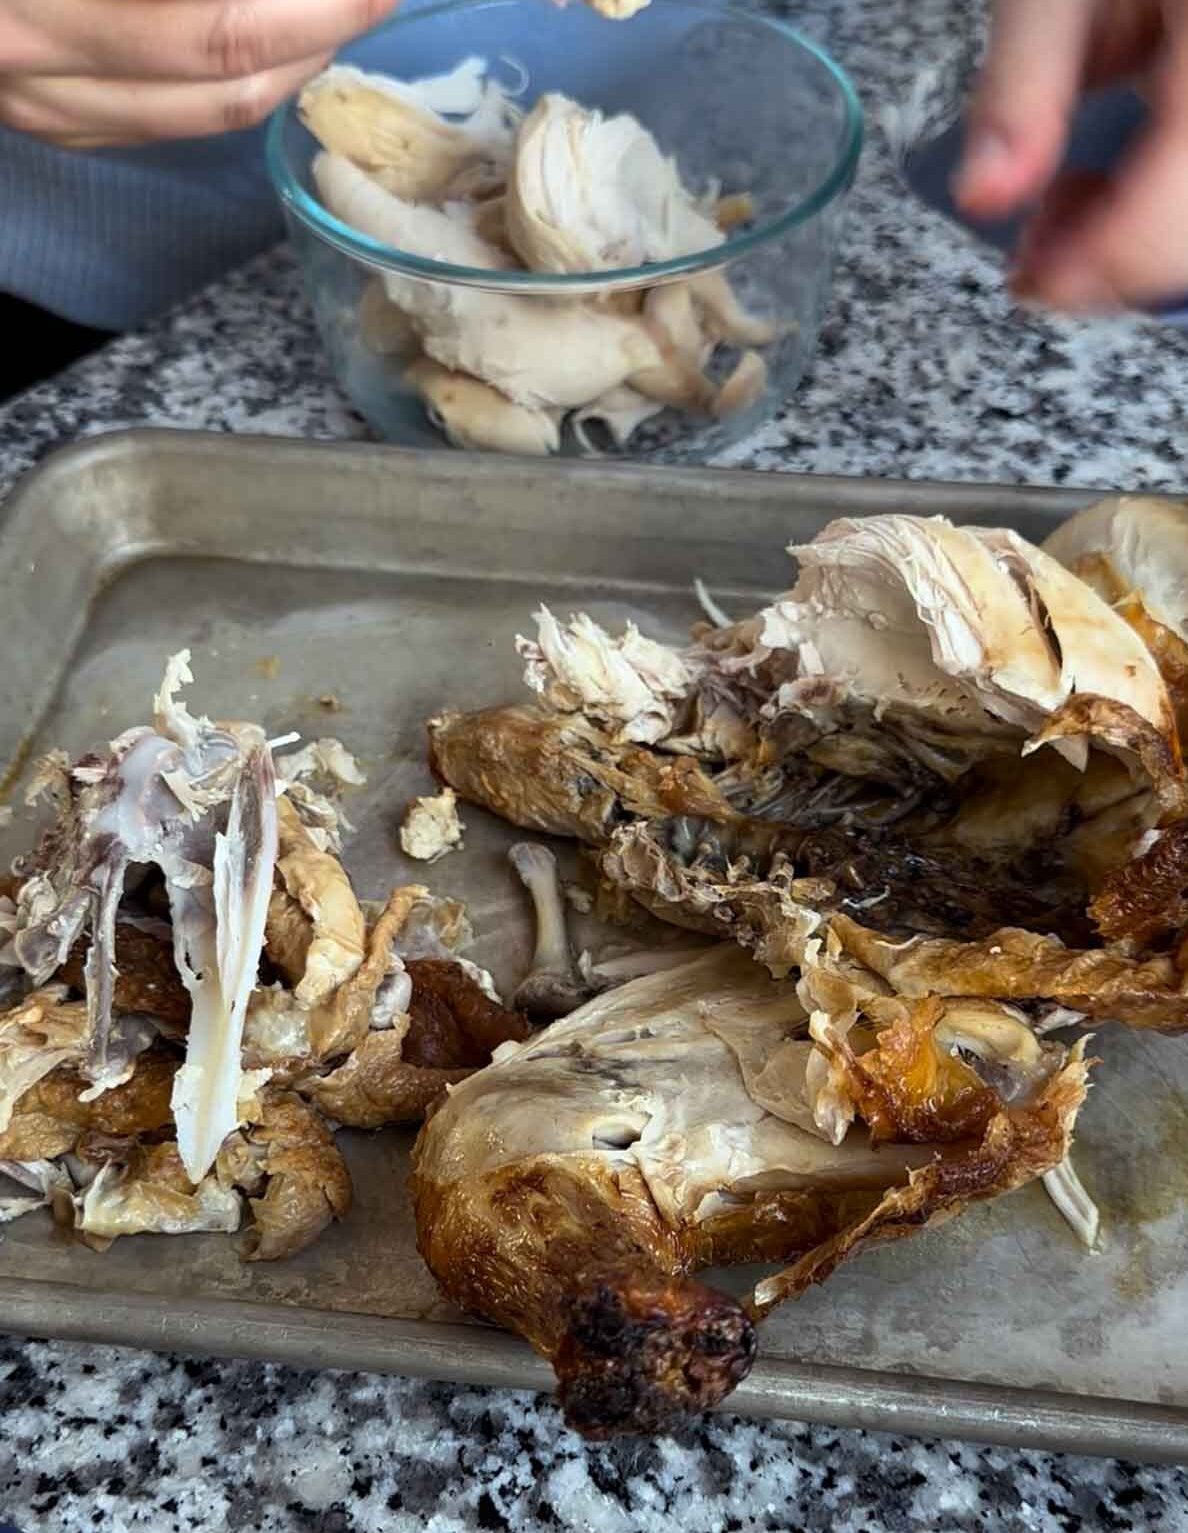
When you’re done collecting all the meat from the rotisserie chicken, you’re left with the carcass, mostly consisting of the bones and skin. Instead of throwing it out, you can use it to make the most amazing (and essentially FREE!) homemade chicken bone broth ever. And the best part? It’s so well-seasoned already, we don’t add any extra salt or other seasonings.
Bone broth is expensive at the store, ranging from about $7 – $12 for a menial amount. Collagen supplements are even more pricey! This recipe is completely FREE to make since you’re using food scraps you’d normally toss.
Here’s what I do. When I have a rotisserie chicken carcass, I stick it in a gallon sized freezer bag and store it in my freezer. Once I have three total rotisserie chicken carcasses, I make this homemade bone broth! I also use veggie scraps that I collect in my freezer, which means it’s EVEN MORE FREE to make!
Brace yourselves. I say the word “carcass” a lot in this post (but hey, at least I’m not saying “moist” with reckless abandon, right?).
Why would you want your homemade chicken bone broth to gel?
A homemade broth/stock that gels up when it cools signifies that it’s super high in collagen. It’s exactly like jello. It will be liquid when it’s warm and solidify to a gel when it cools in the fridge. This is the reason why so many people praise bone broth. The collagen makes the broth super healthy, in addition to the minerals and nutrients you get from simmering the bones for a long time.
So why is collagen good? First, it makes the stock high in protein. It’s a great way to add protein to soups and stews, especially in vegetable-based soups that may otherwise not have much protein. Collagen also plays a vital role in supporting joint health and skin elasticity, and can be especially beneficial as we age. In other words – it can give you a youthful glow. Who could say no to that?
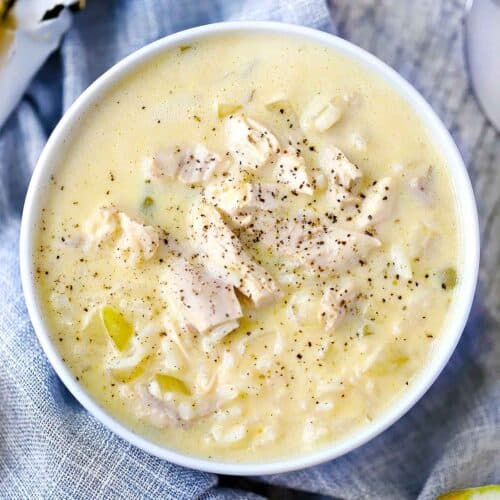
Bone broth can be use in any recipe calling for chicken stock or broth. And it’s also delicious to just sip on for a savory, warming drink in the cold weather!
How long does bone broth need to cook?
Like many – ok, ALL – issues on the internet, there is some debate about this. Basically, the thought is that the longer you cook the bones, the more minerals and nutrients seep out of them and into the stock.
I’ve heard of some people cooking bone broth for multiple days, until the bones literally fall apart completely. I’m not doing that. I like my house smelling like broth for one day, but no longer!
This recipe for homemade chicken bone broth from rotisserie chicken carcasses does not require a huge long cooking period. You can get the broth to gel, the collagen and nutrients to take hold, and taste amazing after about 4 hours of cooking.
HOWEVER. You can go longer if you want. What some people consider a “proper” bone broth usually cooks for 12-18 hours to get the most nutrients and minerals out of all the bones. A slow cooker set on low is a great way to do this. The longer you cook it, the richer it will taste and the more nutrients and minerals will leech out of the carcass and into the stock. You can also use a pressure cooker to maximize the cooking in a shorter amount of time.
Basically, my point is, it’s not that serious. But you do want to allow for a few hours in order for the bone broth to be able to be so collagen rich that it gels up.
It’s important to note that any vegetables you want to add to the stock should not be cooked for many many hours and should only be added at the end (more on that below!).
Three important factors in making bone broth with rotisserie chicken
- You’ll need to use more than one chicken carcass. Using one rotisserie chicken carcass will make a flavorful chicken broth. But it won’t have enough going on to make a collagen-filled broth that gels up unless you use only a little bit of water for a small yield of broth. You can do two large ones (the rotisserie chickens from Coscto, for example, are huge!) or up to four small ones. The more you use as a ratio to the amount of water you add, the greater the chances of the stock gelling up. For me, three is the magic number.
- Make sure to include ALL parts of the chicken carcass, including the skin. A lot of people will omit skin from stock because it contains a lot of fat. While this is true, it also contains a lot of that connective tissue that breaks down into collage. Not to mention the skin of rotisserie chicken is packed with flavor. And as for the fat? Don’t worry, we will remove that after cooking (I’ll share an easy way to do this below). This way, you’re just left with the rich, high protein, collagen-filled, gelatinous chicken broth without any greasiness.
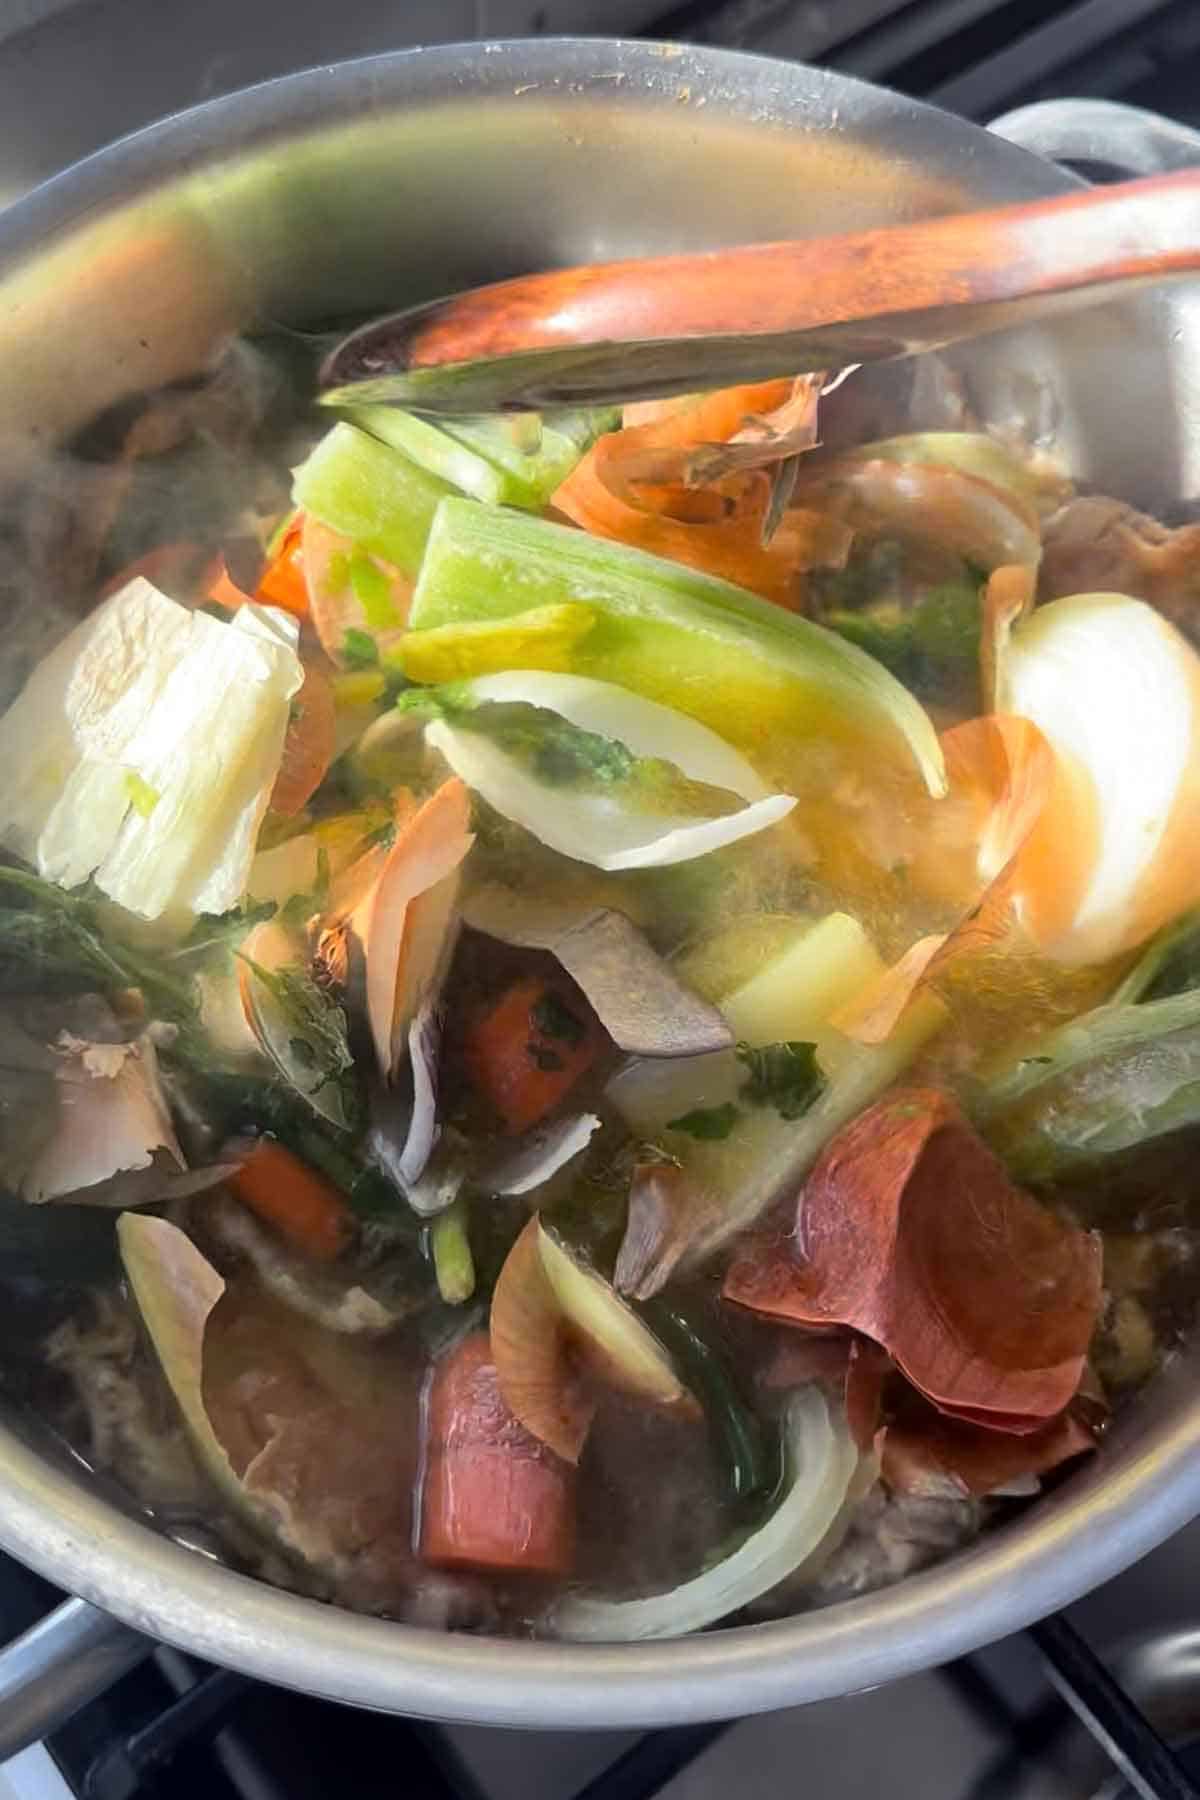
- When adding vegetables to the broth, only add them in the last hour of cooking. You don’t want to add them too early. If you cook vegetables, especially onions, for too long, they impart a bitter flavor. You don’t need more than an hour to get out all the delicious flavor from the veggies.
What veggies should be added to the bone broth?
I always use a mix of onions, celery, and carrots. Sometimes I’ll throw some parsley in there or garlic.
Other veggies you can potentially use are mushrooms, which will add an umami flavor to the broth. Other root vegetables like parsnips and turnips can be used, too. Bay leaves and whole peppercorns are also a nice addition for flavor.
What veggies should NOT be added to homemade broth?
Don’t ever use cruciferous vegetable scraps in homemade broth/stock. Cabbage, broccoli, kale, cauliflower, etc. will impart too strong and overpower the broth. Potatoes may make the broth cloudy because they are so starchy. Don’t use beets or radishes either – they’re too strong AND they’ll color the broth! Avoid strong tasting herbs like basil as well.
How to save veggie scraps in your freezer to use in homemade broth
I collect the ends of onions, celery, and garlic, and peels and ends of carrots, and stems/scraps of parsley in a gallon sized zip-top bag in my freezer, just as I do for the rotisserie chicken carcasses. When I’m ready to cook, I can just grab a couple handfuls of the frozen veggie scraps and toss them into the bone broth to add flavor. This way, I’m reducing food waste and not needing to purchase a single ingredient to make the broth. It makes the entire thing FREE to make! I do this with homemade vegetable broth, too.
If you don’t have veggie scraps, don’t worry! You can just quarter a whole onion or two, add a couple of celery ribs and carrots cut into large pieces. Or skip it altogether – the chicken will have more than enough flavor to get by.
How to make rotisserie chicken bone broth
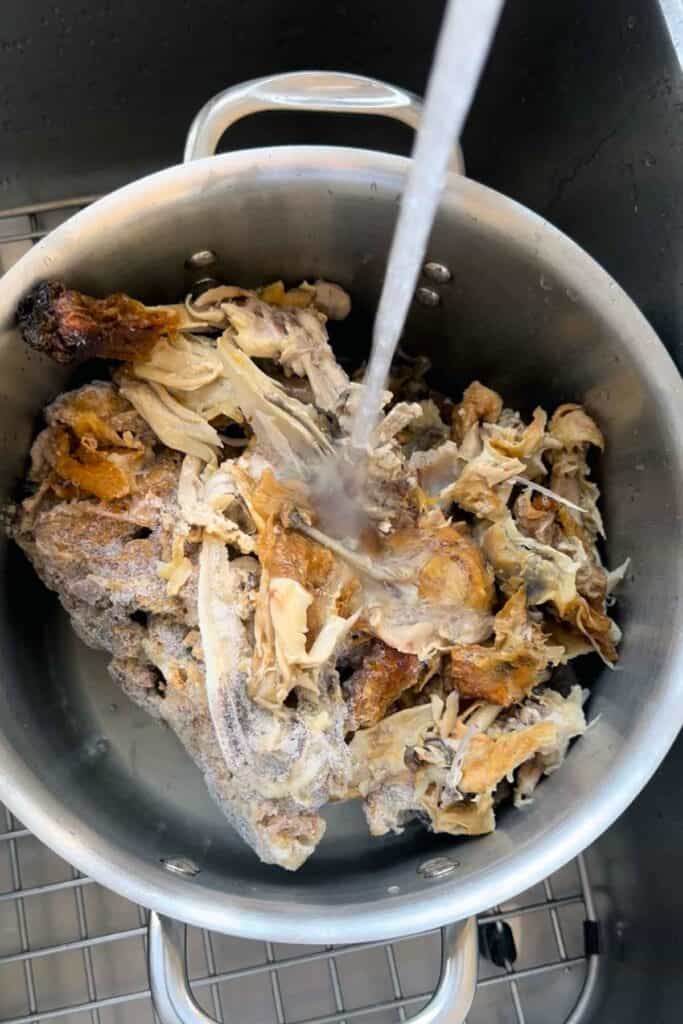
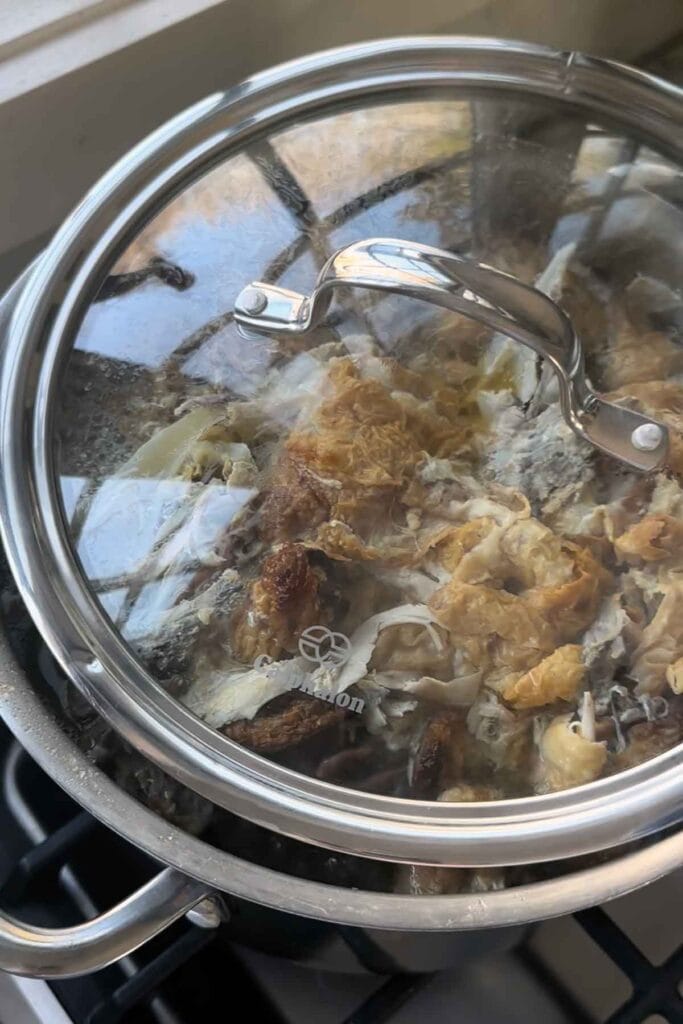
First, place three rotisserie chicken carcasses in a large pot. They can be frozen – I collect mine until I have enough to make stock. Cover with water, bring to a boil, turn the heat to low (I like using the back burner), and simmer, with a lid on top slightly ajar, for about 4 hours. Or longer – the longer you cook it the more nutritious it will be (if you want to cook it for a super long time, a slow cooker is probably your best bet -more on that below!).
During the last hour of cooking, add in some vegetables. I keep scraps of onions, celery, carrots, and parsley in a gallon sized zip top bag in my freezer, so I just grab a few handfuls of that to throw in the pot. Again, have I mentioned that this bone broth is FREE to make?! Use those scraps, friend!
How to strain homemade chicken broth
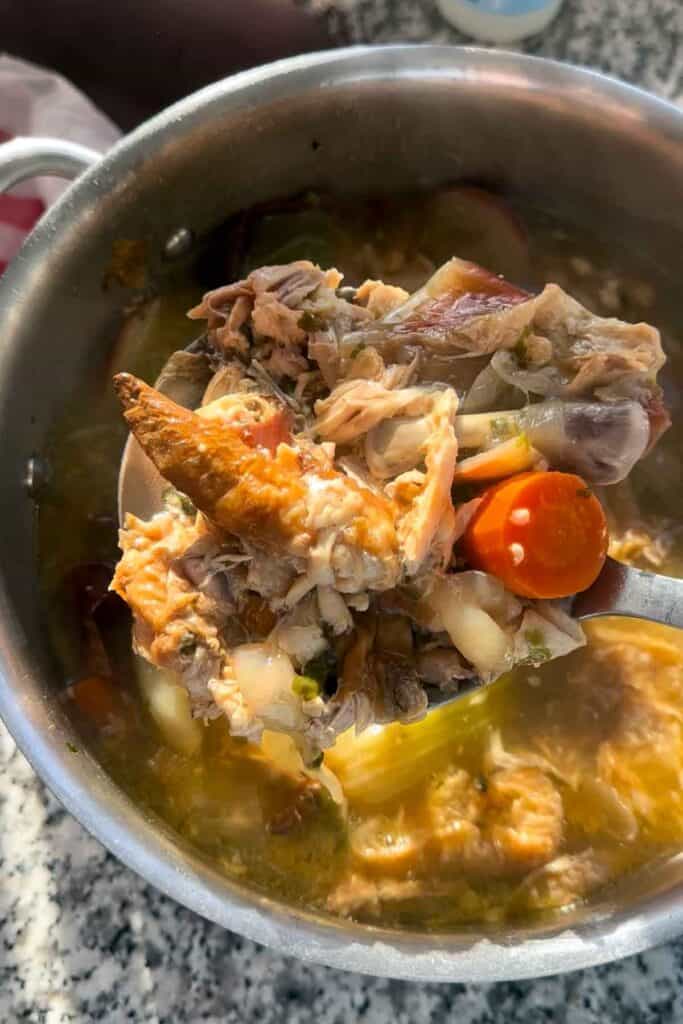
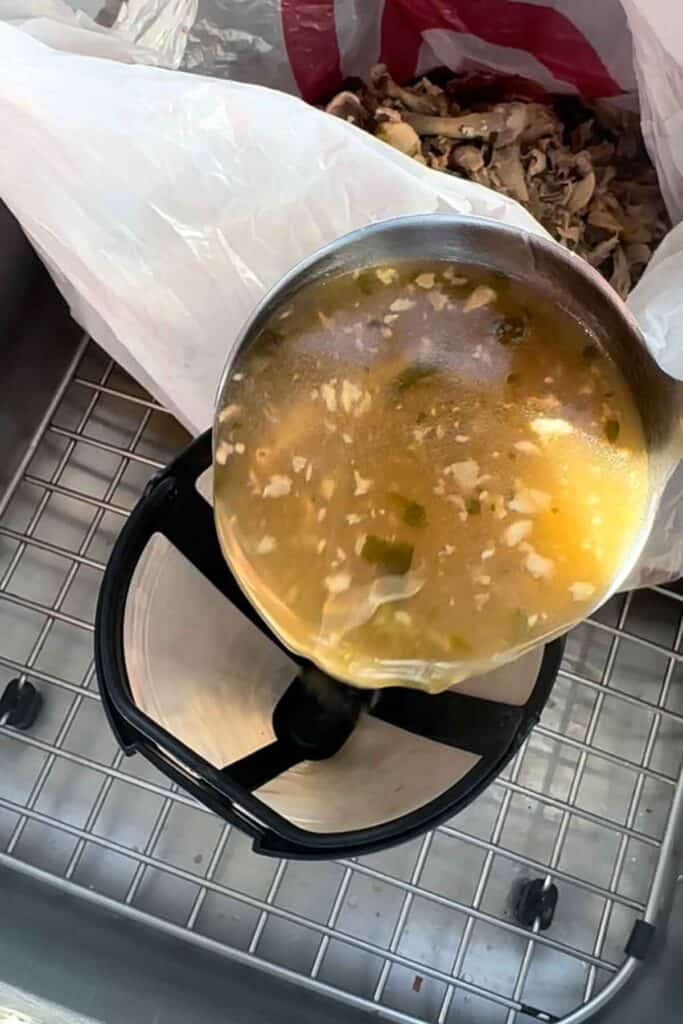
Now, it’s time to strain the broth! There are a few ways to do this but this method is my favorite. For the first step, place an old plastic grocery bag in your sink. Use a slotted spoon to remove the large solids from the pot and place them in the bag. The more solids you scoop out now the easier the rest of the straining process will be. You can also use a container or scoop the solids directly into the trash – though fair warning, they will be liquidy.
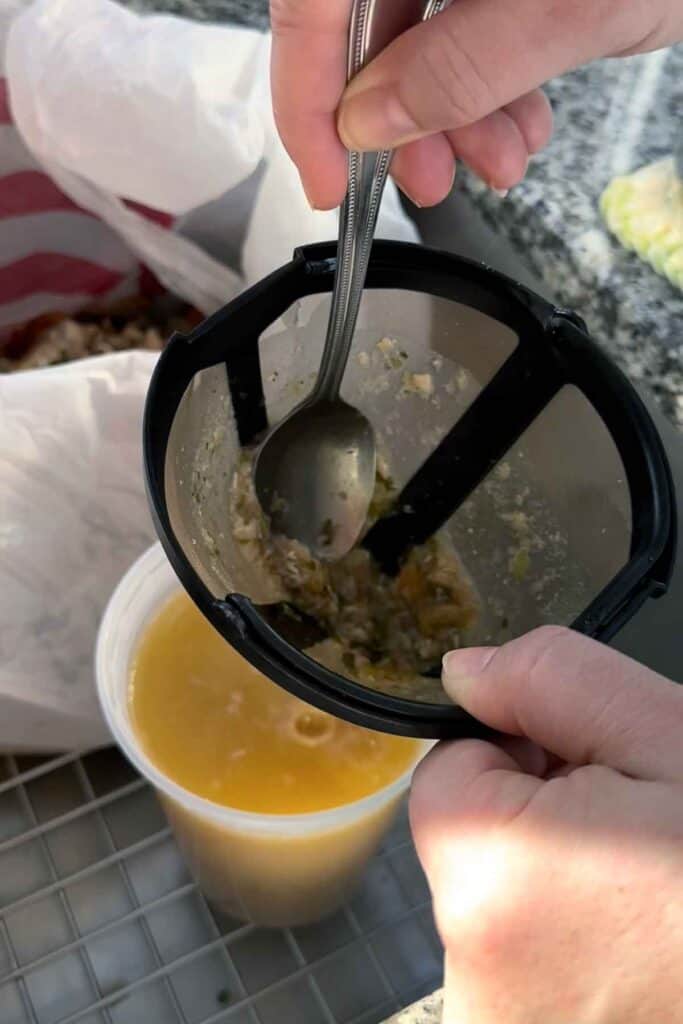
Now here’s my favorite trick – I use a reusable coffee filter to strain the rest of the broth! The super fine mesh helps keep the impurities out of the stock and filters everything out almost perfectly. Alternatively, you can use a mesh sieve lined with cheesecloth for a similar effect. A mesh sieve alone will work in a pinch but you will be left with some small solids in the stock (which are fine to eat but can disrupt the texture a bit).
I place the reusable coffee filter on top of one of those take-out soup containers (I save them when I order Thai food! But you can use any container or jar you want). Then I ladle the chicken stock into the filter and let it strain into the container. It may congeal or get stuck – if that happens, you can use a spoon to stir around the mixture in the filter to get all the liquid to drain out. Dump any small amounts of solids into that bag/container from before.
Now just tie up the bag with the solids and put it in your trash (or compost if you’re fancy like that!).
How to remove fat from homemade chicken broth
The fat will float to the surface after you strain the broth. You’ll want to remove it so the broth isn’t too greasy. There are two ways to do this.
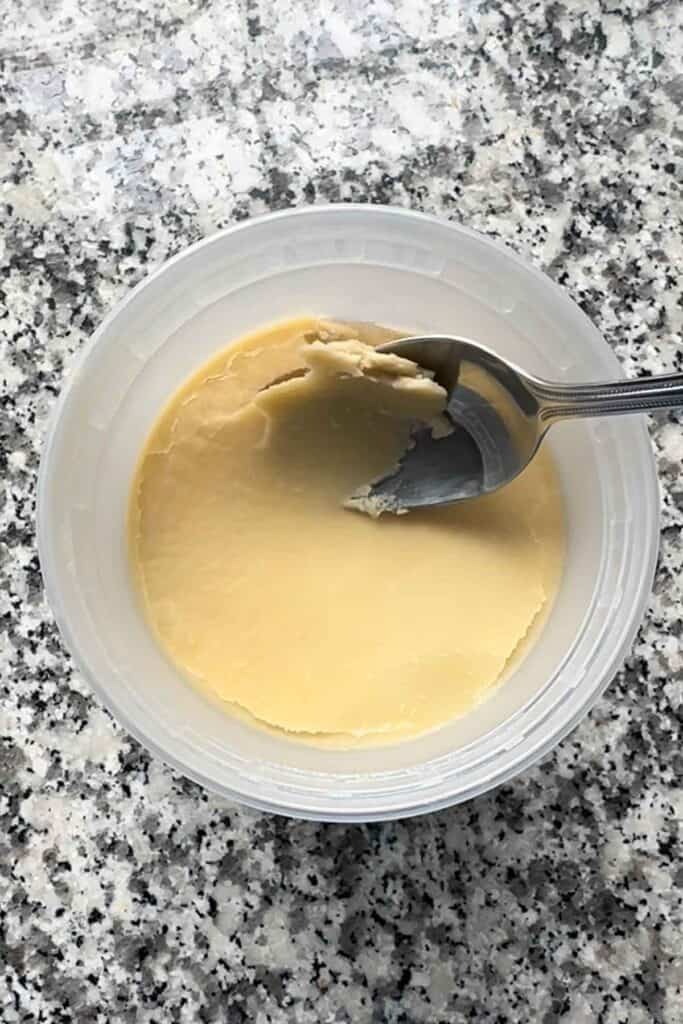
My favorite way is to let the broth cool at room temperature for a while, then transfer to the refrigerator for a couple of hours. The fat will solidify on top, making it easy to remove with a spoon (or even just peel it off with your hands).
Alternatively, you can use a spoon to skim off the fat from the top of the hot broth. This is a good alternative if you want to use it right away to cook with.
If you want to save the chicken fat for another purpose, go for it! It’s schmaltz, and can be used in all kinds of recipes. It’s great for making homemade gravy or as a base for sautéing veggies for soups and more.
Can you use a slow cooker or pressure cooker?
Absolutely! For a slow cooker, place the chicken carcasses and cover with water in the crockpot. Cover and cook on high for at least 4 hours. You can go much longer if you want. I recommend cooking on low if going past 8-10 hours or so. As with the stovetop directions, add veggies in during end of cooking, then continue to cook on high for 1-2 more hours. Then strain as directed.
For a pressure cooker / Instant pot, place the chicken carcasses in the pot and cover with water. Cover the pressure cooker and set the valve to “sealing” and cook on manual, high pressure, for at least 2 hours. Again, you can go longer if you want, up to 3-4 hours. Once the time is up, manually release the pressure, add the veggies, and cover and cook for 15 more minutes on high pressure. Manually release the pressure, then strain as directed.
How to freeze homemade bone broth
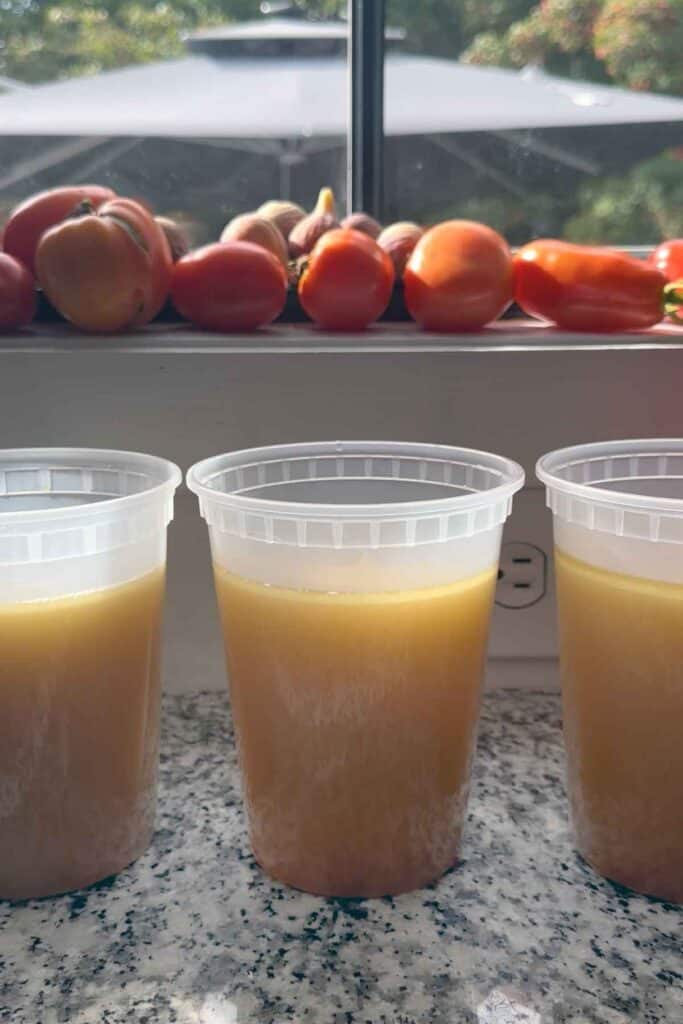
After my broth has cooled in the refrigerator, I often transfer it to my freezer if I don’t have plans to use it for the immediate future. It freezes well for many months!
When I’m ready to use it, I’ll run hot water over the outside of the container to loosen it up. Then I plop the frozen block into a pot to heat up and defrost, covered, while I prepare the rest of whatever recipe I’m making.
Can you use home roasted chicken carcasses instead of rotisserie?
Absolutely! If you aren’t a rotisserie chicken person, save the carcasses from home roasted chickens in the same way and follow the same instructions. The flavor of the broth will vary depending on the seasonings you used to cook the chicken. I do this when I make my Dutch Oven Whole Roast Chicken – the lemon, rosemary, and garlic flavors make a really great base for the bone broth!
Recipes to use homemade chicken bone broth
You can use chicken bone broth in any recipe that calls for chicken broth or stock! It will completely elevate that recipe to a whole new level. You may never go back to buying store-bought chicken broth again. I can’t wait for you to try it. Here are some ideas to use the bone broth in.
- Avgolemono Soup (Greek chicken soup with lemon and egg)
- Portuguese Kale Soup
- Homemade Egg Drop Soup (15 Minutes!)
- Easy Classic Shrimp and Grits
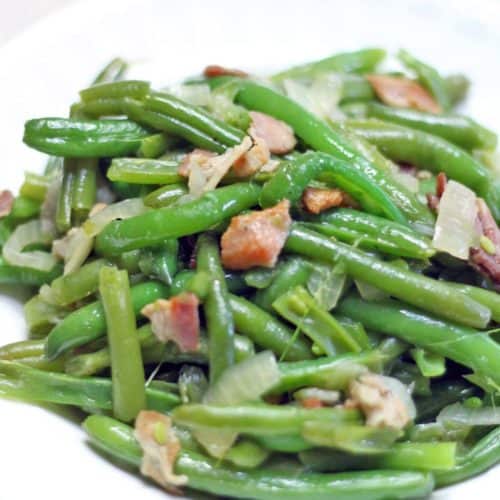
- Southern Style Green Beans
- Turmeric Soup with Chickpeas, Orzo, and Spinach
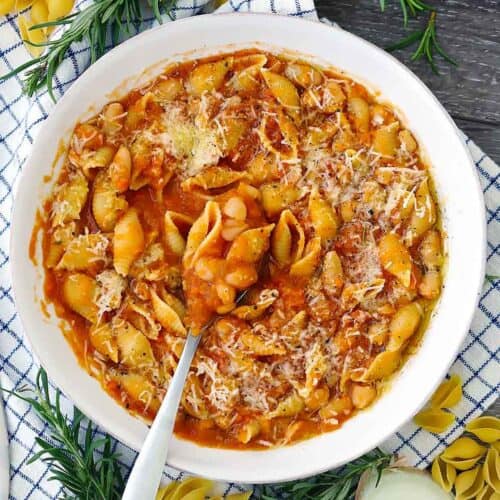
- Authentic Pasta e Fagioli (Italian Pasta and Beans Recipe)
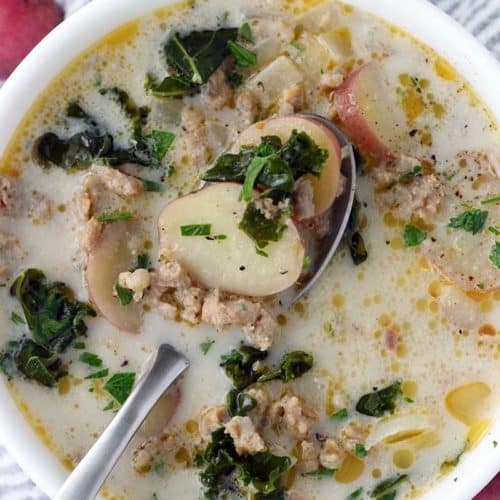
- Zuppa Toscana (Olive Garden Copycat)


Did you know commenting and rating recipes is one of the best ways you can support your favorite food bloggers? If you made this recipe or have a question, please click the stars below to comment and Rate this Recipe and/or share photos on social media using the hashtag #bowlofdelicious or tagging @bowlofdelicious! I reply personally to every comment and I’m excited to hear what you think.

Rotisserie Chicken Bone Broth
Equipment
- 1 Reusable coffee filter not completely necessary, but it helps a lot for straining the broth!
Ingredients
- 3 Rotisserie chicken carcasses including bones, skin, and any other scraps
- 2-3 cups onion, celery, and carrot scraps see notes
- 12-16 cups water
Want to save this recipe?
Instructions
- Add 3 Rotisserie chicken carcasses to a large pot and cover with about 12-16 cups water, depending on how big your pot is. They can be frozen – no need to thaw out beforehand. Bring to a boil, then set a lid on top ajar and simmer on low for 4 hours or longer (see notes). I use the back burner for an extra low simmer.
- In the last hour of cooking, add the 2-3 cups onion, celery, and carrot scraps (again, they can be frozen going in). Continue to simmer the broth on low with the lid ajar.
- To strain the broth, use a slotted spoon to get the large solids out and discard (I like to add them to a plastic grocery bag in my sink). Then, place a reusable coffee filter (or mesh sieve lined with cheesecloth) on top of the container you wish to store the bone broth in (a wide-mouth mason jar is good for this, but I use those take-out soup containers). Use a ladle to scoop the broth into the filter and let it strain into the container. If it's hard to drain the filter, use a spoon to stir it around in the filter to press the liquid out.
- Remove the fat from the top. It's easy to remove the fat once the broth has cooled in the fridge – you can just peel it right off the top. If you are using the bone broth right away, you can skim the fat off with a spoon. (Save it for another purpose if you want – see notes!)
- Use the bone broth in any recipe that calls for chicken broth or stock, or sip it as a cozy savory beverage in the cold weather!
Notes
- Straining the broth through a very fine sieve like a coffee filter or a mesh sieve lined with cheesecloth removes the really small particles that are inevitably found in a broth that is cooked for such a long time. If you are picky, you may need to strain a couple of times. If you aren’t picky, a regular mesh sieve will do – you’ll be left with some detritus in the broth but it’s edible, even if the broth looks a bit cloudy!
- Vegetable scraps are easy to save in your freezer. When you use onions, carrots, or celery for recipes, just save the ends and peels in a gallon sized zip-top bag in your freezer (make sure they’re clean first!). Then, when you make this broth, you can grab a couple of handfuls to add to the pot.
- If you don’t have vegetable scraps, just add a quartered yellow onion, a couple of stalks of celery cut into pieces, and a couple of carrots cut into pieces. Or skip it all together!
- Other veggies you can use: I often add parsley stems to my freezer bag of scraps. You can add other root vegetables like parsnips or turnips. Mushrooms add a nice umami flavor to broth.
- Veggies NOT to use for broth: Cruciferous vegetables like cabbage, kale, or broccoli will be too overpowering in flavor. Don’t use beets or radishes – they’re too strong in flavor AND they’ll color the broth. Potatoes will make the broth cloudy. Don’t use strong herbs like basil either.
- Freezing the bone broth is a great way to store it. After it’s cooled and I’ve removed the fat, I store in my freezer for many months. To defrost, I run hot water over the outside of the container until it’s loosened, then plop the frozen block into a pot to defrost. This won’t work if you use a jar or container that doesn’t have straight sides, like a traditional mason jar, as the frozen block won’t be able to pop out.
- You can use any roasted chicken carcasses for this recipe. If store-bought rotisserie chickens aren’t your thing, save the carcasses from your home roasted chickens and follow the same guidelines. The flavor of the broth will depend on how the chicken was seasoned when you cooked it. If you have other scraps, like those left from bone-in thighs or wings, feel free to throw those in too.
- The total amount of bone broth you get depends on how much water was used originally, how much evaporated during cooking, and how much you strain out of the solids. I usually end up with 10-12 cups of broth using my 8-quart pot.
- Don’t use too big of a pot unless you add more chicken carcasses! The ratio of water to chicken parts is important here for getting the broth to gel and have lots of collagen. While a watered down broth will still be tasty and useful, it won’t be the gelled up bone broth we’re aiming for here.
Nutrition
Nutrition Information Disclaimer
The provided nutrition information is my best estimate and reflects one serving of the recipe (total servings indicated at top of recipe card). It does not include any added sodium from seasoning to taste, any optional ingredients, and it does not take brands into account. I use an automatic API to calculate this information. Feel free to calculate it yourself using one of these tools:
Taylor
I literally never review recipes but wanted to say how much i appreciate the simplicity and laid back approach to making broth. This is what I love about cooking! Thank you!
Elizabeth Lindemann
So glad you liked it! And thanks for leaving this comment – I appreciate it, and I agree, I’m all about laid back cooking approaches! It’s not that serious :-)
Samantha
Honestly, I know how to make bone broth, but I appreciate how uncomplicated and straightforward this recipe is! Also, turned out amazing! Thank you
Elizabeth Lindemann
So glad you liked it! It’s such a simple thing to make but sooooo necessary!
Susan Sims
Important recipe! We should try not to waste anything as food is so expensive. The only thing we do differently with our poultry stocks is we will break up the bones a bit with a meat mallet to expose the bone marrow. Bones and bits of them get strained out after it cooks. Homemade is always better!
Elizabeth Lindemann
I love this tip, thanks so much for sharing! Agreed – it’s so important not to waste food, there are so many benefits.
Debbie
Thank you!
Debbie
Can you make beef bone broth the same way?
Elizabeth Lindemann
Kind of! It’s the same principle but beef bones are generally much larger and take MUCH longer to break down. That may be a good job for a slow cooker or instant pot. You can add a little vinegar – I like using apple cider vinegar – which I’ve heard helps hasten the process a bit. I haven’t personally done it, but from my research you can do 24-36 hours (!) in a slow cooker on low or 4 hours in a pressure cooker. I encourage you to do a bit more research on this, since I’m much more familiar with chicken broth, but hopefully this is a good starting point!
alice
I air fry chicken thighs for my dogs a couple of nights a week and freeze the bones for bone broth. Don’t know why I haven’t used rotisserie chicken carcasses, tossing them into the mix as well but will do so now. I often give my dogs freezer dried raw medallions and adding bone broth to them makes for a moister meal.
Elizabeth Lindemann
Yes, a combination of rotisserie chicken and whatever other chicken bone scraps you have will all work nicely! Aw, your dogs sound like they are so well cared for and loved ❤️
Michael
I started doing this about 2 years ago with my rotisserie chickens from Sam’s Club. Yep, bones etc. right into the freezer, then when I have 3 or more, I make my broth and freeze it in plastic bags. I use it mostly for making rice in my rice cooker (if I need a little more, I’ll just add some water). You tips have given me great ideas of what to add to make it even more tastier! Thank you!
Elizabeth Lindemann
Love the idea of using it for rice, it adds such flavor to a simple ingredient!
Michael
Indeed! Just throw in some veggies (or even chicken!) and you’ve got something!
Ana
I hate throwing food away! I roasted a chicken last night and was wondering exactly this! Thank you for the tip! Will definitely save up my next carcasses and try this! Thank you!
Elizabeth Lindemann
Oh yay, I’m so happy this was helpful! I also hate wasting food, and am always looking for new ways to use scraps. So economical AND good for the earth!