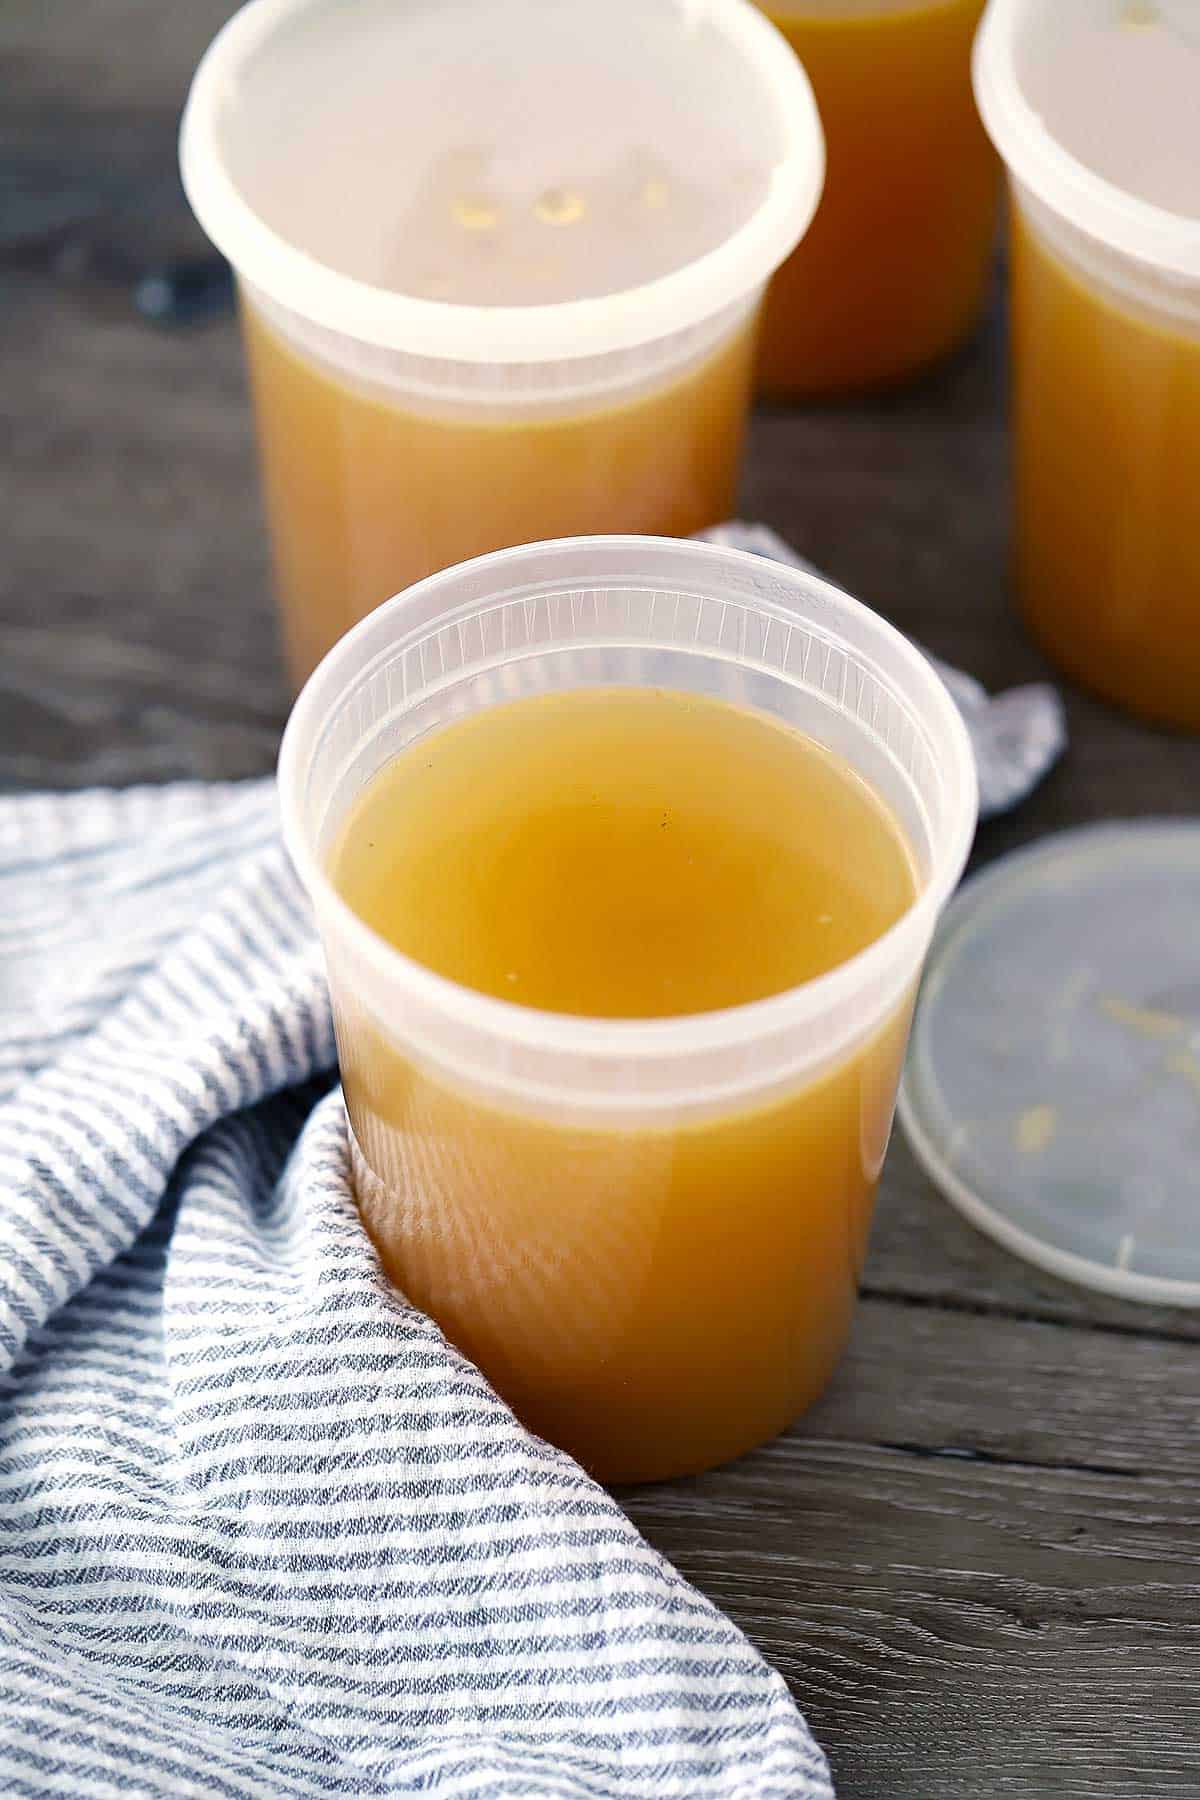
It’s so easy to make your own homemade chicken stock FOR FREE from scraps you keep in your freezer! Homemade chicken stock is packed with rich flavor, nutrition, and is so much better than store-bought chicken broth.
I’m so excited to share one of my easiest TOP TRICKS to getting super delicious, rich flavor in countless recipes. The secret? Homemade chicken stock!
But there are so many recipes out there that make such a production of it. Buy a whole chicken, buy specific veggies, and throw it all together to make stock. This is a COMPLETE waste of money and food.
I make my homemade chicken stock FOR FREE from vegetable and chicken scraps I save in my freezer! Things that I would normally throw away are given new life in this DELICIOUS and EASY recipe for homemade chicken stock in bulk. It’s such a great way to reduce food waste and save money!
In this post, I’ll explain:
- What the heck the difference between stock and broth actually is.
- What kinds of scraps you should freeze for stock and how to store them.
- How to make chicken stock on the stovetop, in your slow cooker, or in you instant pot/pressure cooker.
- How to EASILY strain the stock when it’s done.
- How to store the chicken stock in your freezer or refrigerator.
- What kinds of recipes you can use the homemade stock in.
Here we go!
What is the difference between stock and broth?
In a nutshell, stock is better, but both can usually be used interchangeably.
So if you’re about to cook a recipe for, let’s say, chicken noodle soup, and it requires chicken stock, don’t worry: you can use the chicken broth you buy at the store for it.
BUT. Here’s why chicken stock is so much better than broth.
Stock is made with bones, whereas broth is usually made with meat. Stock is cooked for a long time, whereas broth can be cooked for less time.
What does this mean?
There’s an awesome ingredient hiding in the bones (whether you’re making chicken, beef, or pork stock)- collagen. When cooked for a long time, the collagen breaks down and is extracted from the bones, which turns into gelatin. Yes, the same kind of gelatin in Jell-O.
A good stock will be full of gelatin, and may actually solidify and turn into a Jell-O like consistency when you refrigerate it.
When a stock is full of gelatin, it adds more flavor, nutrition (why do you think bone broth is so popular? It’s literally just stock), and body to the stock. Heck- people even buy unflavored gelatin to add to recipes when they don’t have a good homemade stock available.
When you start using homemade chicken stock in your recipes, you’ll notice a huge different in taste and richness and texture. Which is why I ALWAYS keep a store of homemade stock in my freezer ready to go.
How to Freeze Vegetable and Chicken Scraps for Stock
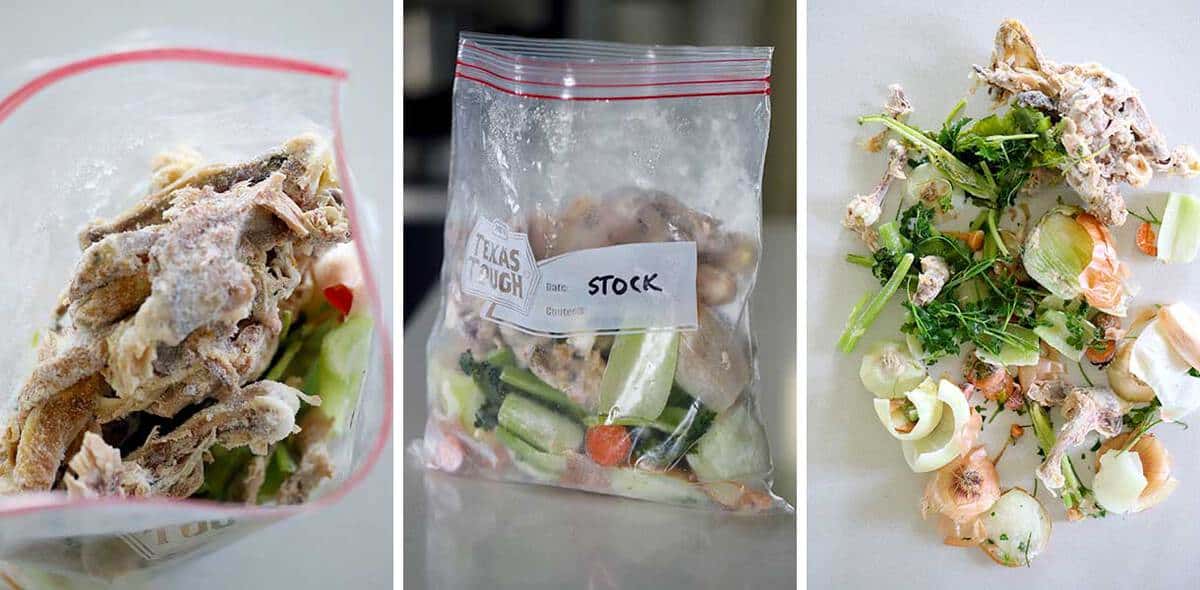
I keep a gallon-sized plastic bag in my freezer that I fill gradually with vegetable and chicken scraps until it’s full, then I make the stock.
I save the ends and peels of onions, the tops and bottoms of celery and carrots, and parsley stems in a gallon-sized freezer bag for stock.
Whenever I have bones or a carcass from a chicken, I keep them in the bag, too. When I roast a whole chicken, or have leftover bones from roasted chicken thighs, or even just the remains from a rotisserie chicken from the grocery store, I toss the bones into the bag. I try and remove large pieces of skin before adding it to the bag, since that will mostly just add fat to the broth rather than collagen/gelatin.
I recommend sticking to the classic veggies- onions, celery, and carrots- for homemade chicken stock. The flavors are simple and won’t overpower. You can experiment with other kinds of veggies, but make sure you DON’T use vegetables with a ton of overpowering flavor, such as broccoli, bell peppers, cauliflower, kale, brussels sprouts, etc.
Once the bag is full, you’re ready to make stock! And don’t throw out that bag– just place it back in your freezer when you’ve emptied it out for another round. It’s totally reusable.
How to make homemade chicken stock from freezer scraps
It’s SO easy to make this homemade chicken stock recipe on your stovetop, in your slow cooker, or in your pressure cooker, with only a few minutes of prep work. Here’s how.
Stovetop Instructions:
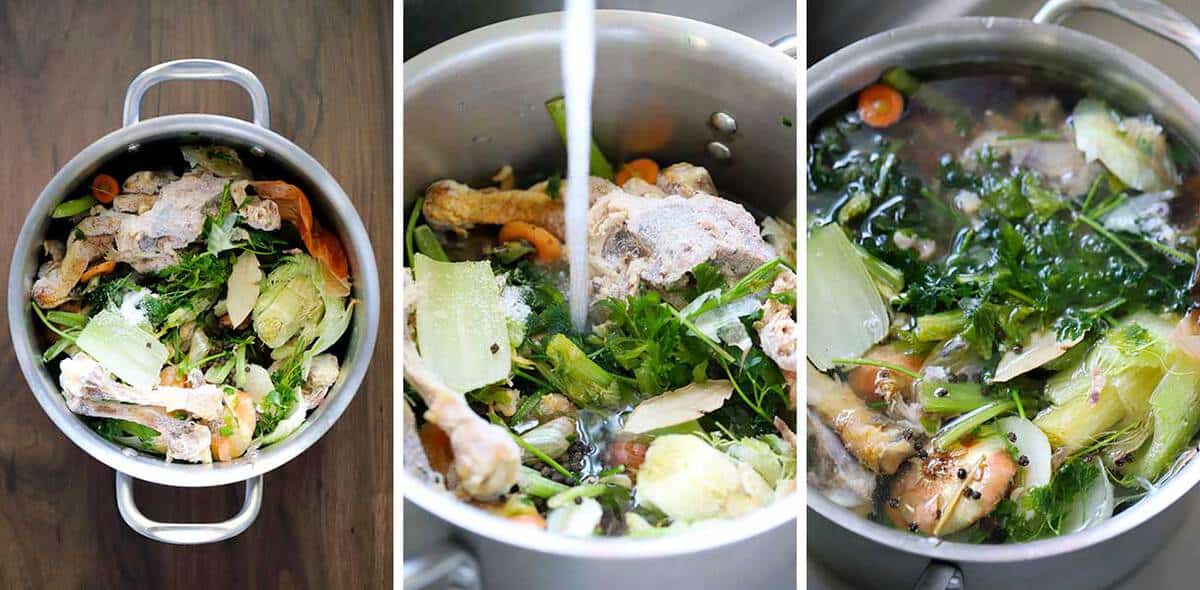
- Add the contents of the bag to a large stockpot, or the biggest pot with a lid you have.
- Cover the contents in the pot with water, leaving about 2-3 inches of room at the top of the pot.
- Add some whole peppercorns (about 1 teaspoon), a bay leaf, and a teaspoon of kosher salt (if you want).
- Bring to a boil, then cover and turn down the heat to low.
- Simmer, covered, for a minimum of 3 hours and up to 6 hours.
- Turn off the heat, uncover, and allow to cool for 20 minutes so it’s easier to strain.
Slow Cooker / Crockpot Instructions:
- Add the contents of the bag to your slow cooker– make sure it’s at least 6 quarts.
- Cover the contents in the pot with water, leaving about 1-2 inches of room at the top of the crockpot.
- Add some whole peppercorns (about 1 teaspoon), a bay leaf, and a teaspoon of kosher salt (if you want).
- Cover and cook on low for 8-10 hours or high for 4-6 hours.
- Turn slow cooker off, uncover, and allow to cool for 20 minutes so it’s easier to strain.
Instant Pot / Pressure Cooker Instructions:
- Add the contents of the bag to your pressure cooker – make sure it’s at least 6 quarts. This won’t work with a mini instant pot, unless you use only half of the contents of the bag.
- Cover the contents in the pot with water, making sure to NOT go past the “max fill” line.
- Add some whole peppercorns (about 1 teaspoon), a bay leaf, and a teaspoon of kosher salt (if you want).
- Place the cover on and make sure the valve is in “sealed” position.
- Set pressure to manual on high for 45 minutes. It will take about 20-30 minutes to come to pressure.
- Allow to naturally release pressure for 30 minutes, then move the sealing valve to “venting” and wait for the float valve to sink down before opening.
- Open the pressure cooker, turn it off, and allow to cool for 20 minutes so it’s easier to strain.
The easiest way to strain chicken stock
Now that you’re done cooking the stock, you have to strain it so it’s just liquid. I’ve tried a few different ways, and here’s the easiest way to do it that results in a clear stock (not PERFECTLY clear, but close enough) without making a HUGE mess.
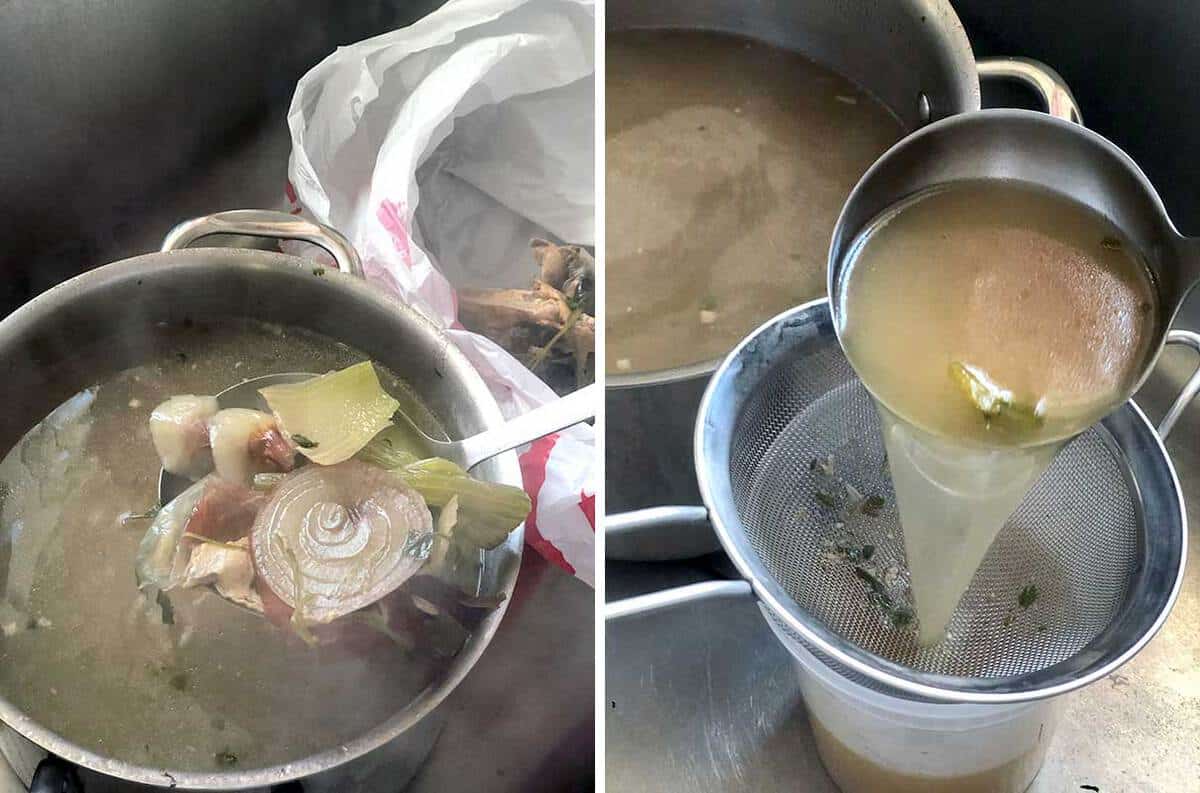
First, place your pot in your sink and place an opened plastic grocery bag next to it. Use a slotted spoon to scoop the large scraps into the grocery bag– get as much as you can. Then, tie up the bag and toss it in the trash.
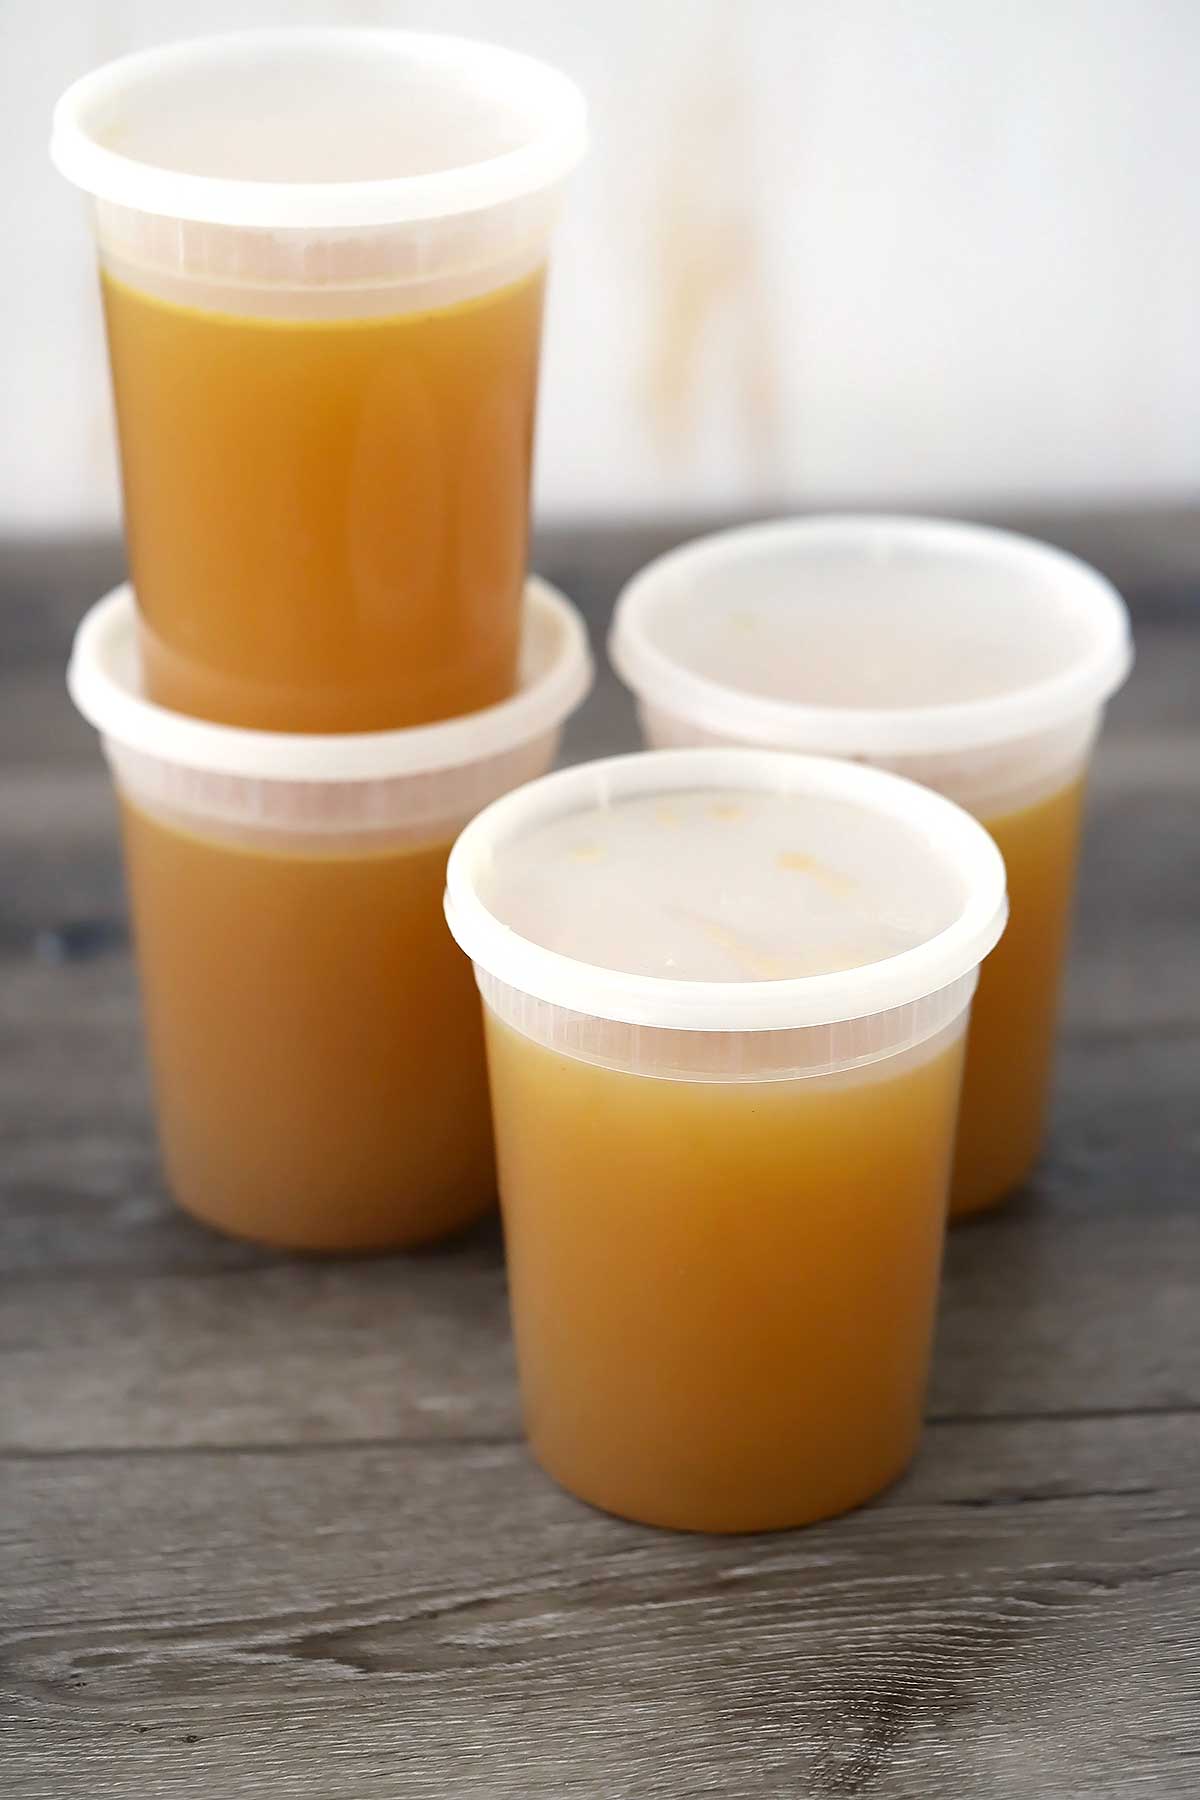
Next, place the container you want to store the chicken stock in next to the pot in the sink. I like reusing those containers you get soup in from restaurants- kind of like these.
Place a mesh sieve directly over the container – use a small one if you’re using small containers, and a larger one for a larger container.
Then, use a ladle to scoop the chicken stock into the container through the sieve, which will catch any remaining solid pieces lingering in the liquid. If you want REALLY clear chicken stock, you can add a layer of cheesecloth inside the sieve.
If you plan on freezing the stock (which I’ll get to in a second), make sure you leave a little bit of room at the top of the container, since it will expand in the freezer. I usually leave about 1 inch.
How to store chicken stock in the freezer or refrigerator
If you know you’re going to use the chicken stock for a recipe in the next few days, the easiest thing to do is to keep it in your refrigerator. You can keep it in there for about 4 days.
But I almost always end up freezing my chicken stock so I always have a stash to use. You can freeze it for up to 6 months!
There are three ways you can defrost frozen chicken stock.
- Take it out 24-48 hours before you want to use it and place it in your fridge. It should be completely defrosted, or close to, by then.
- Microwave it for 5-10 minutes until it’s melted.
- Or, you can simply run hot water over the container until it’s loose, then pop it out and place the big frozen chunk of chicken stock in a pot to heat up on the stove. I use this same method with frozen soup.
Recipes in which to use homemade chicken stock:
I use my homemade chicken stock in TONS of recipes, including soup recipes, stews, gravies and sauces, rice and pasta dishes, etc. But sometimes, especially if I’m feeling under the weather, I just heat it up and drink it out of a mug. Delicious! And did you know- you can actually use chicken stock in most recipes that require beef broth, too! Here are some of my favorites.
Soup/Stew Recipes:
- Easy Chicken and Dumplings from Scratch
- Detox Chicken and Vegetable Soup
- Lasagna Soup
- Avgolemono (Greek Chicken Soup with Lemon and Egg)
- Easy Chicken Noodle Soup
- Instant Pot Split Pea Soup
Pasta/Rice/Quinoa Recipes:
- One Pot Orzo with Mushrooms, Browned Butter, and Thyme
- Instant Pot Chicken, Broccoli, and Quinoa with Cheese
- Chicken and Broccoli Linguine with Lemon Butter Basil Sauce
- Fresh Pea Risotto with Arugula and Mint
- Spicy Quinoa and Black Beans
Sides:
- Southern-Style Green Beans
- Slow Cooker Scalloped Potatoes
- Rosemary Infused Potato and Cauliflower Mash
- The Best Refried Beans Ever
Other Dinner Recipes:
- Slow Cooker Greek Style Green Beans and Chicken Thighs
- 20-Minute Honey Mustard Chicken
- Slow Cooker Spicy Stuffed Cabbage Casserole
- Pan Fried Sea Bass with Lemon Garlic Herb Sauce
One FINAL thing before you go- if you’re vegetarian, you can also use this freezer scrap method to make homemade vegetable stock, too!
Did you make this Homemade Chicken Stock from Freezer Scraps? Please comment below and Rate this Recipe

Homemade Chicken Stock from Freezer Scraps
Ingredients
- onion scraps peels and ends
- celery scraps leaves and ends
- carrot scraps ends and peels
- parsley scraps stems or wilted leaves
- chicken bones or carcass most skin removed
- 10 cups water or more, if it can fit
- 1 teaspoon black peppercorns optional
- 1 teaspoon kosher salt optional
- 1 bay leaf optional
Instructions
- Save onion, celery, carrot, and parsley scraps in a gallon sized plastic bag in your freezer, along with any chicken bones or a rotisserie chicken carcass, until you are ready to cook.
Stovetop Instructions
- Add the contents of the bag to a large stockpot, or the biggest pot with a lid you have.
- Cover the contents in the pot with water, leaving about 2-3 inches of room at the top of the pot.
- Add the whole peppercorns (1 teaspoon), the bay leaf, and a teaspoon of kosher salt (optional).
- Bring to a boil, then cover and turn down the heat to low.
- Simmer, covered, for a minimum of 3 hours and up to 6 hours.
- Turn off the heat, uncover, and allow to cool for 20 minutes so it's easier to strain.
Slow Cooker Instructions
- Add the contents of the bag to your slow cooker- make sure it's at least 6 quarts.
- Cover the contents in the pot with water, leaving about 1-2 inches of room at the top of the crockpot.
- Add the whole peppercorns (1 teaspoon), the bay leaf, and a teaspoon of kosher salt (optional).
- Cover and cook on low for 8-10 hours or high for 4-6 hours.
- Turn slow cooker off, uncover, and allow to cool for 20 minutes so it's easier to strain.
Instant Pot / Pressure Cooker Instructions
- Add the contents of the bag to your pressure cooker - make sure it's at least 6 quarts. This won't work with a mini instant pot, unless you use only half of the contents of the bag.
- Cover the contents in the pot with water, making sure to NOT go past the "max fill" line.
- Add the whole peppercorns (1 teaspoon), the bay leaf, and a teaspoon of kosher salt (optional).
- Place the cover on and make sure the valve is in "sealed" position.
- Set pressure to manual on high for 45 minutes. It will take about 20-30 minutes to come to pressure.
- Allow to naturally release pressure for 30 minutes, then move the sealing valve to "venting" and wait for the float valve to sink down before opening.
- Open the pressure cooker, turn it off, and allow to cool for 20 minutes so it's easier to strain.
How to strain the stock
- Place your pot in your sink and place an opened plastic grocery bag next to it. Use a slotted spoon to scoop the large scraps into the grocery bag- get as much as you can. Then, tie up the bag and toss it in the trash.
- Next, place the container you want to store the chicken stock in next to the pot in the sink. I like reusing those containers you get soup in from restaurants- kind of like these.
- Place a mesh sieve directly over the container - use a small one if you're using small containers, and a larger one for a larger container.
- Use a ladle to scoop the chicken stock into the container through the sieve, which will catch any remaining solid pieces lingering in the liquid.
Notes
- If you want REALLY clear chicken stock, you can add a layer of cheesecloth inside the sieve.
- To lower the fat content of your chicken stock, you can use a spoon to skim off any fat that has accumulate on top after it's cooled a bit. This is easy to do after you refrigerate it, as the fat will solidify on the top.
- The provided nutrition information does not include any added sodium from seasoning to taste, any optional ingredients, and it does not take brands into account. Feel free to calculate it yourself using this calculator or by adding the recipe to Yummly.
Nutrition
Nutrition Information Disclaimer
The provided nutrition information is my best estimate and does not include any added sodium from seasoning to taste, any optional ingredients, and it does not take brands into account. I use an automatic API to calculate this information. Feel free to calculate it yourself using one of these tools:


Popeye
I want to make chicken stock/broth but only have the chicken trimmings in the freezer. Can’t I just make it without the vegetables and just add some seasonings?
Elizabeth Lindemann
Yup, that absolutely works!
Popeye
Ok, I broke down and bought a bunch of celery and carrots, had an onion. I forgot to chop up the onion nd use it though. I made it and I ended up with 4 full quart jars and a pint jar of broth. While the 4 quarts were in my Nesco canner, I drank the remaining pint. It was so good…
Elizabeth Lindemann
So glad you liked it!
Angie
It was easy to make, and it turned out great. I will continue to use this recipe. I recommend giving this a try.
Elizabeth Lindemann
So glad you liked it!
Danielle Coleman
Do the frozen scrapes go into the pot frozen, or thawed?
Thank you!
Elizabeth Lindemann
Frozen is fine!
Alex
Quick question about how much chicken bone do I need overall to get a good broth? Will probably use fresh vegtables so its hard to estimate by when the bag is full.
Elizabeth Lindemann
I’m not super picky about it, I use a whole chicken carcass usually for a crockpot that’s 8 qt. capacity. The more bones you add the more flavor you will get. But personally, I try not to think about it too much, since you can always boost the flavor of anything you’re cooking with the broth later on!
Holly
I’ve been making something similar for many years — this recipe is a real treasure for those of us who find that store bought chicken stock is never as tasty or healthy as what you can make. I would make one important addition to your recipe, something I learned back in the ’60’s from Adele Davis, an early pioneer in healthy cooking. Add a bit of white vinegar (1/4 c. to 1/2 c.) to your water — the vinegar flavor will boil off, but the acid helps release the gelatin from the bones. You can tell because the cooled stock will be gelatinous, just like those few chicken drippings in the pot where you’ve roasted the chicken (I always save those as well, and if I don’t use it for gravy, I add it to the stock or other soup).
Elizabeth Lindemann
I love that vinegar tip! I just tried it after reading your comment and the broth was a lot thicker! I used apple cider vinegar for mine. Thanks so much!
Ruth Prim
I freeze my chicken bones and scraps to make broth in a large freezer bag. My question is how long can they stay in the freezer and still remain safe to use?
Elizabeth Lindemann
Food stored in the freezer should actually be “safe” to eat indefinitely (according to the USDA). The worry about freezing for a long time is freezer burn, which can affect the taste. I’d say use frozen chicken broth within 1 year max, or more preferably 6 months, personally. Hope that helps!
Yehudis
Looks delicious! Does this work with chicken leftovers previously used in chicken soup, too?
Elizabeth Lindemann
Yes, I almost always do this! It does work, with one caveat: if you boiled a chicken in water for chicken soup for a long time, much of the collagen from the skin and bones has already been used in the soup. While the bones and carcass from a previously boiled chicken will lend flavor to stock and can be used again, the stock won’t be quite as thick and rich as with bones from a roasted chicken. Hope that helps!
Coleen Alldred
Hi there! Just thought I would mention that collagen comes from the gristle / connective tissue and skin. The marrow gives the stock nutrients and flavor but if your wanting to have a stock high in collagen which is so good for our joints and skin, So if you were to throw out the chicken skin your throwing out the best part. I understand you dont want much fat in your stock doesn’t give it a good flavor so what I do is when I’m done with my roasted chicken I just squeeze the fat off the skin and never do I throw out any knuckle bones/ gristle and of course skin its 100% collagen and especially roasted skin gives your stock the most amazing flavor ever! My favorite is Costco roasted chicken skin but like I was saying I just take the skin off and clean any fat that might be on it. I dont worry too much about it because i can skim any off the top anyways also the Asians really know there stock, we can learn a lot from them they use chicken feet in there stock chicken feet are 100% collagen so I always make a special trip to my local Asian market for they always have some frozen I can buy for cheap. So I always keep some on had in my freezer to add .. I use about 4-6 feet per stock just for the extra boost of collagen. I normally freeze my stock but my freezer was full so this time I was going to try canning it thats how I found this blog was trying to find the best way to can it so I could just keep it in the pantry.
Elizabeth Lindemann
This is excellent information- thanks so much for taking the time to share this!
John H Vetne
Stock (or broth) can be stored in the refrigerator for a month or more in a canning jar (I use quart jars with recycled lids). Preheat canning jar with hot tap water. Bring the stock back to a low boil after straining. Empty hot water from canning jar, and fill jar with hot stock. Screw lid on tightly. Turn sealed jar upside down on counter and leave for a couple of minutes to ensure that the inside of the lid is sterilized. Then turn canning jar right side up and allow to cool before placing it in the fridge, making sure of the seal by checking to see if the lid has popped down and is concave.
When you take out the jar for a recipe, use the fat layer on the top to make a wonderful roux for comfort food gravy or pot pie filling. Or (sadly) discard the fat and thicken stock with corn starch or arrowroot powder.
If you want to store the stock for many months, follow conventional canning procedure and use new lids.
Elizabeth Lindemann
Thanks so much for this awesome tip! My freezer always gets so crowded, so this is a great alternative.
Teddi Hocker
If we have chicken for supper with everyone having a few pieces; are these bones good for stock???? That seems kind of gross.
Elizabeth Lindemann
Of course! Save those bones! When we have roasted chicken thighs or drumsticks for dinner, I have my whole family save their bones and make sure they go into the stock bag. Do you think it’s gross because people have eaten off of the bones? Don’t worry- any germs will be killed when you boil the stock. The only thing you want to consider is the seasoning that was on the chicken – if it was a simple seasoning, go ahead and save them. If it was something like buffalo or BBQ, it may not be as good for stock since you don’t want those flavors in stock usually. Hope that helps!
Nancy Mitchell Ash
An easy way to separate fat from any stock, it to place the whole thing in the fridge after staining. The fat will rise to the top and solidify. That top, fat layer can be scraled off with your hands or a spoon. leaving a slightly jelled broth behind. Just reheat to eat.
Elizabeth Lindemann
Yes! So much easier than skimming it off the top when it’s hot! Thanks so much for the suggestion :-)